made X modern

Hog Panel Isn't Just for Pigs

DIYCatharine KlepacComment

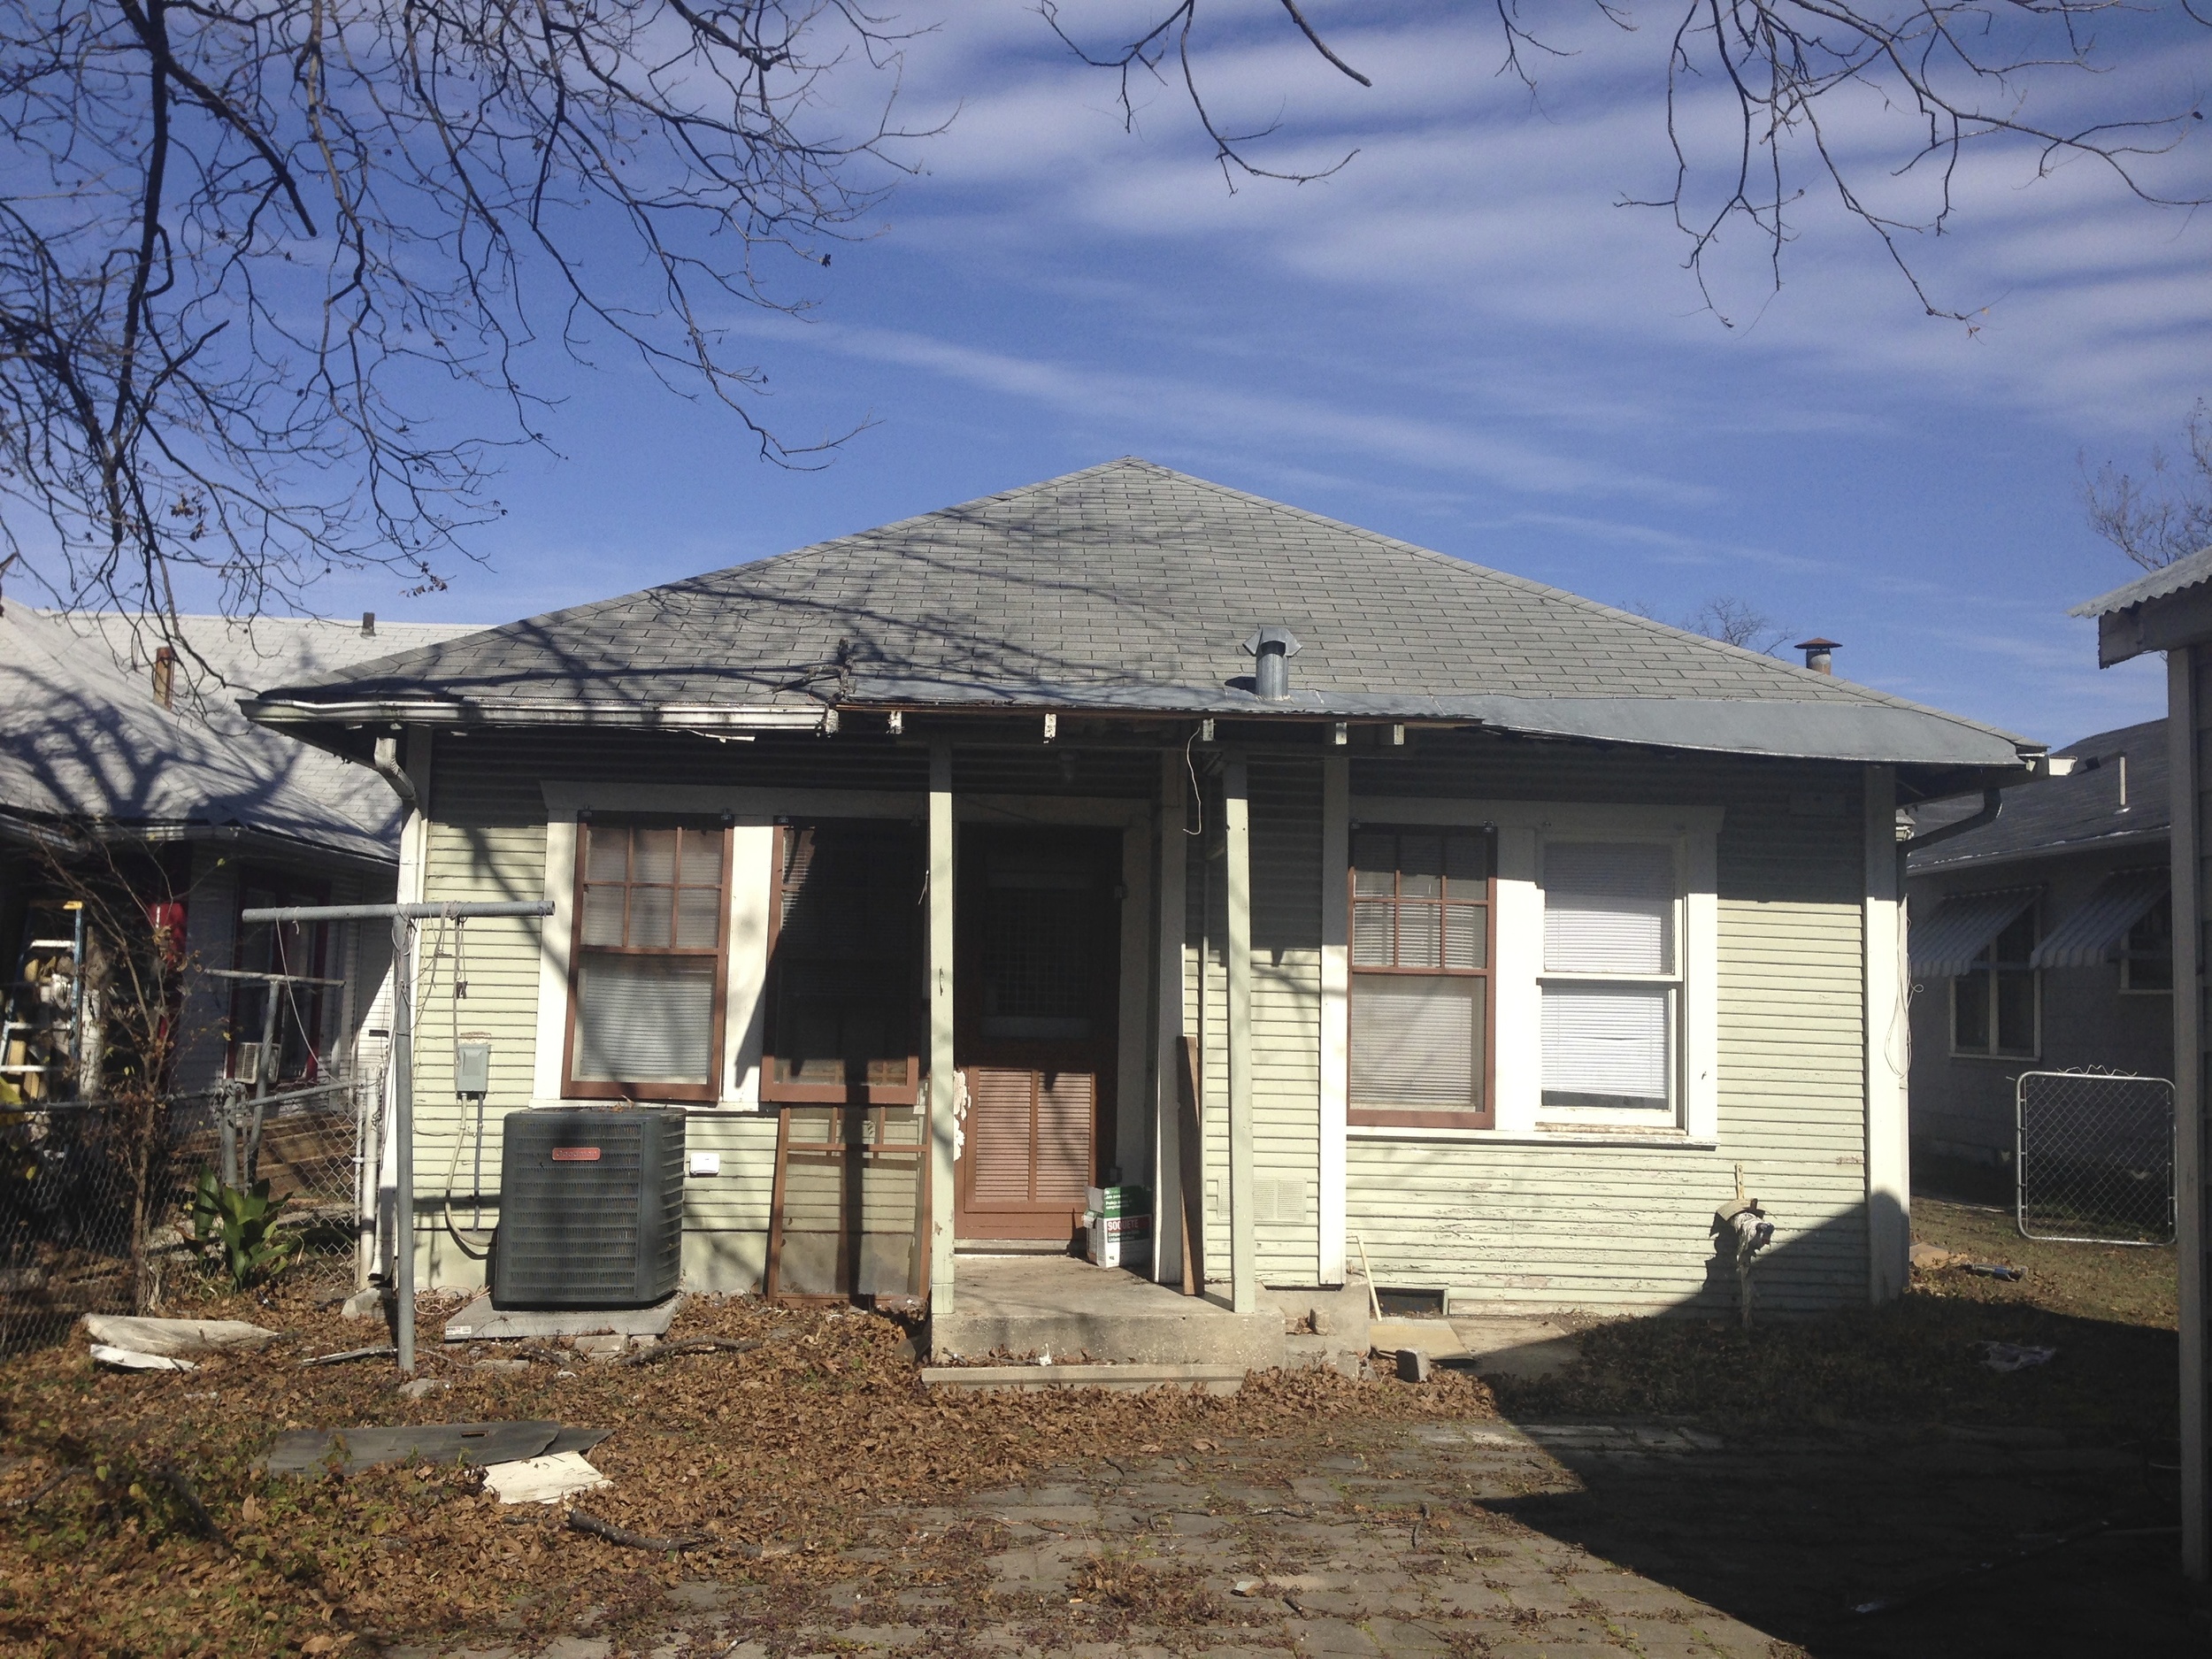
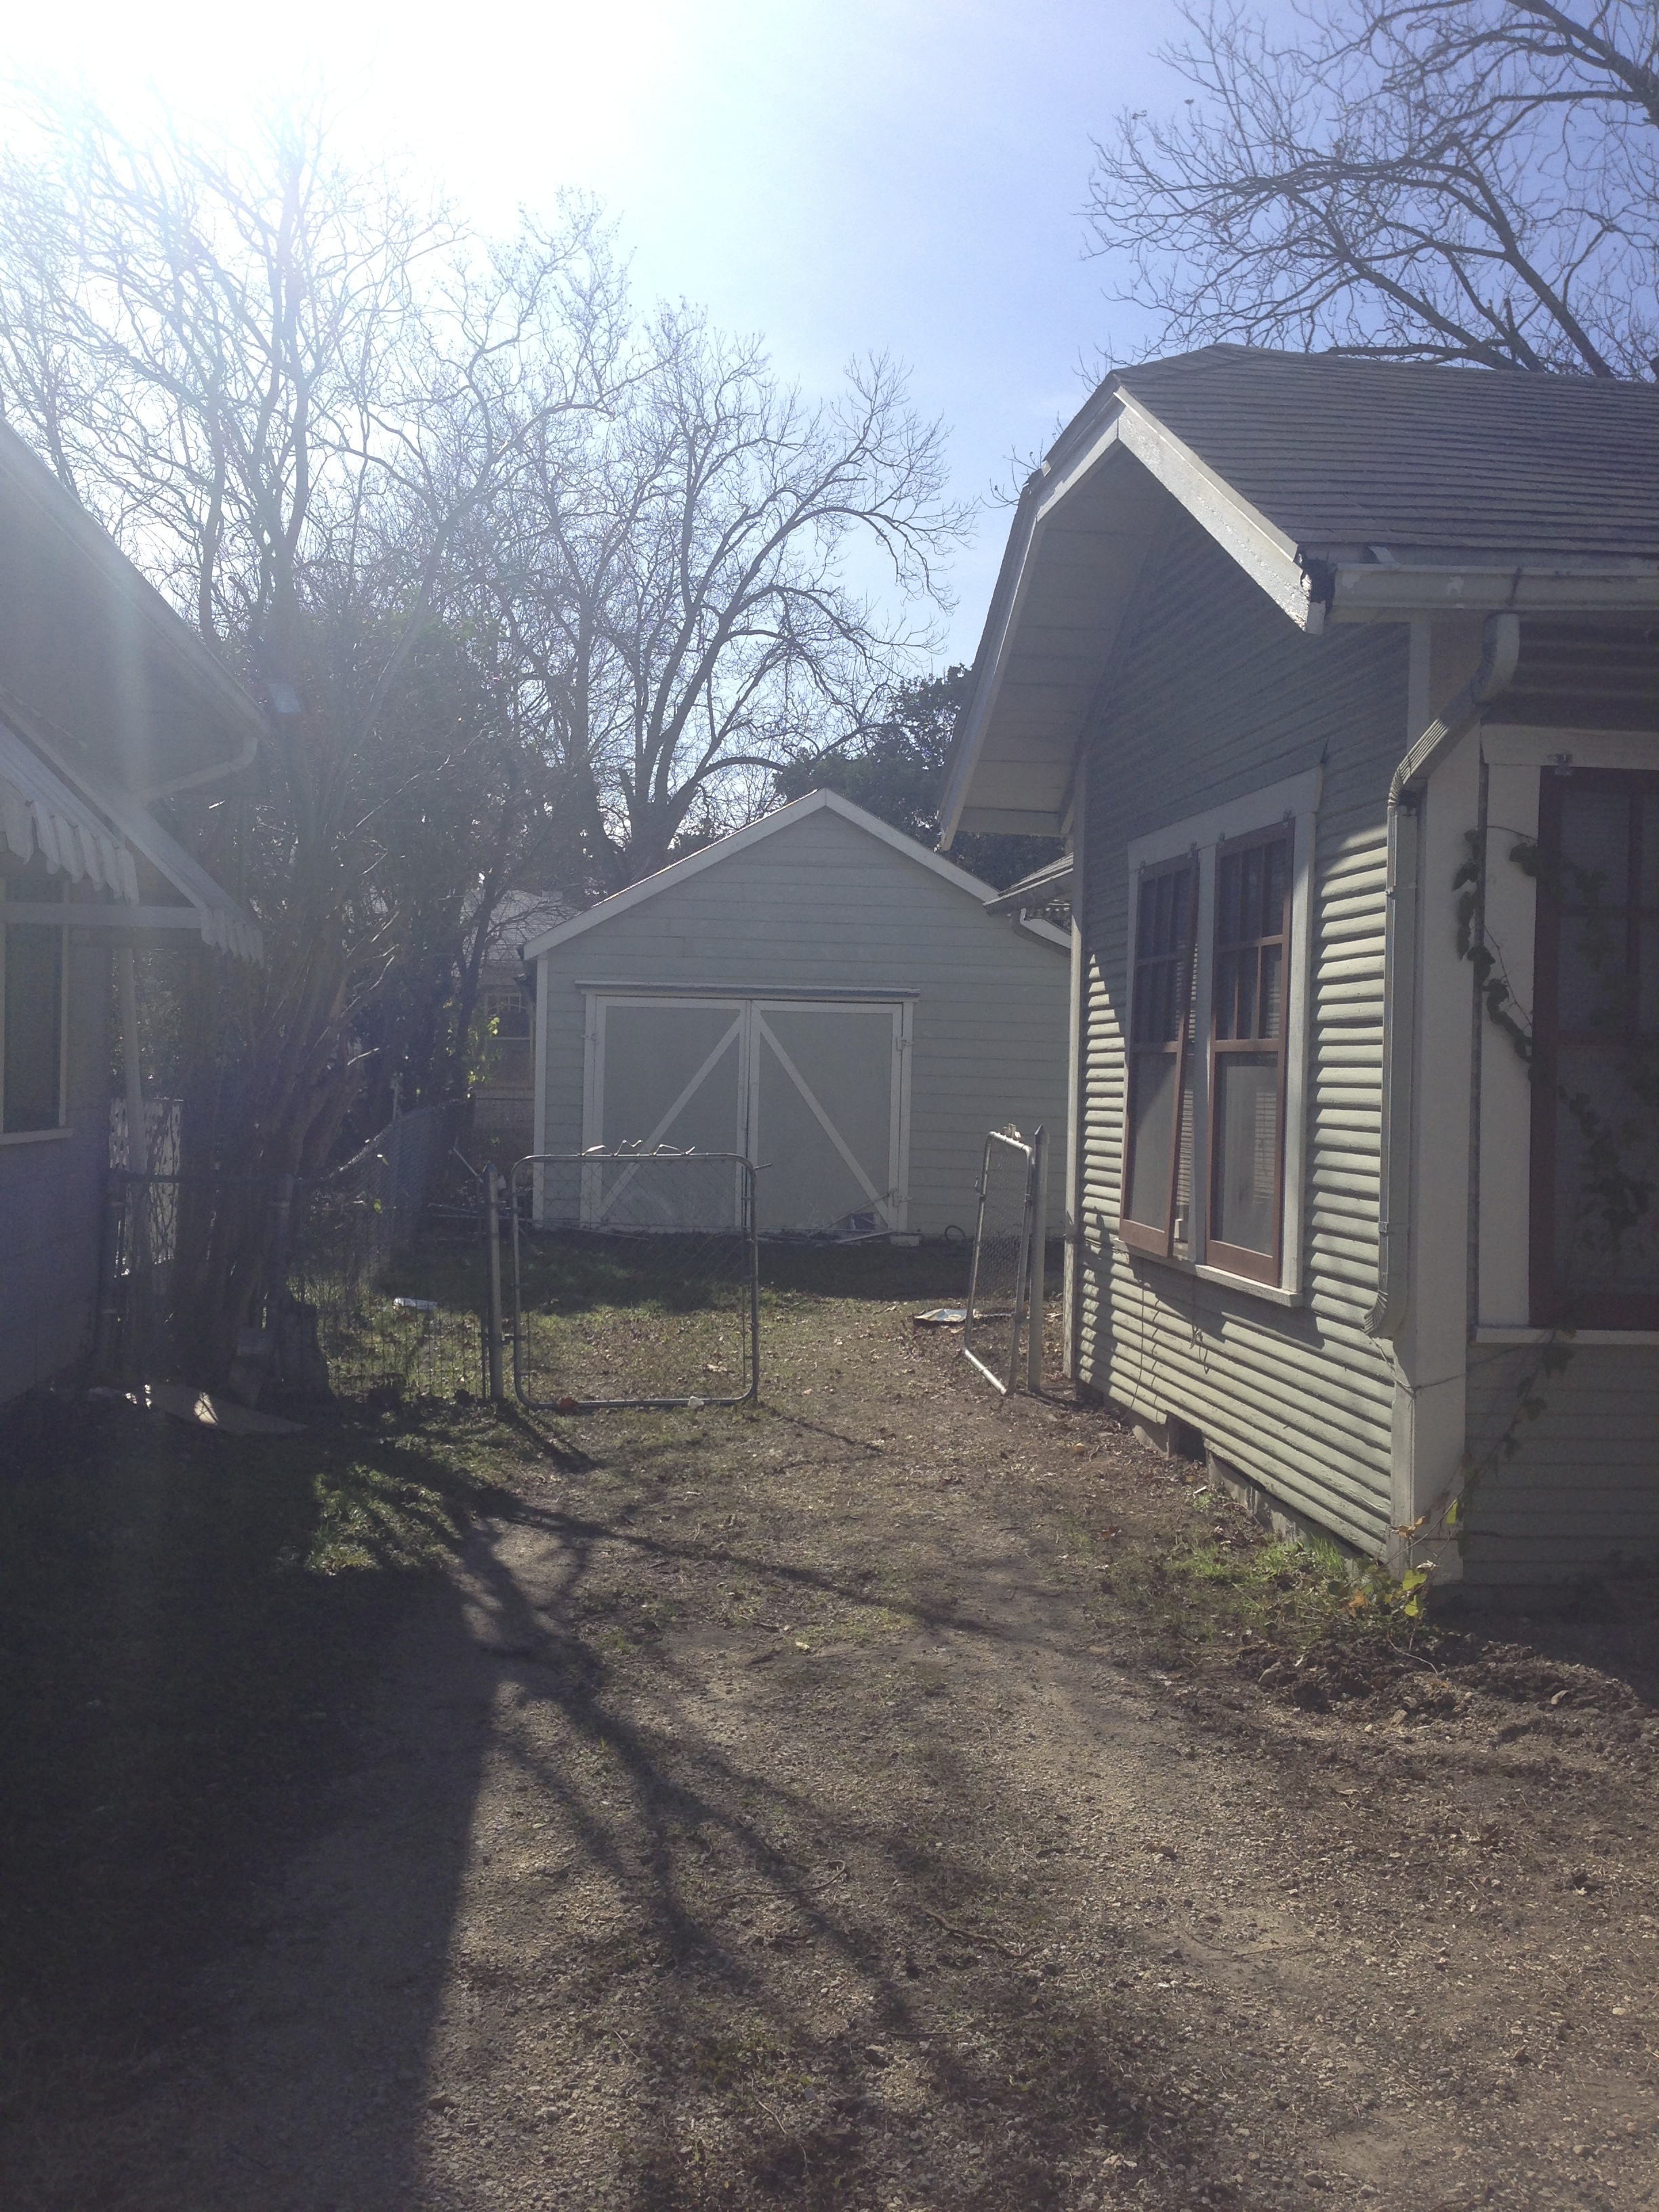
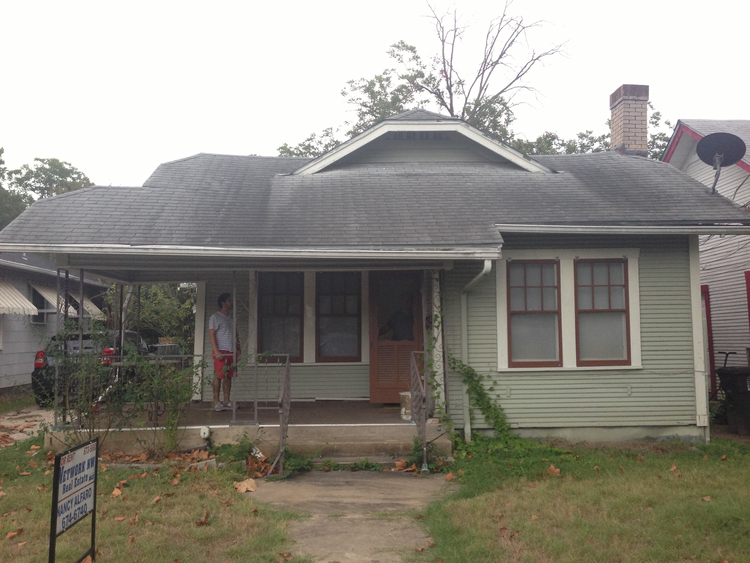
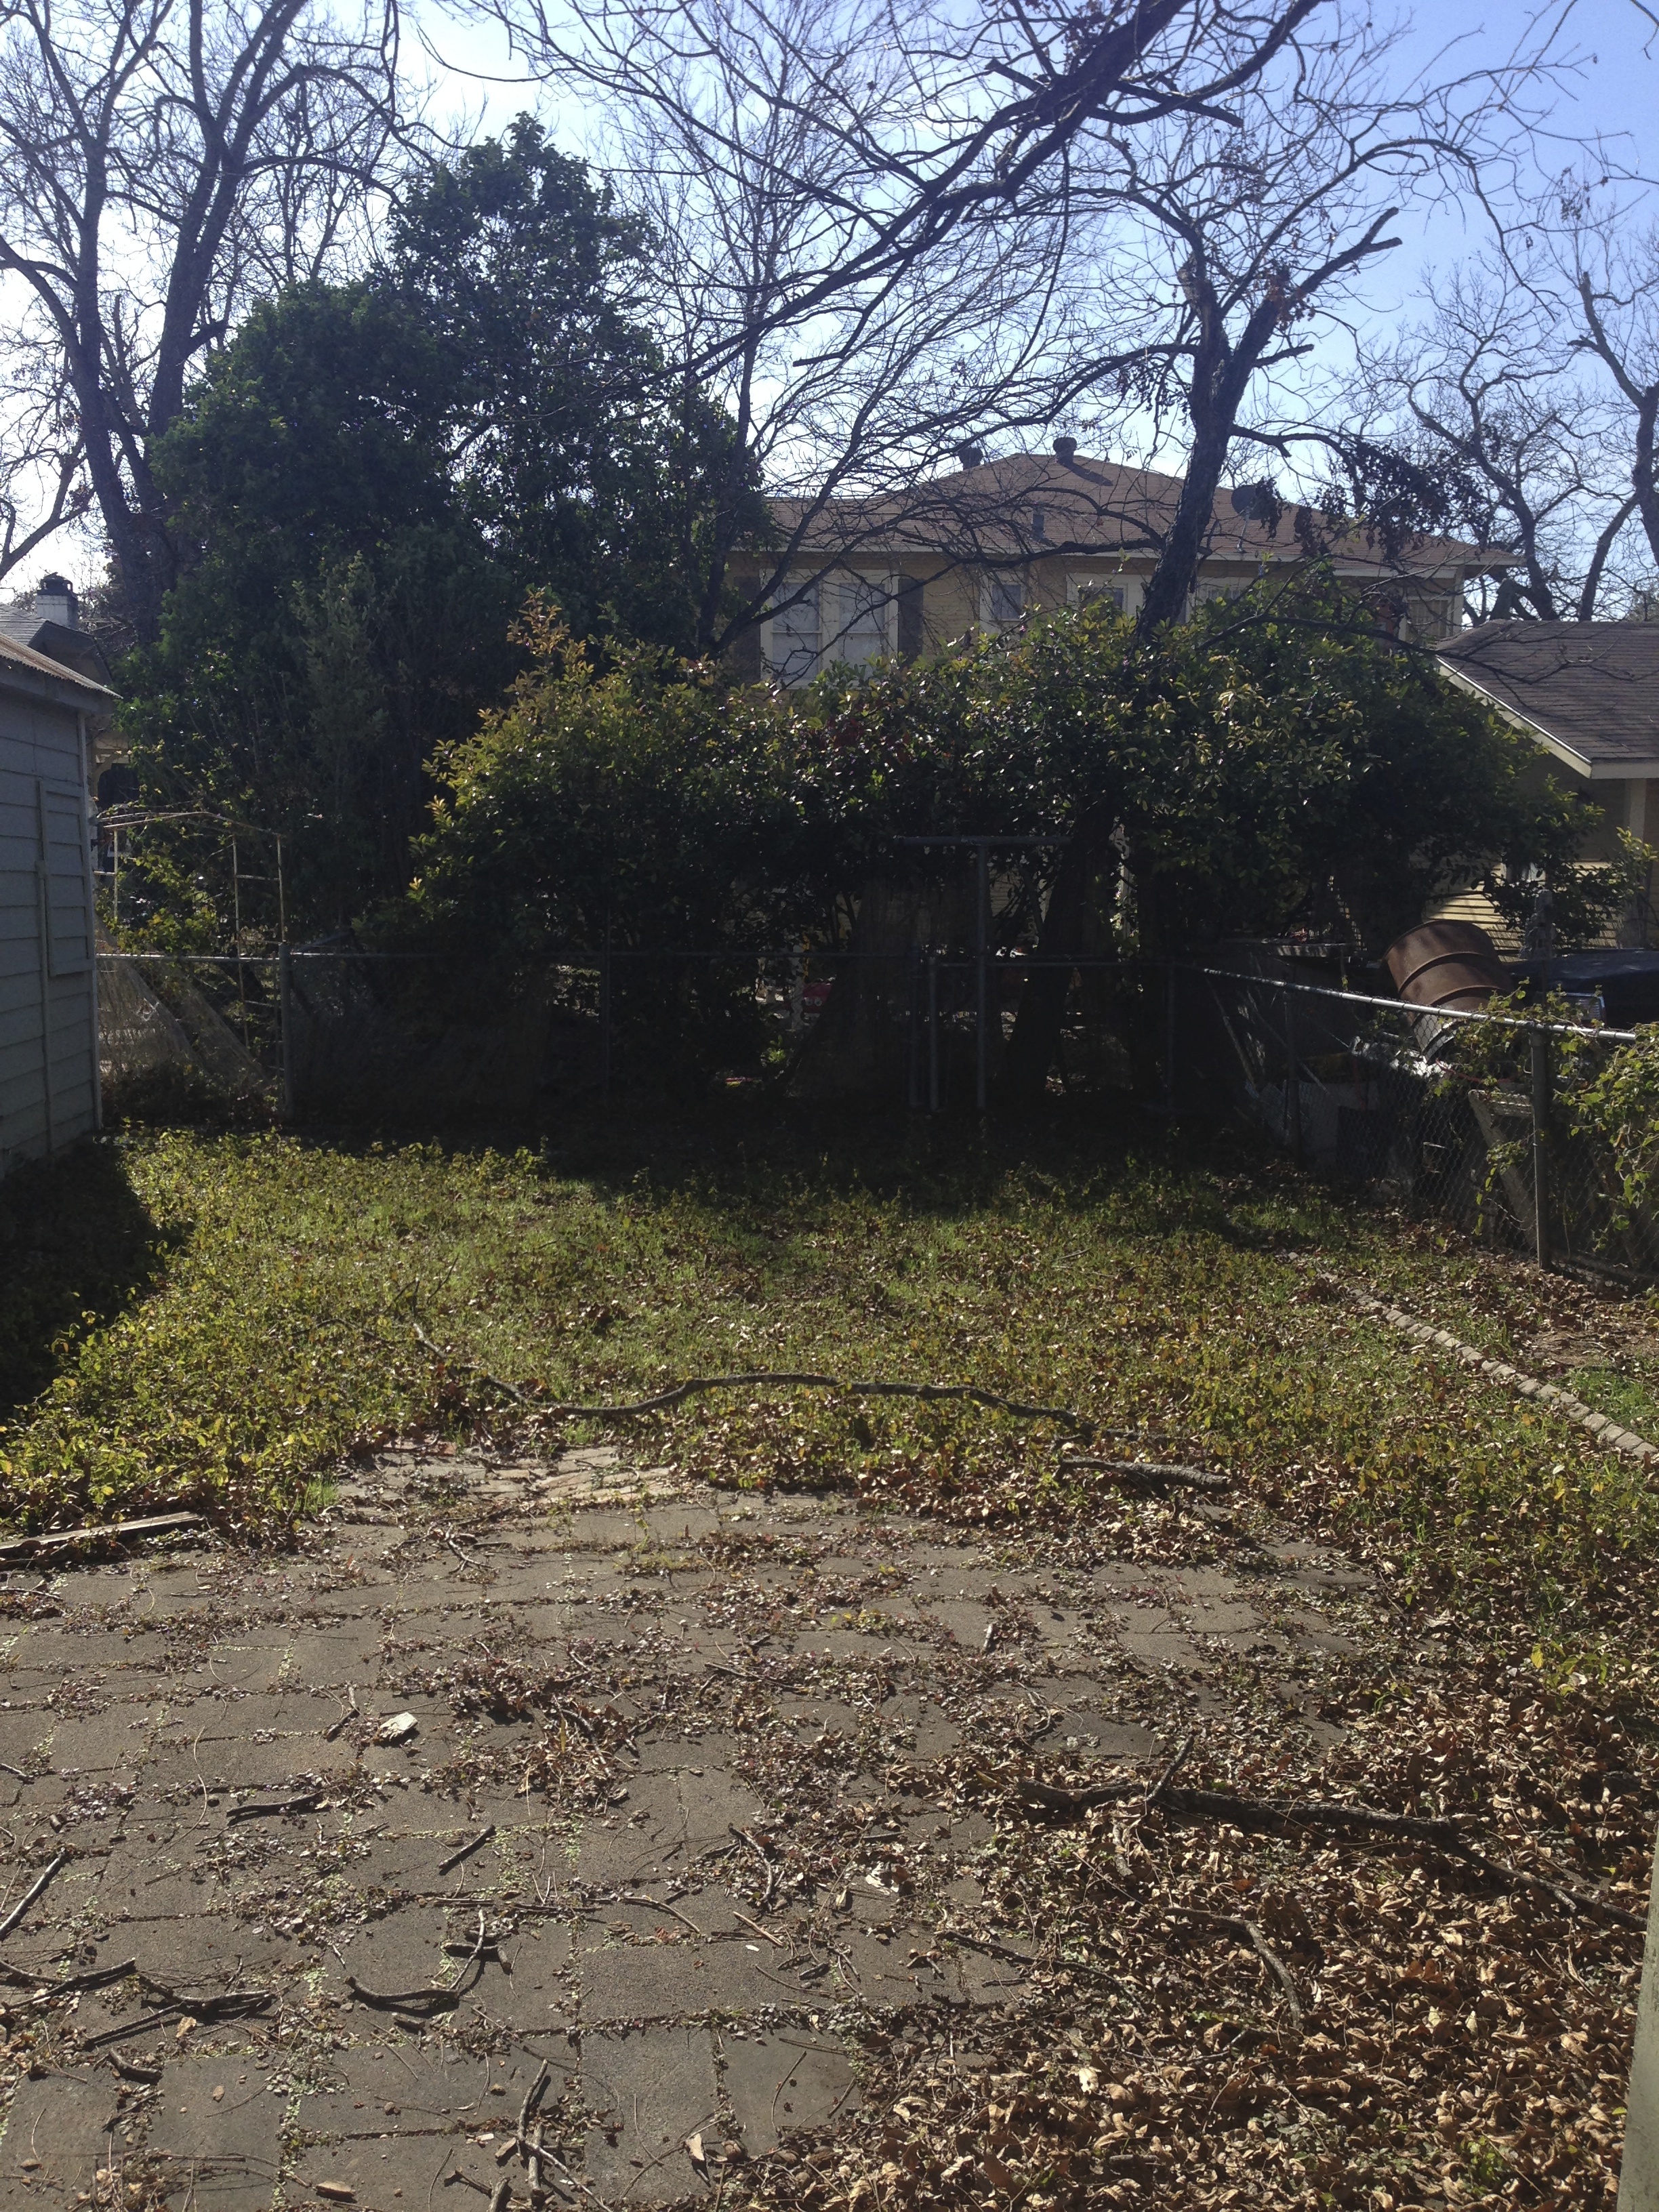
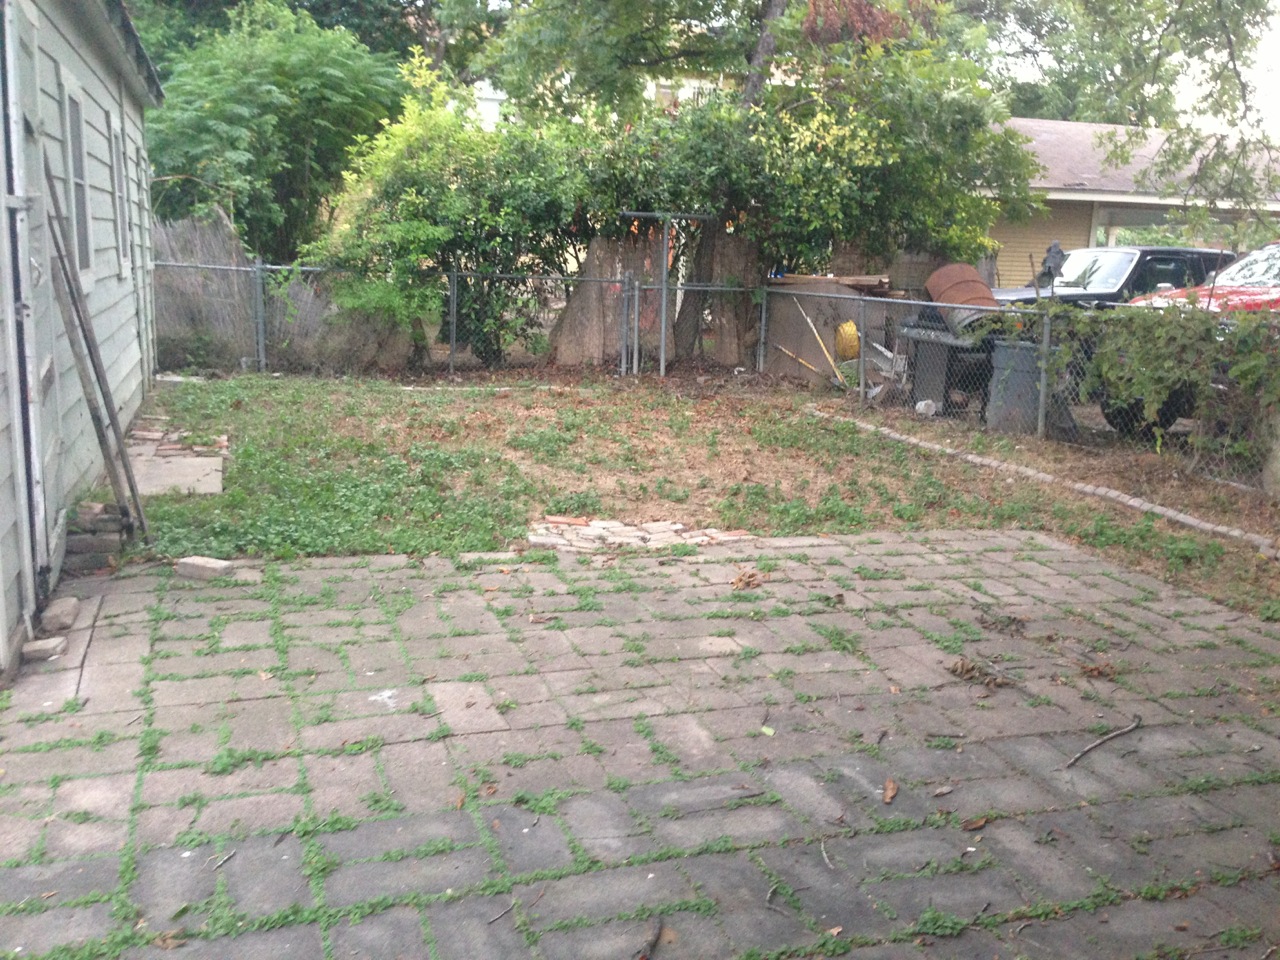
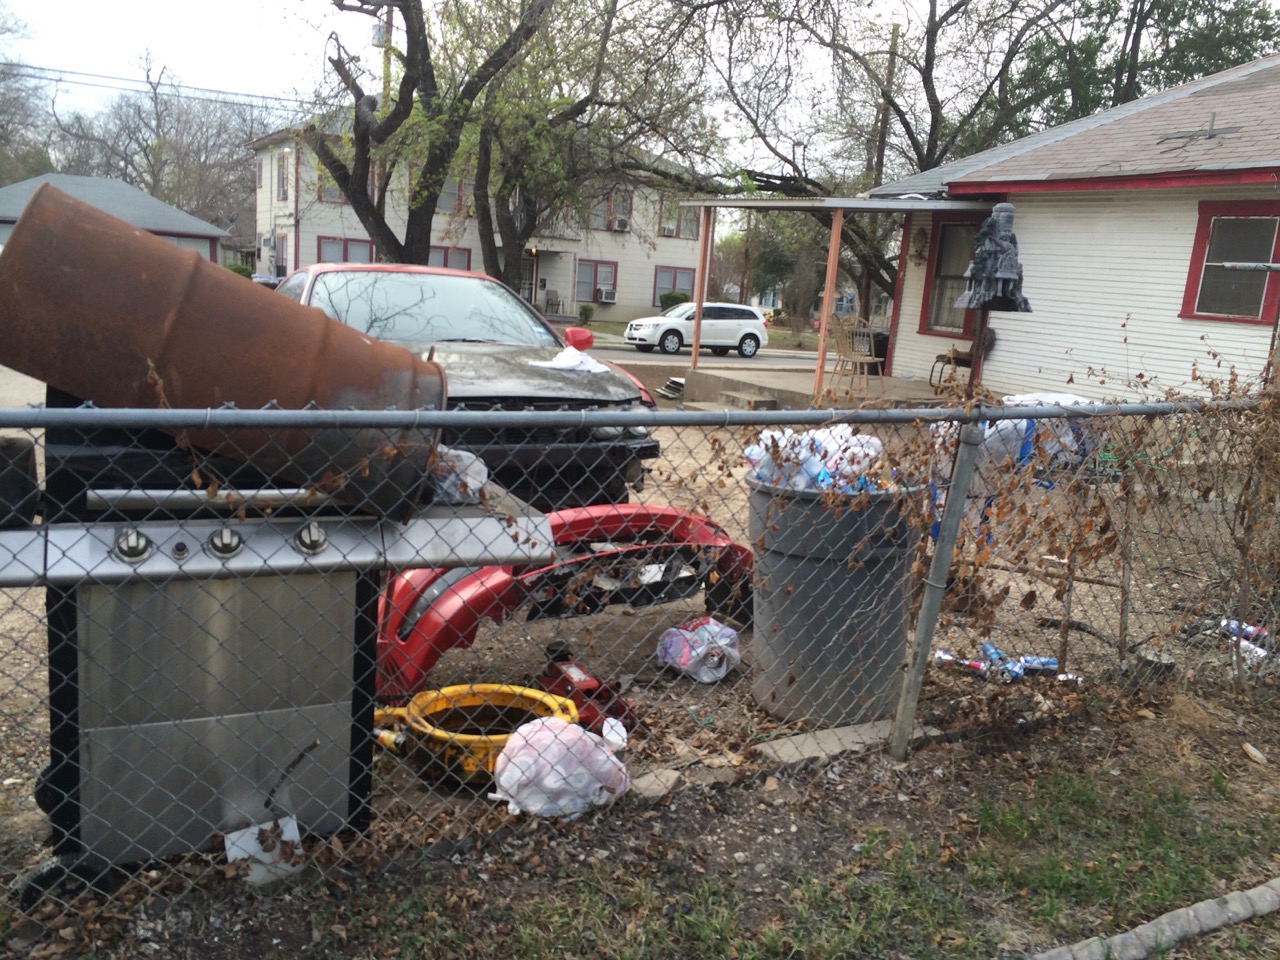
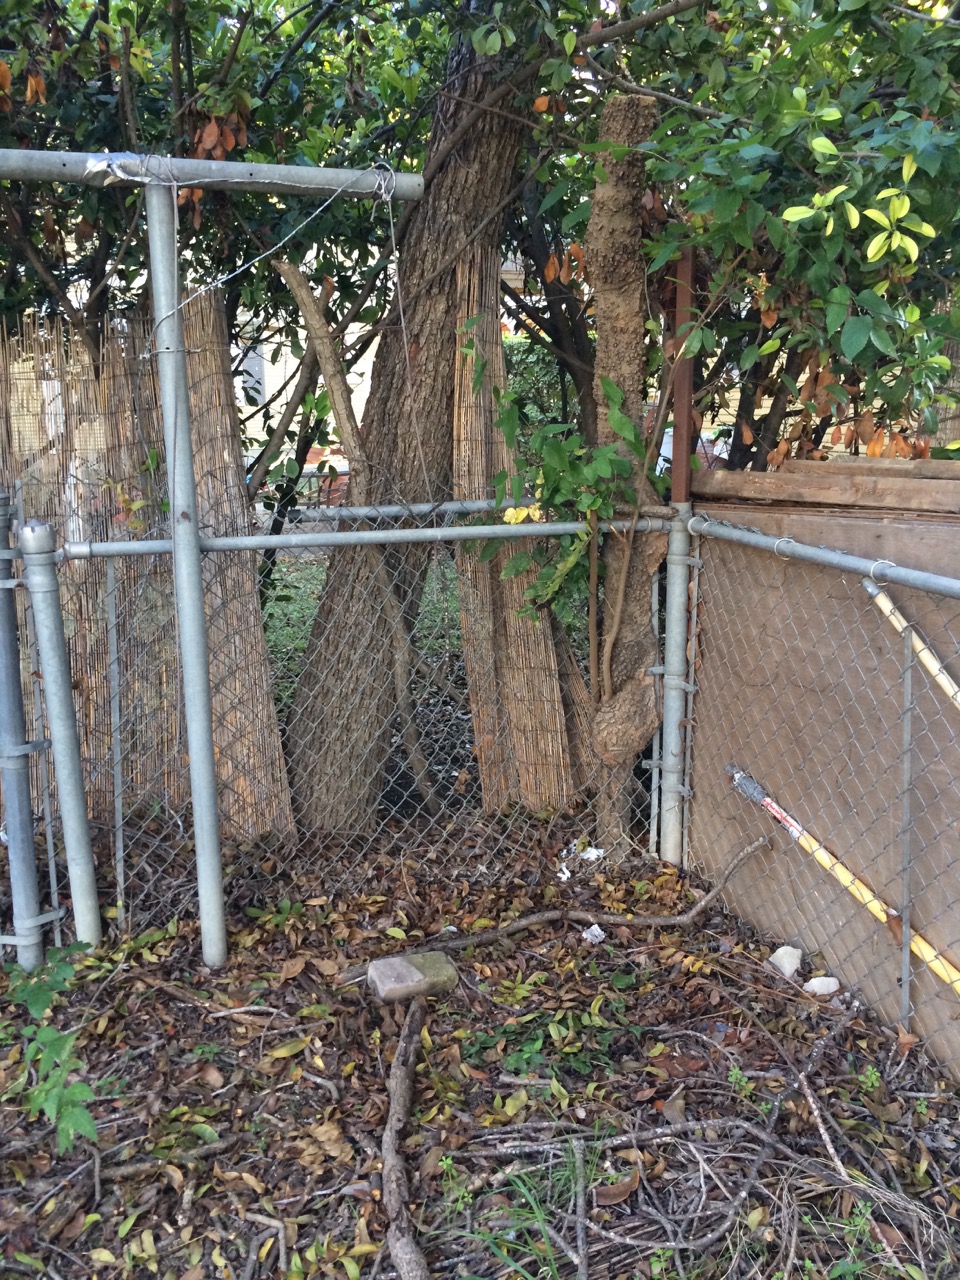
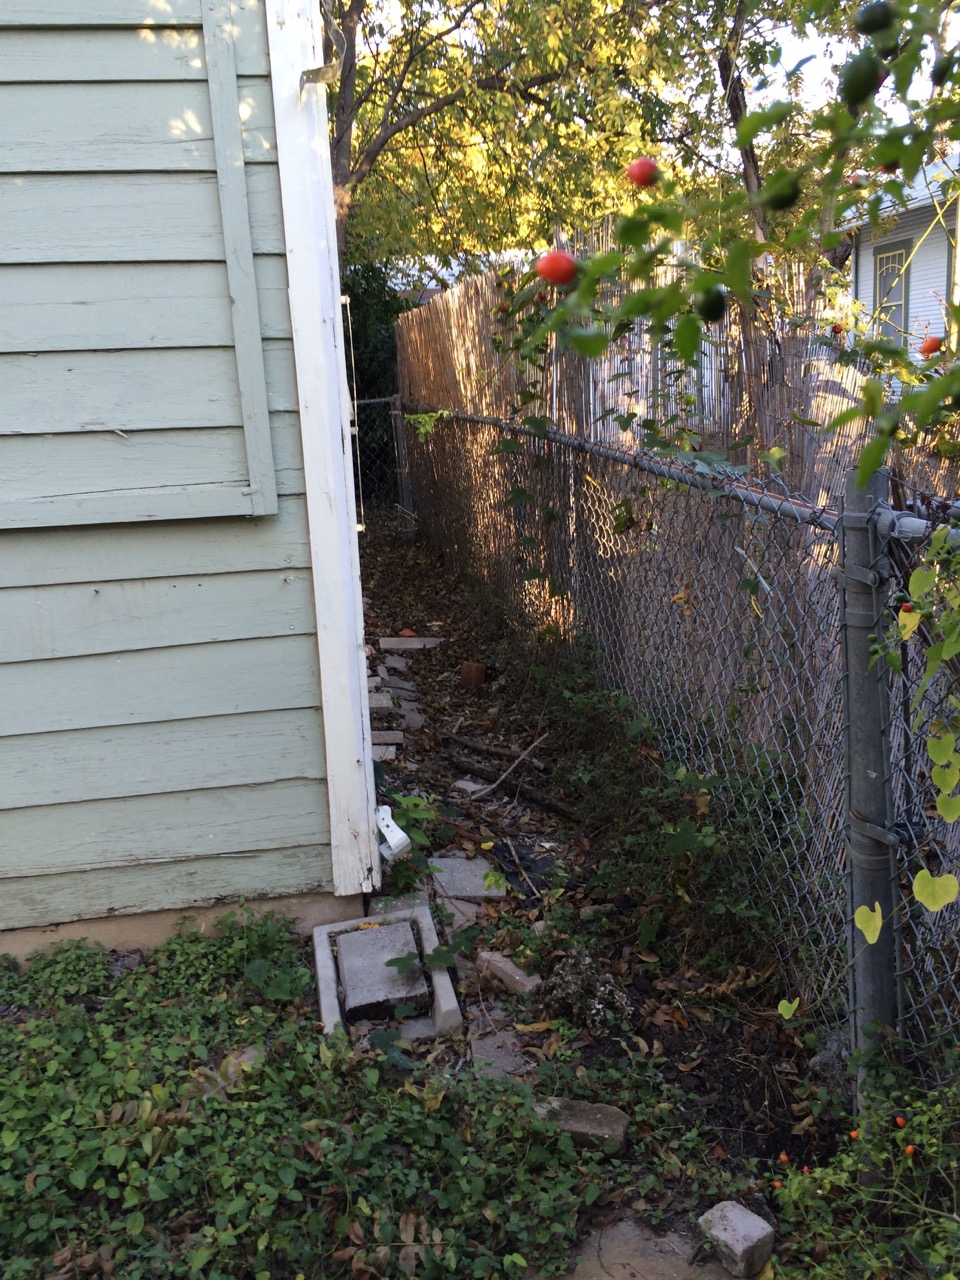
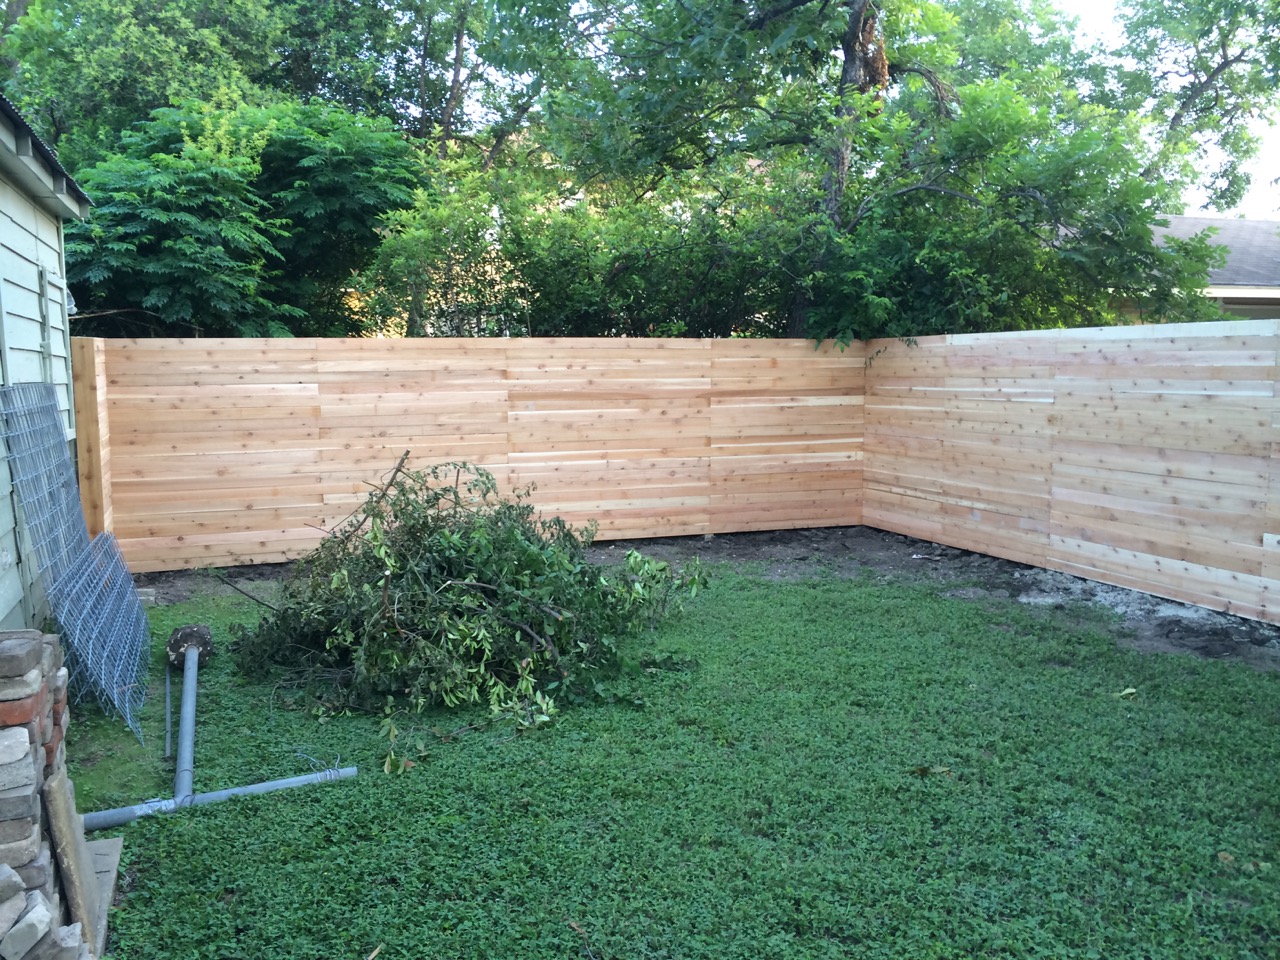
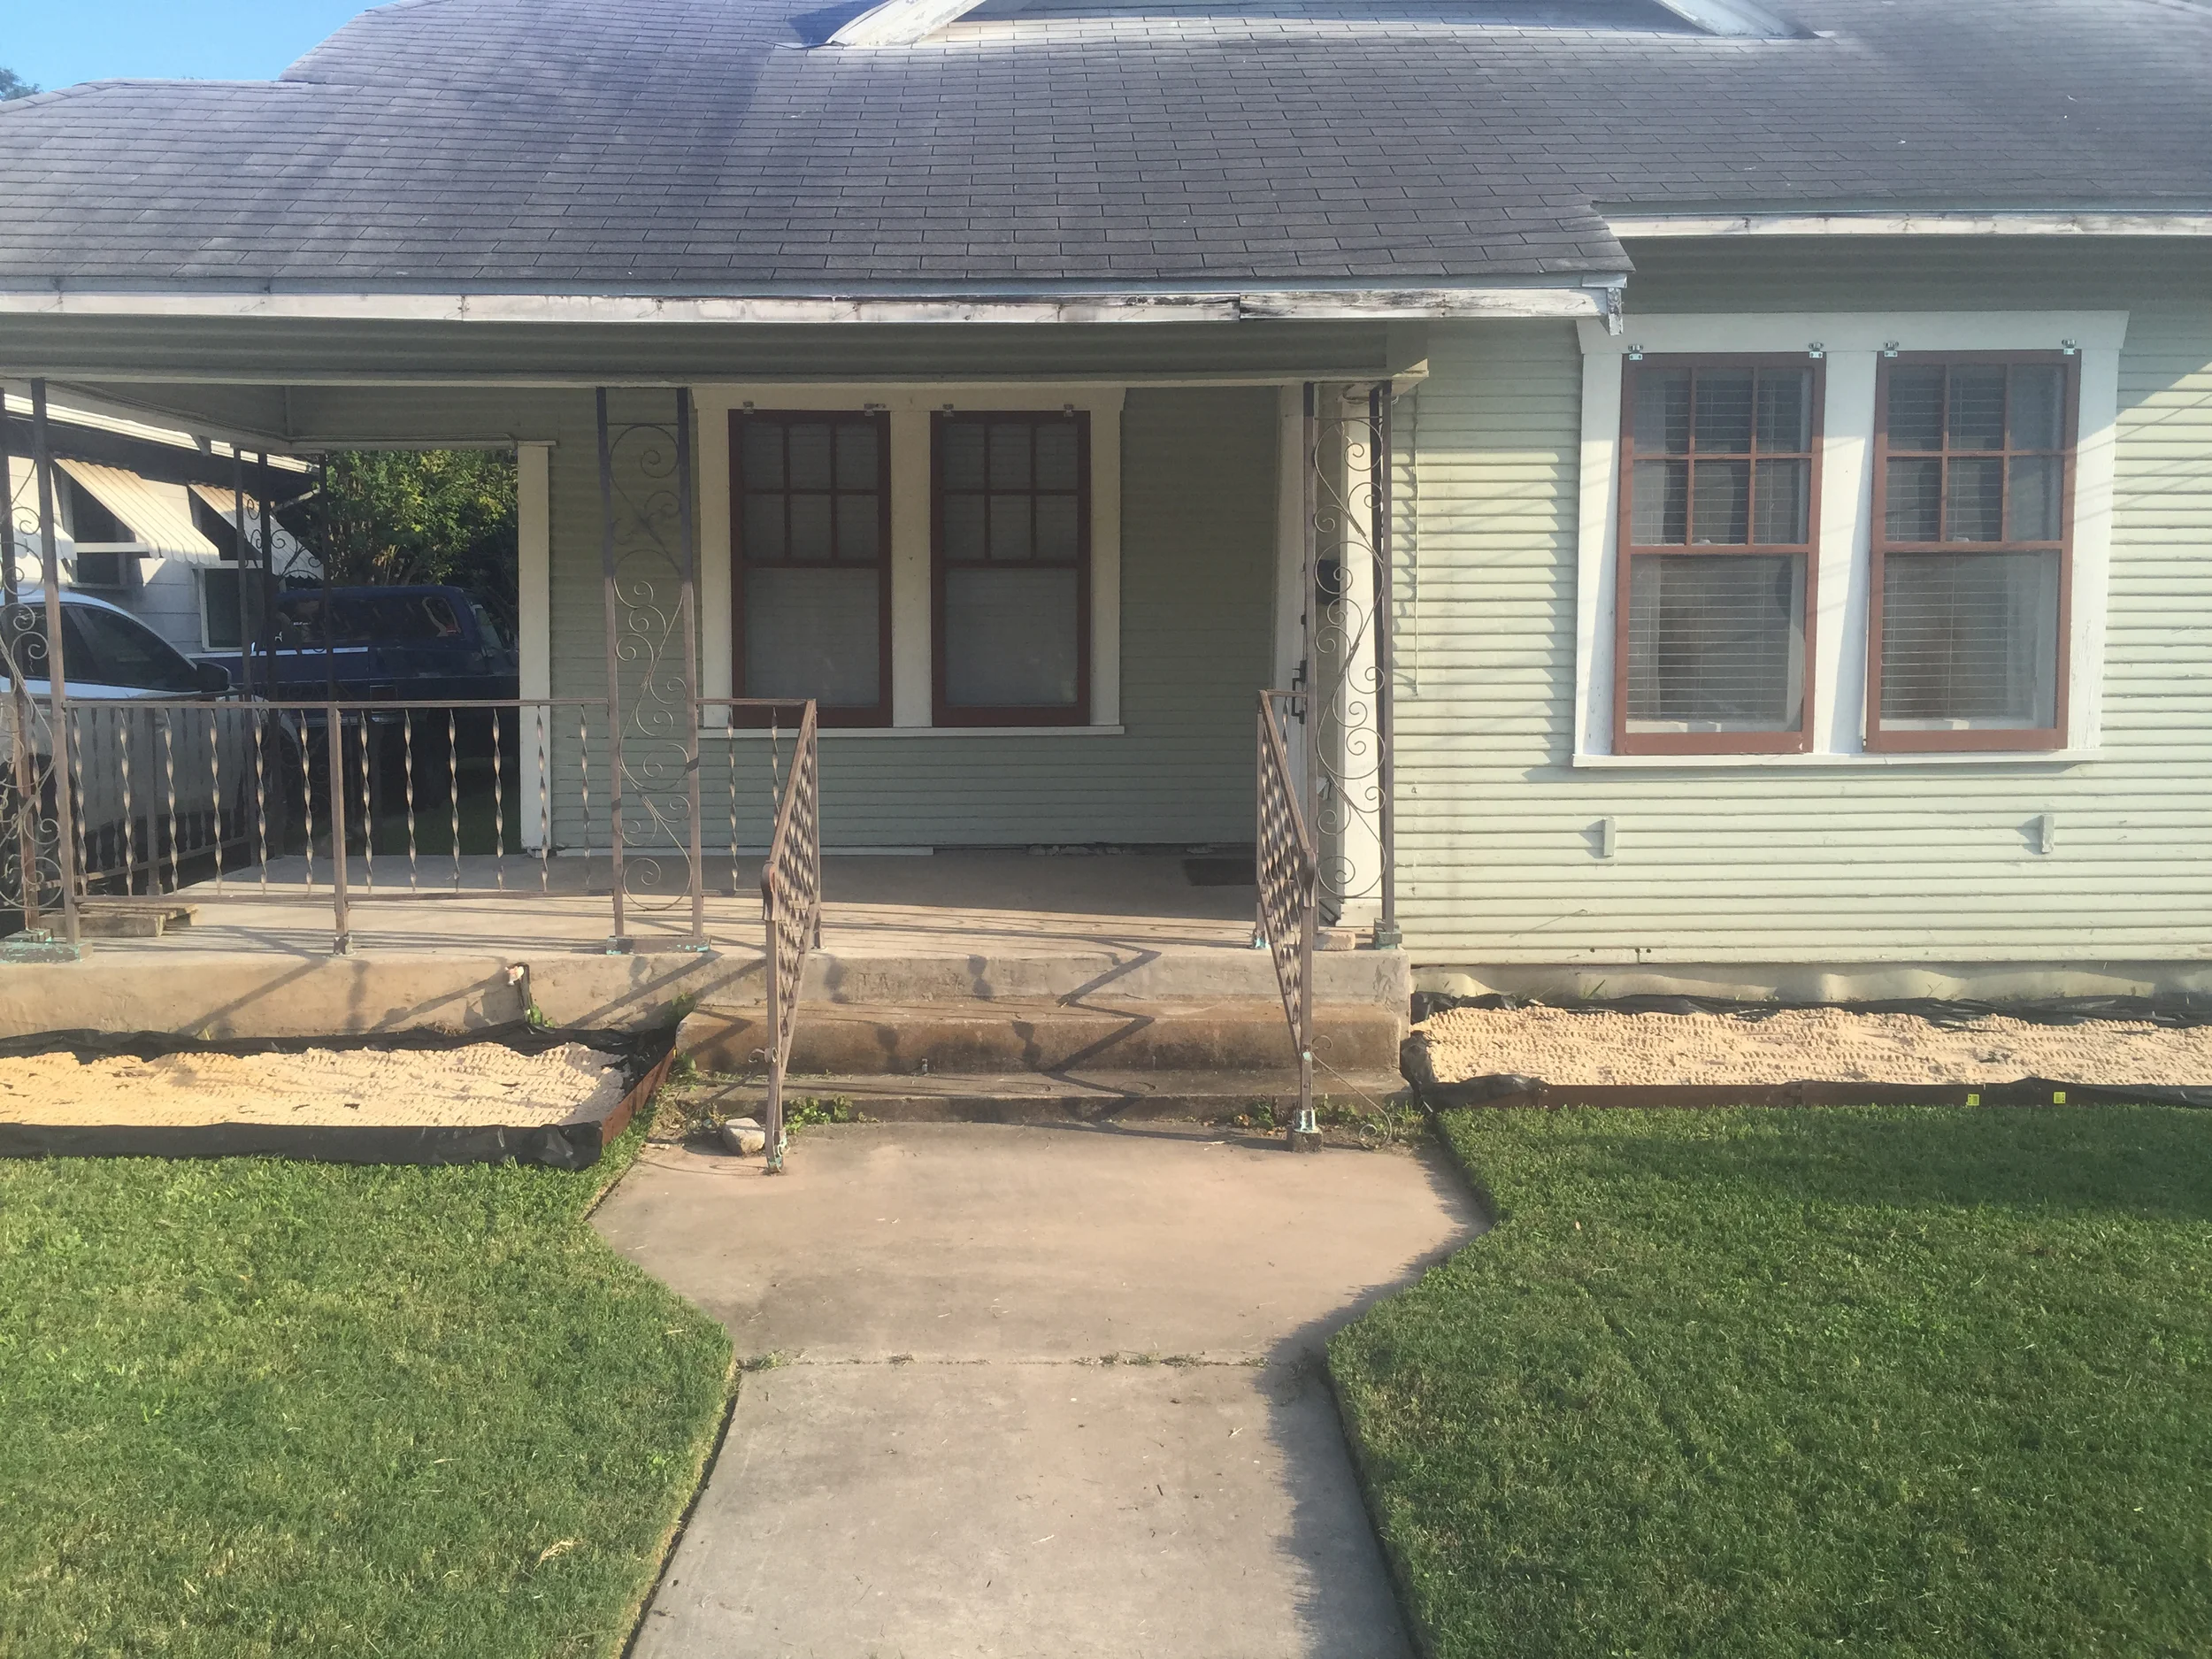
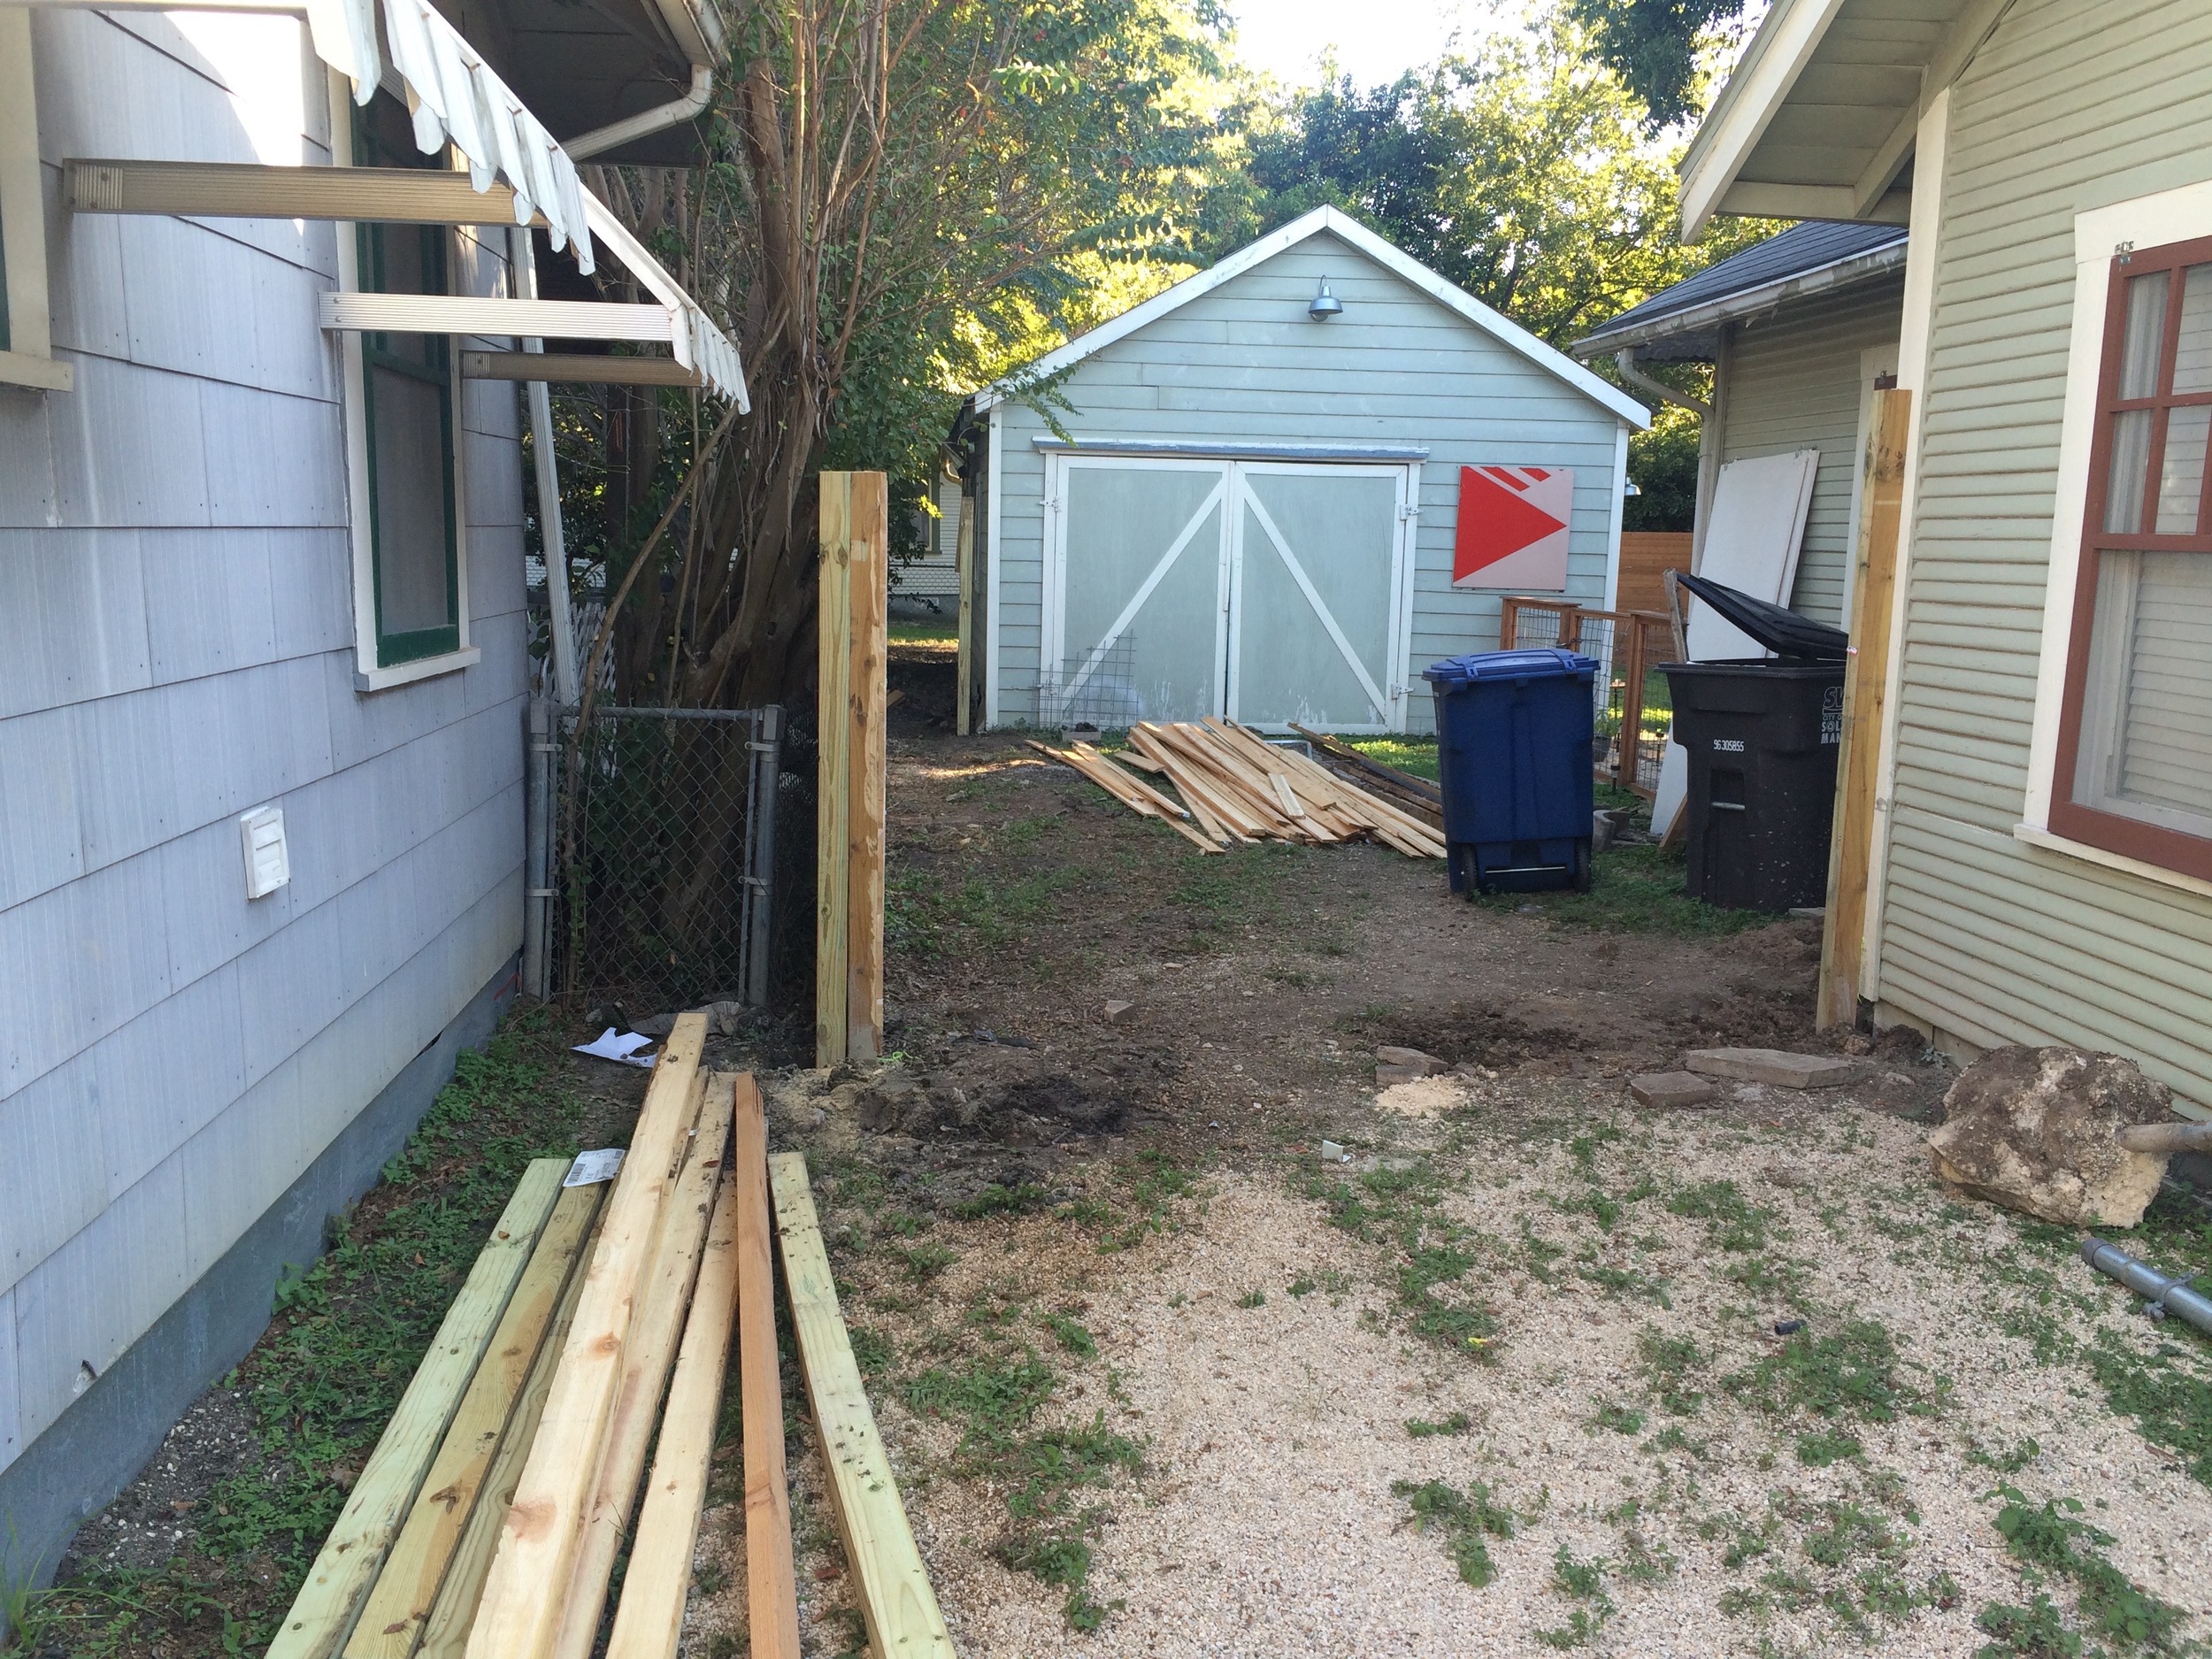
Earlier this week we shared our new horizontal privacy fence for the main portion of our backyard. However, having a detached garage made the design of the fence a little challenging on the driveway side. This side had a shared chain link fence with our other (much nicer) neighbor and a super questionable gate.

Why yes, those ARE ethernet cables holding everything together. What.

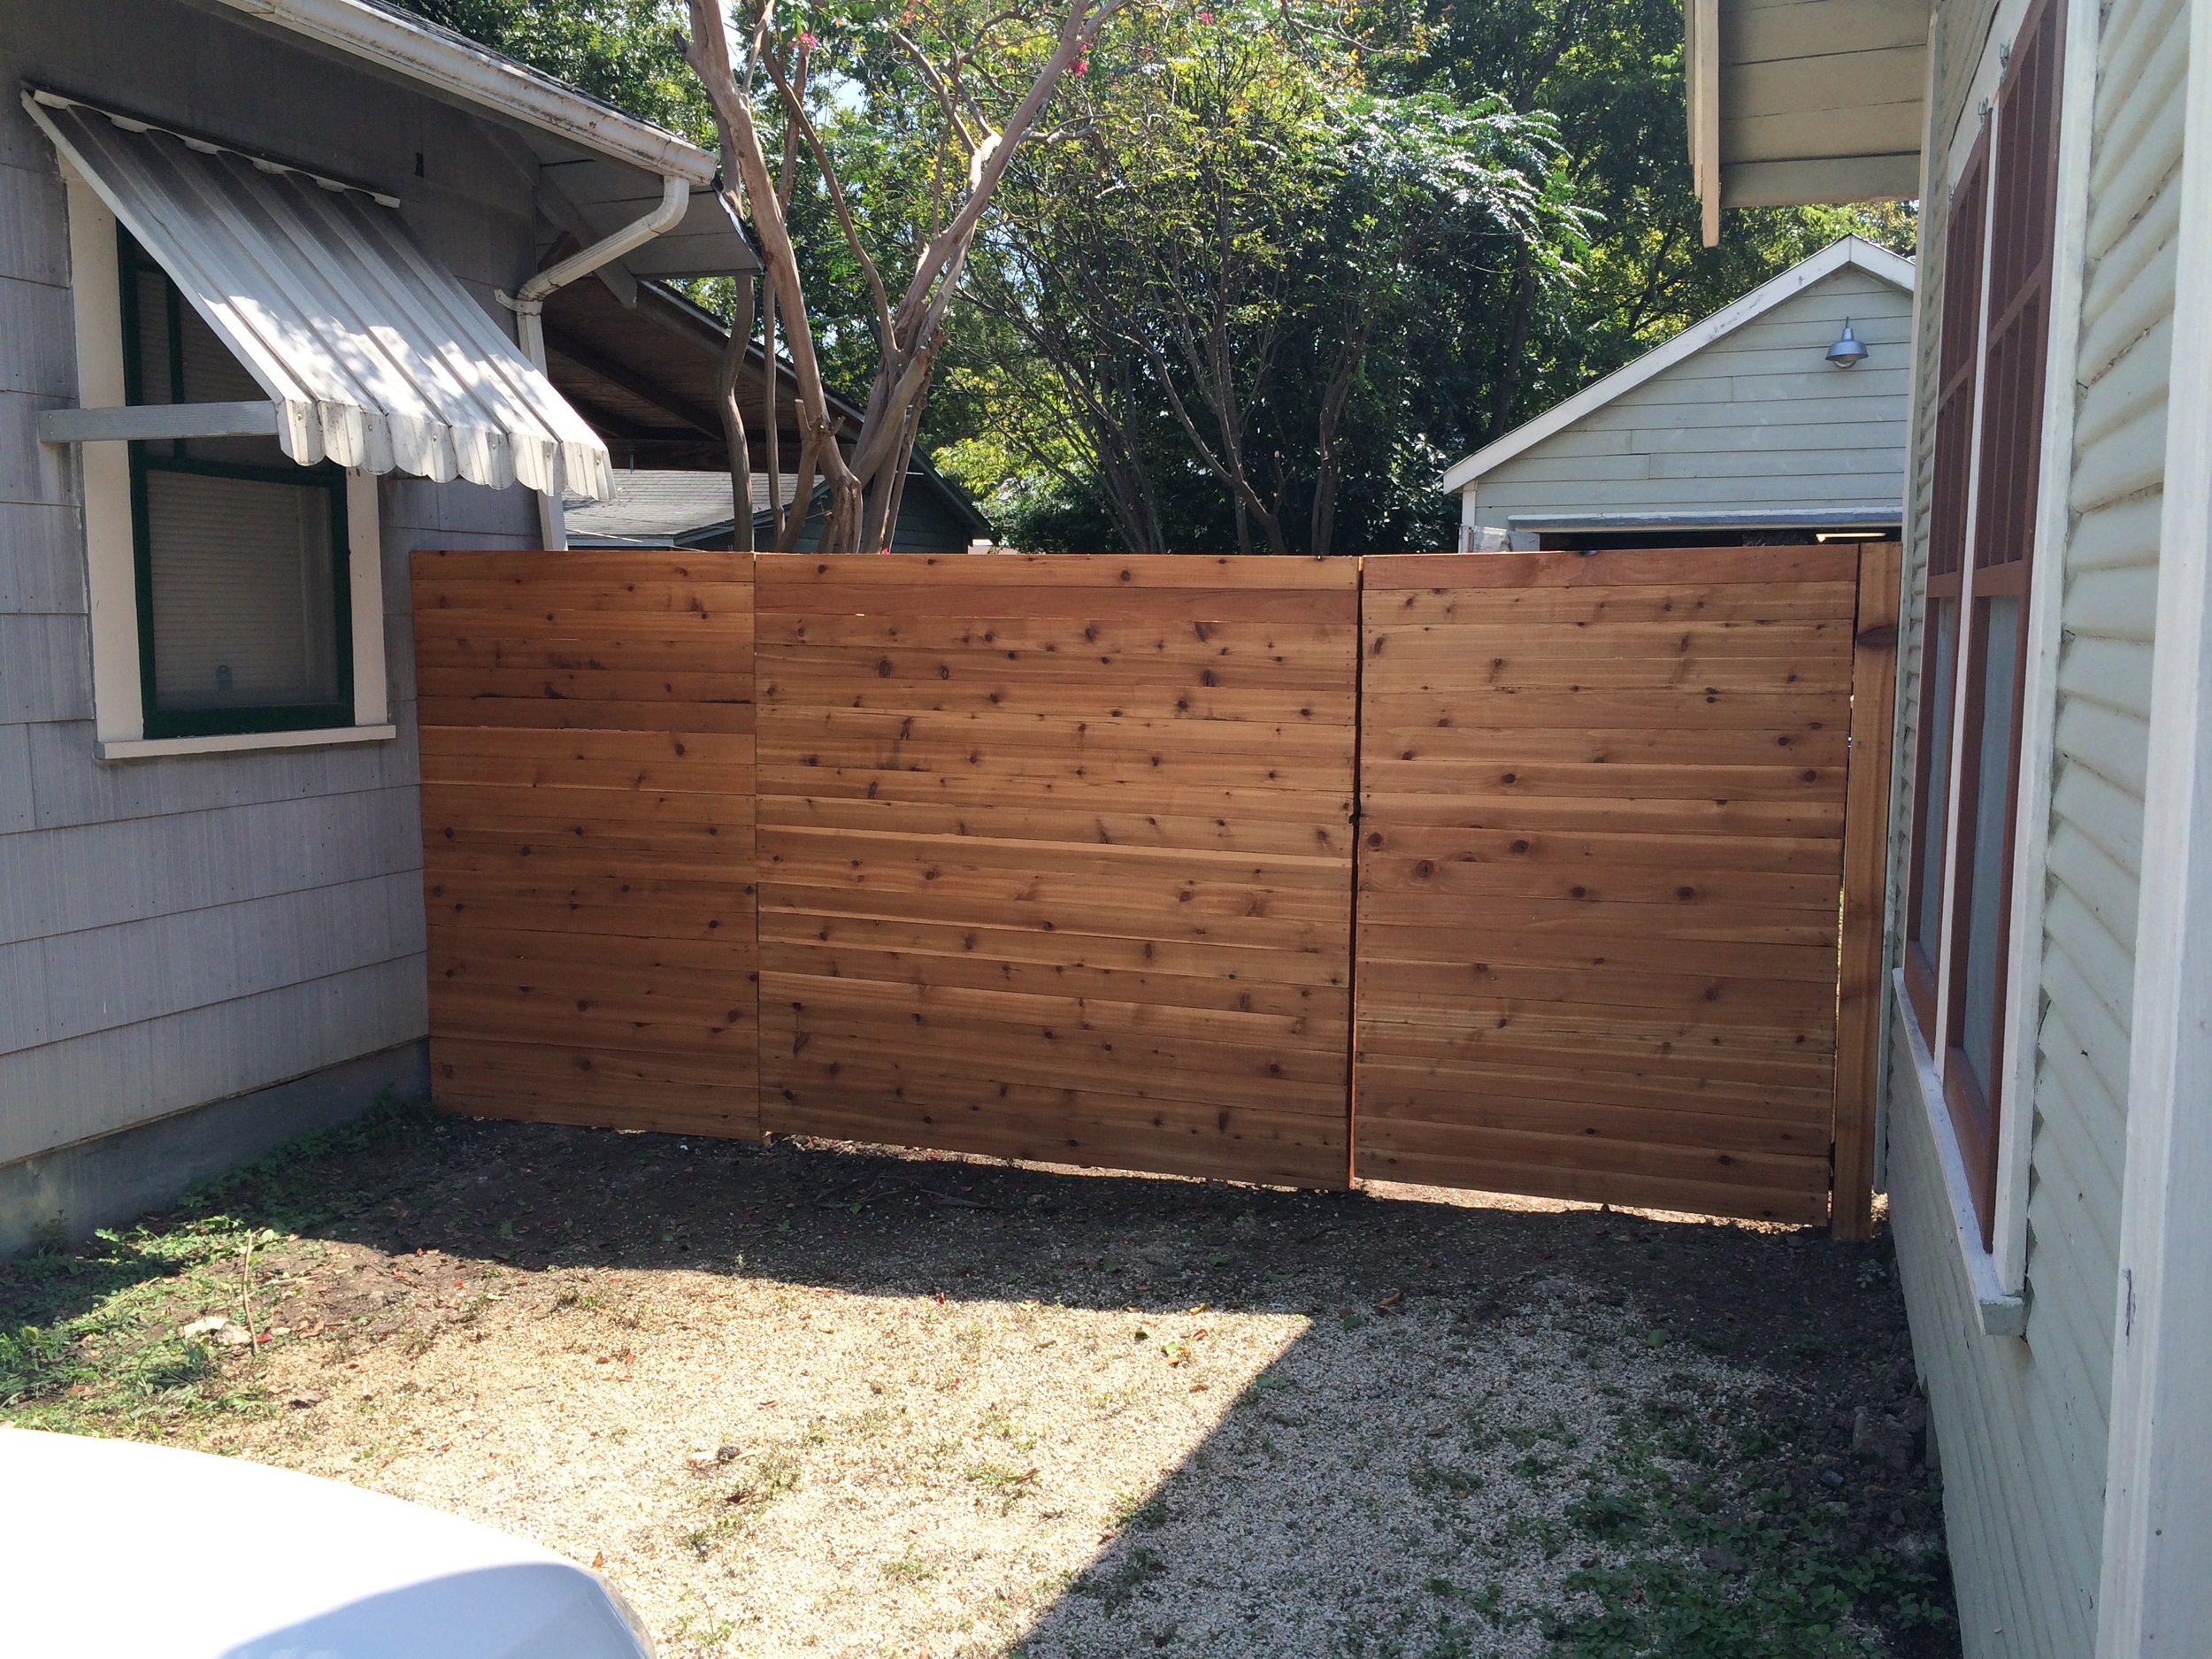
We knew that we wanted to have a shorter fence with a gate to divide the main yard from the driveway so that we could keep Geoffrey from roaming too far. 

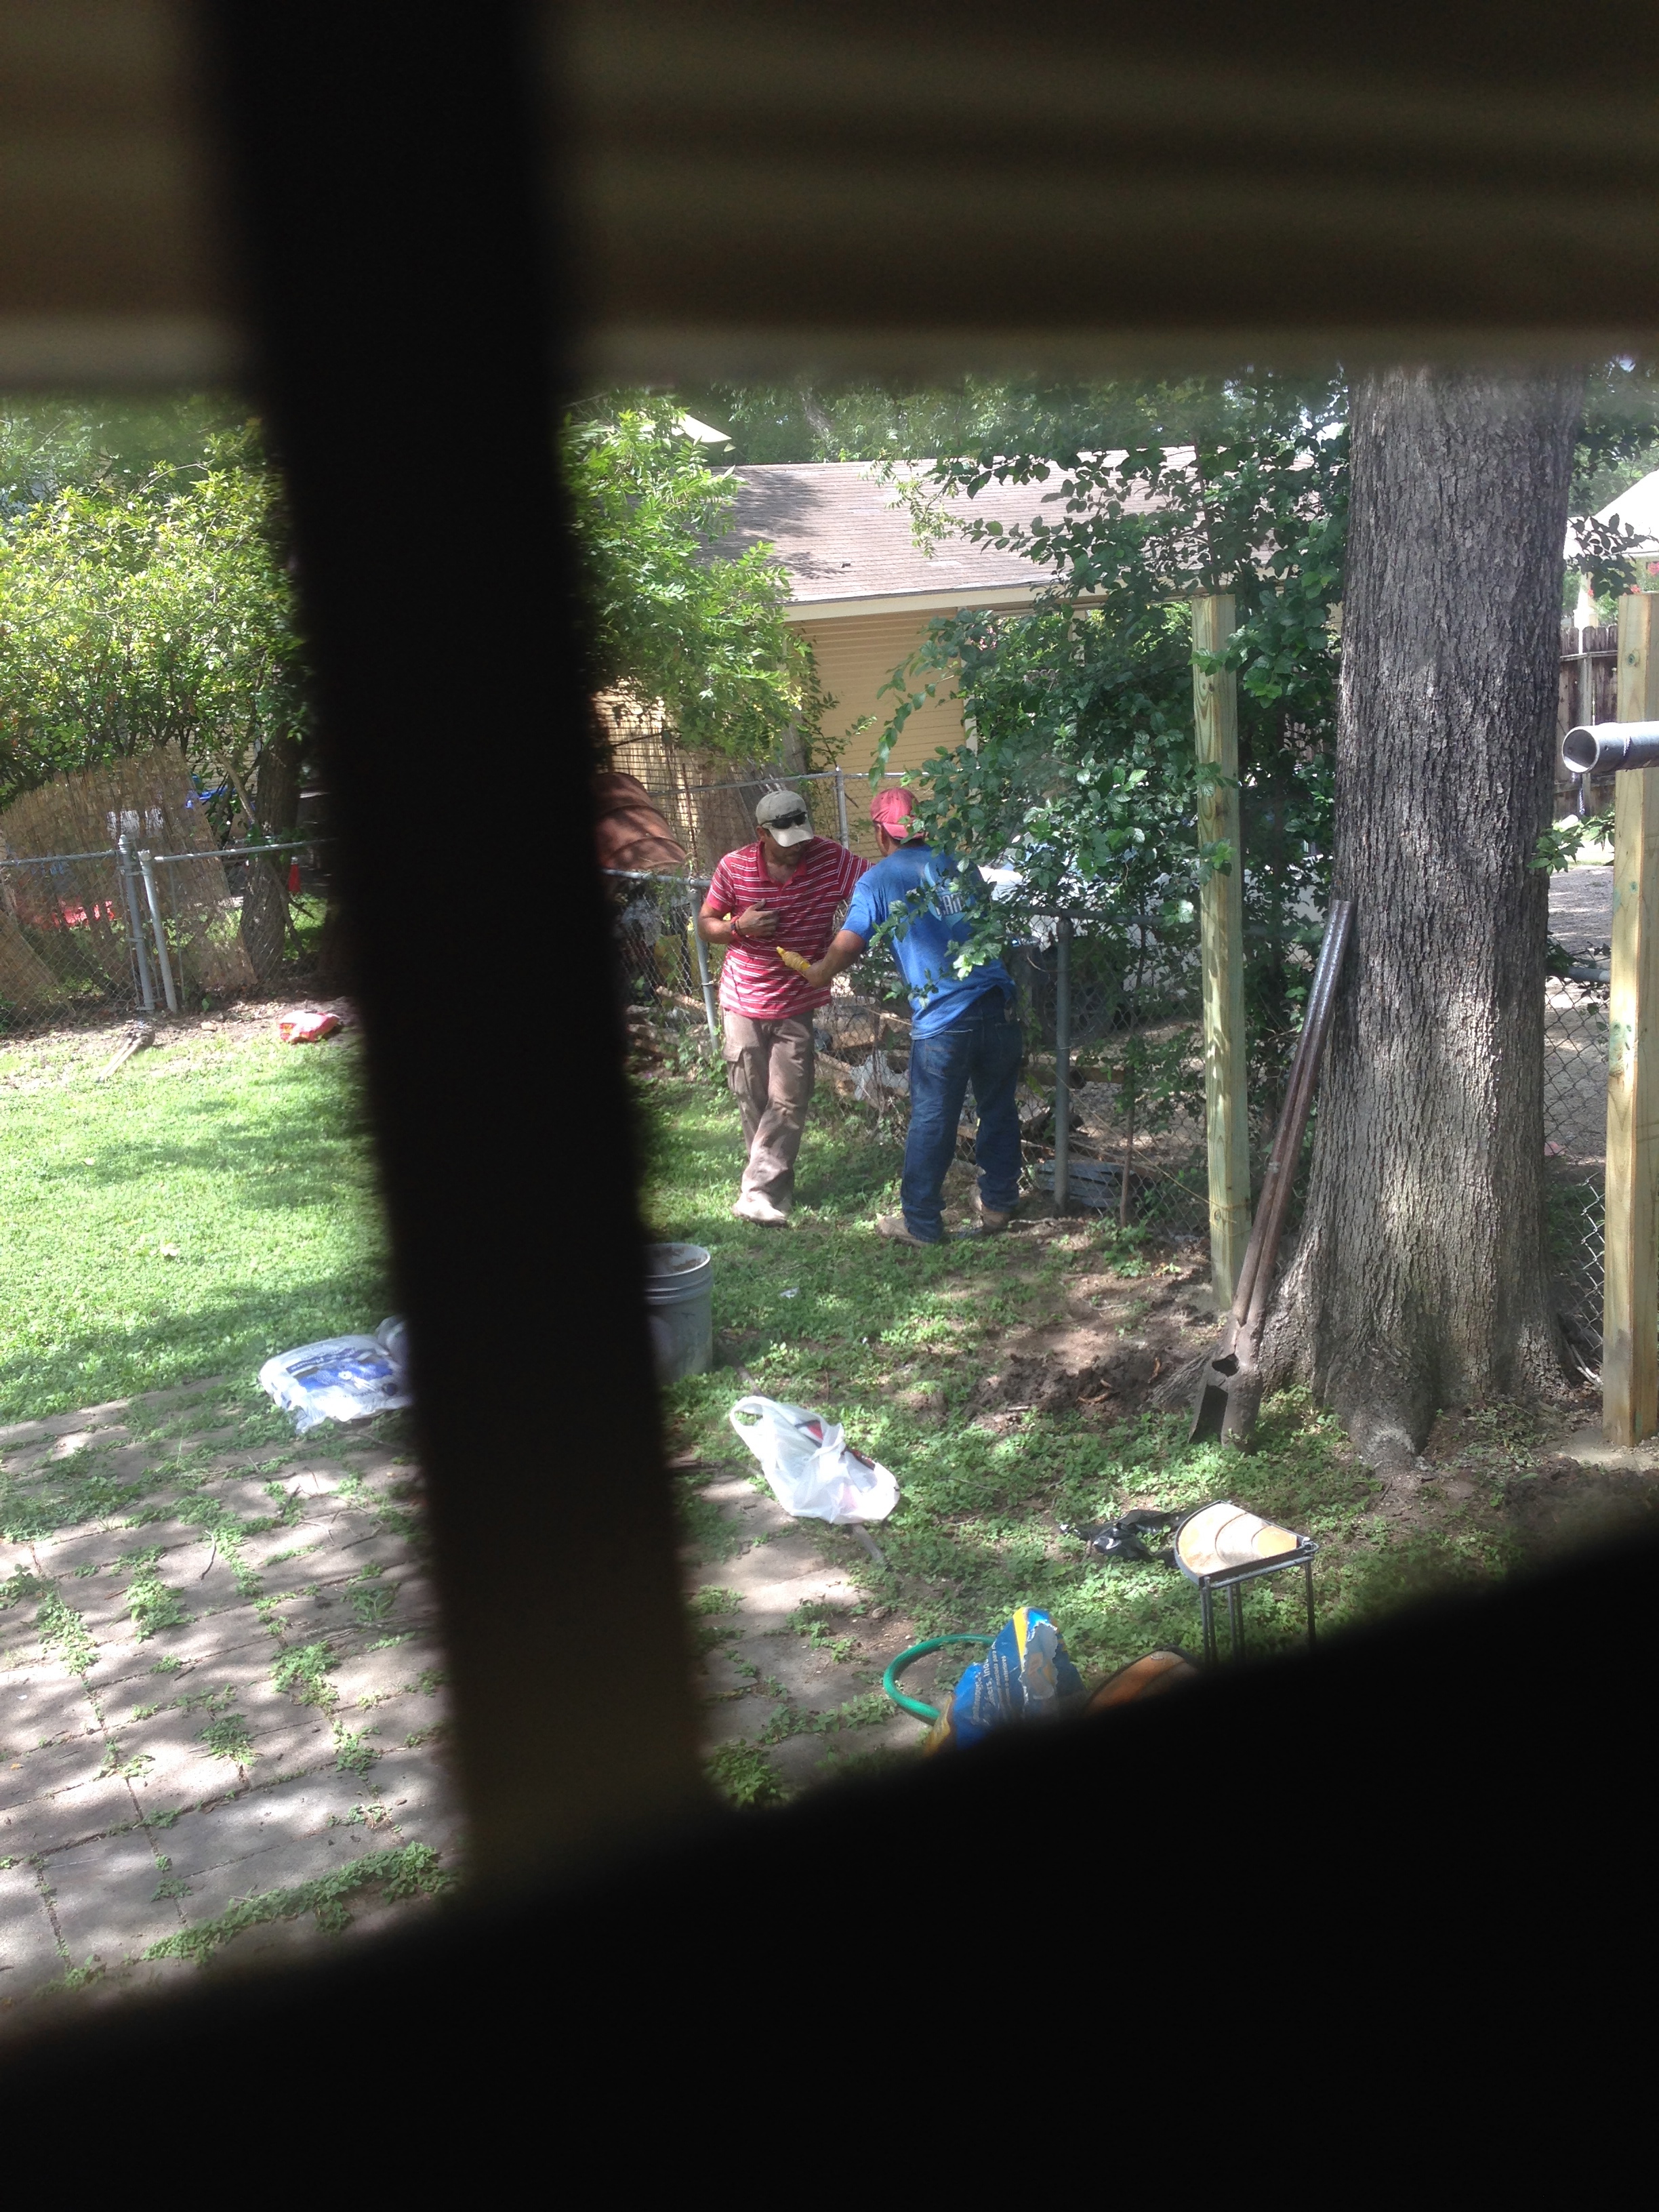
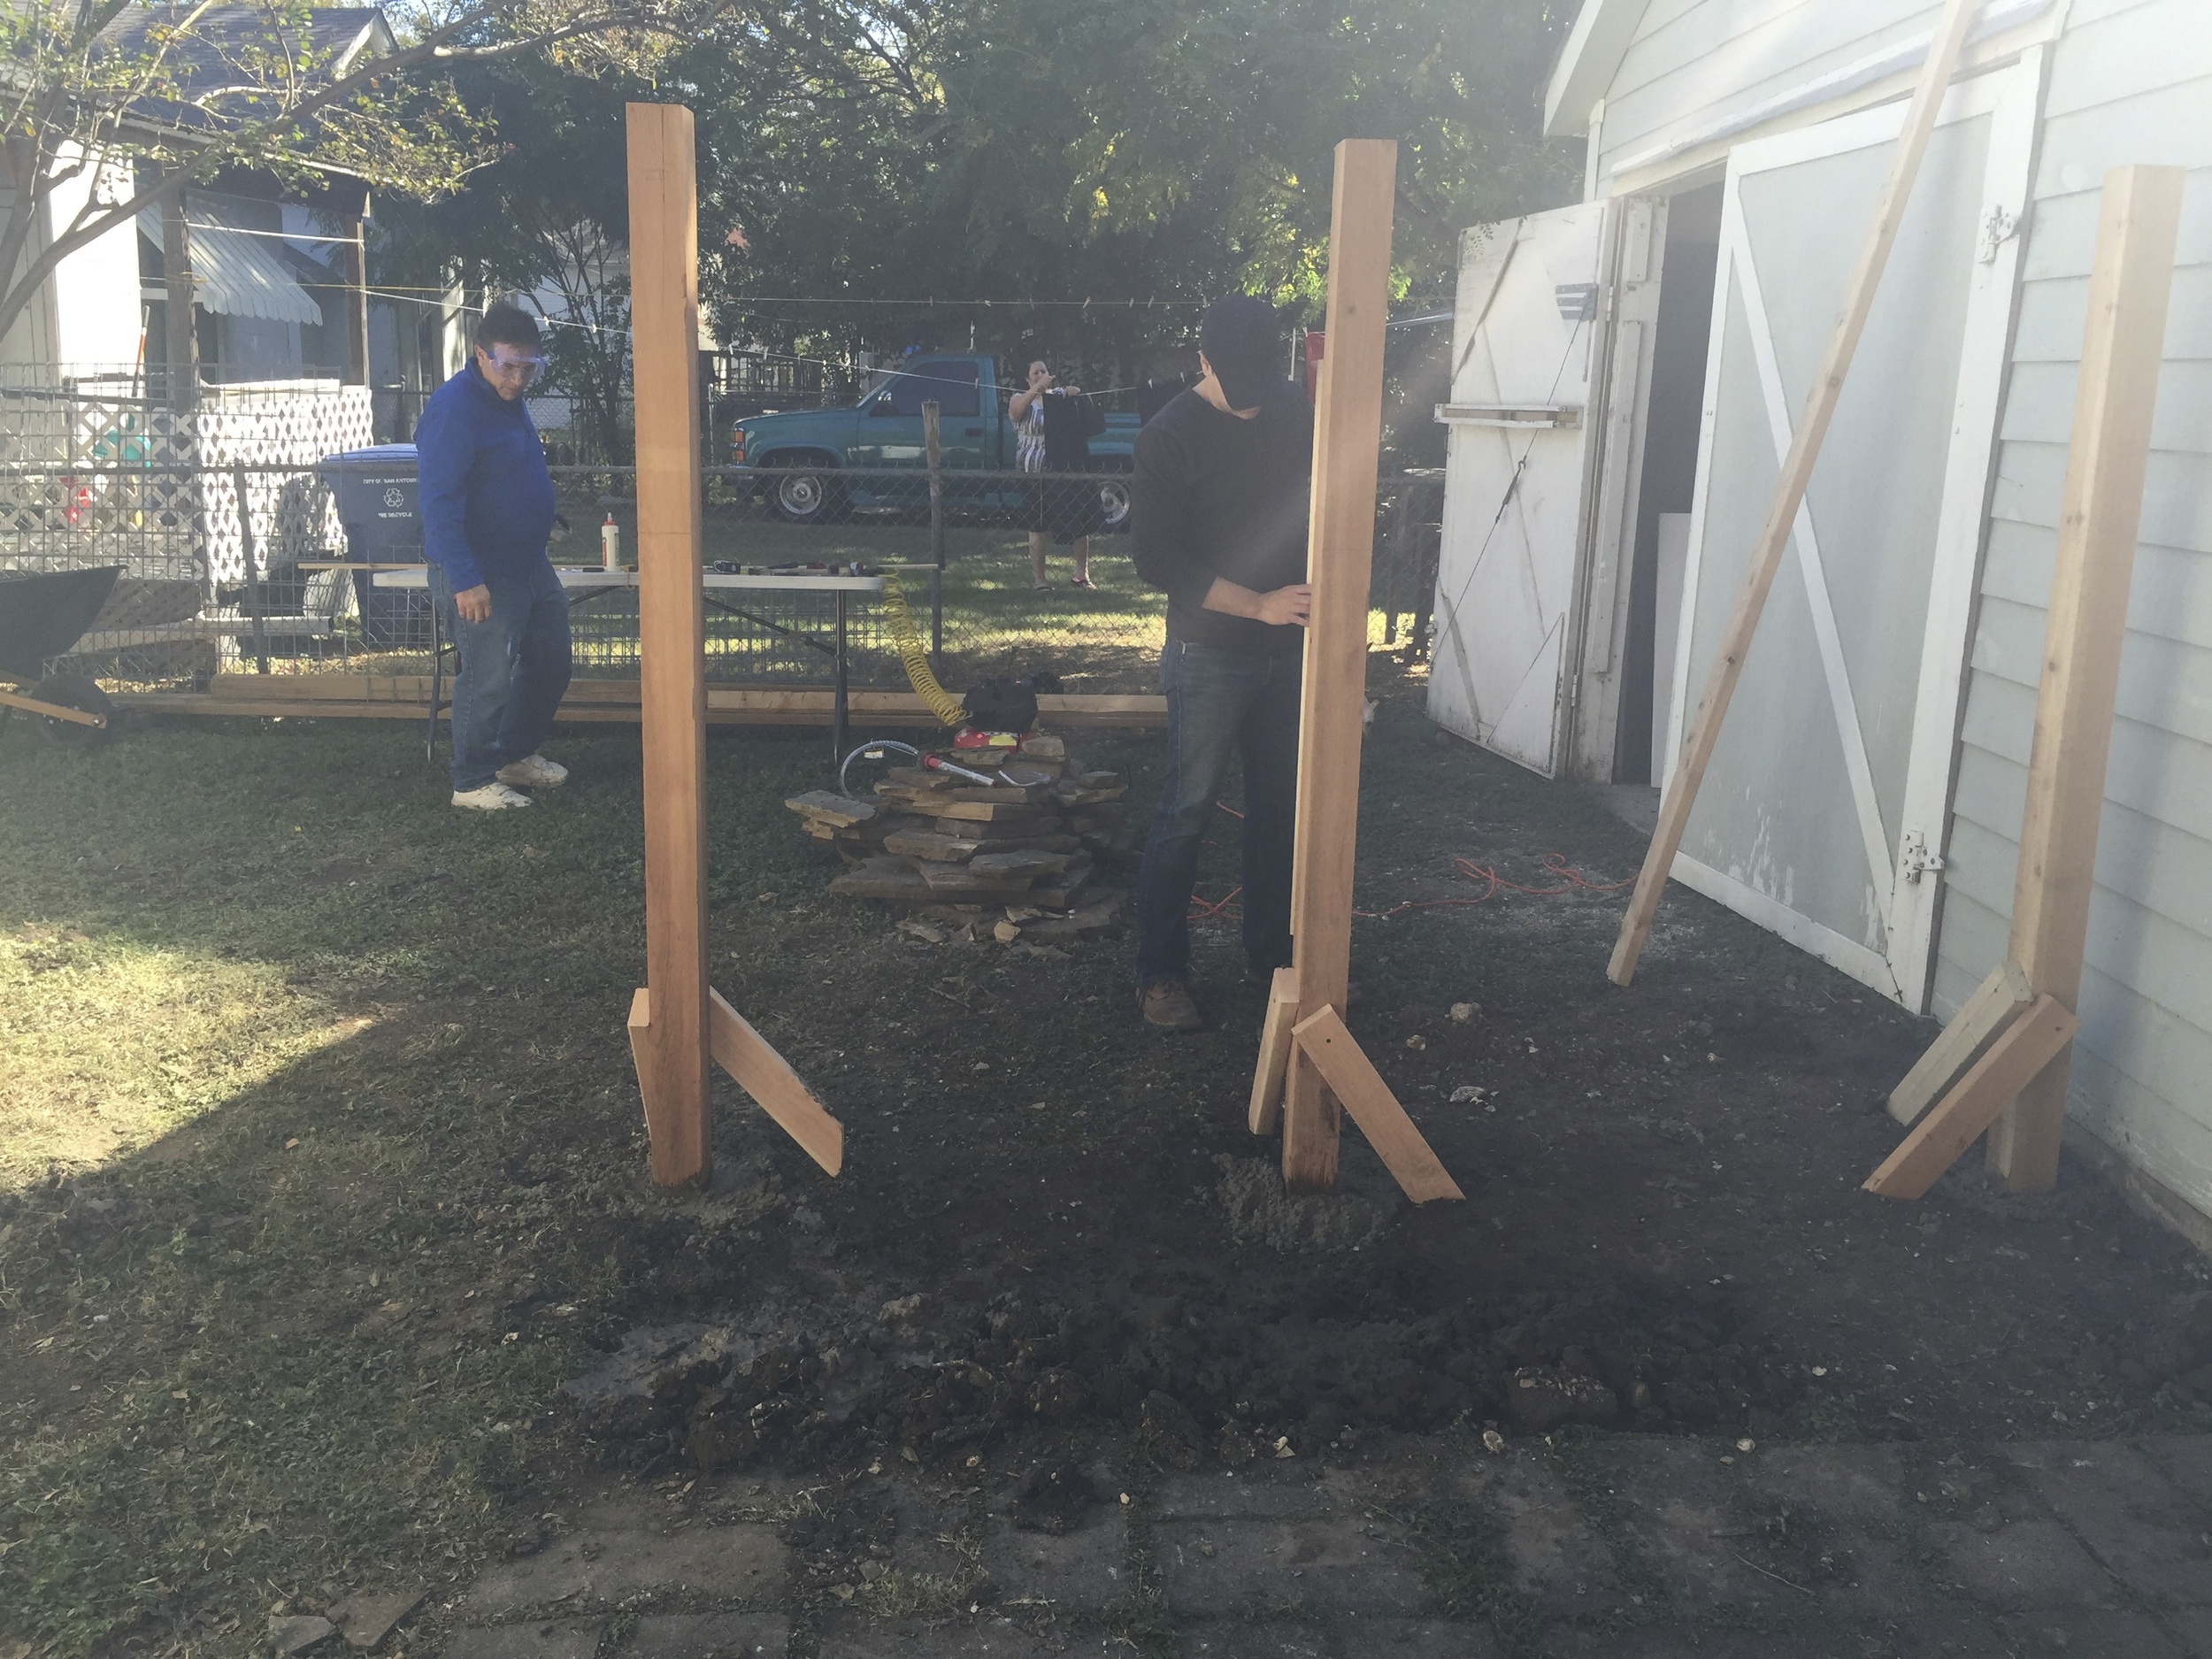
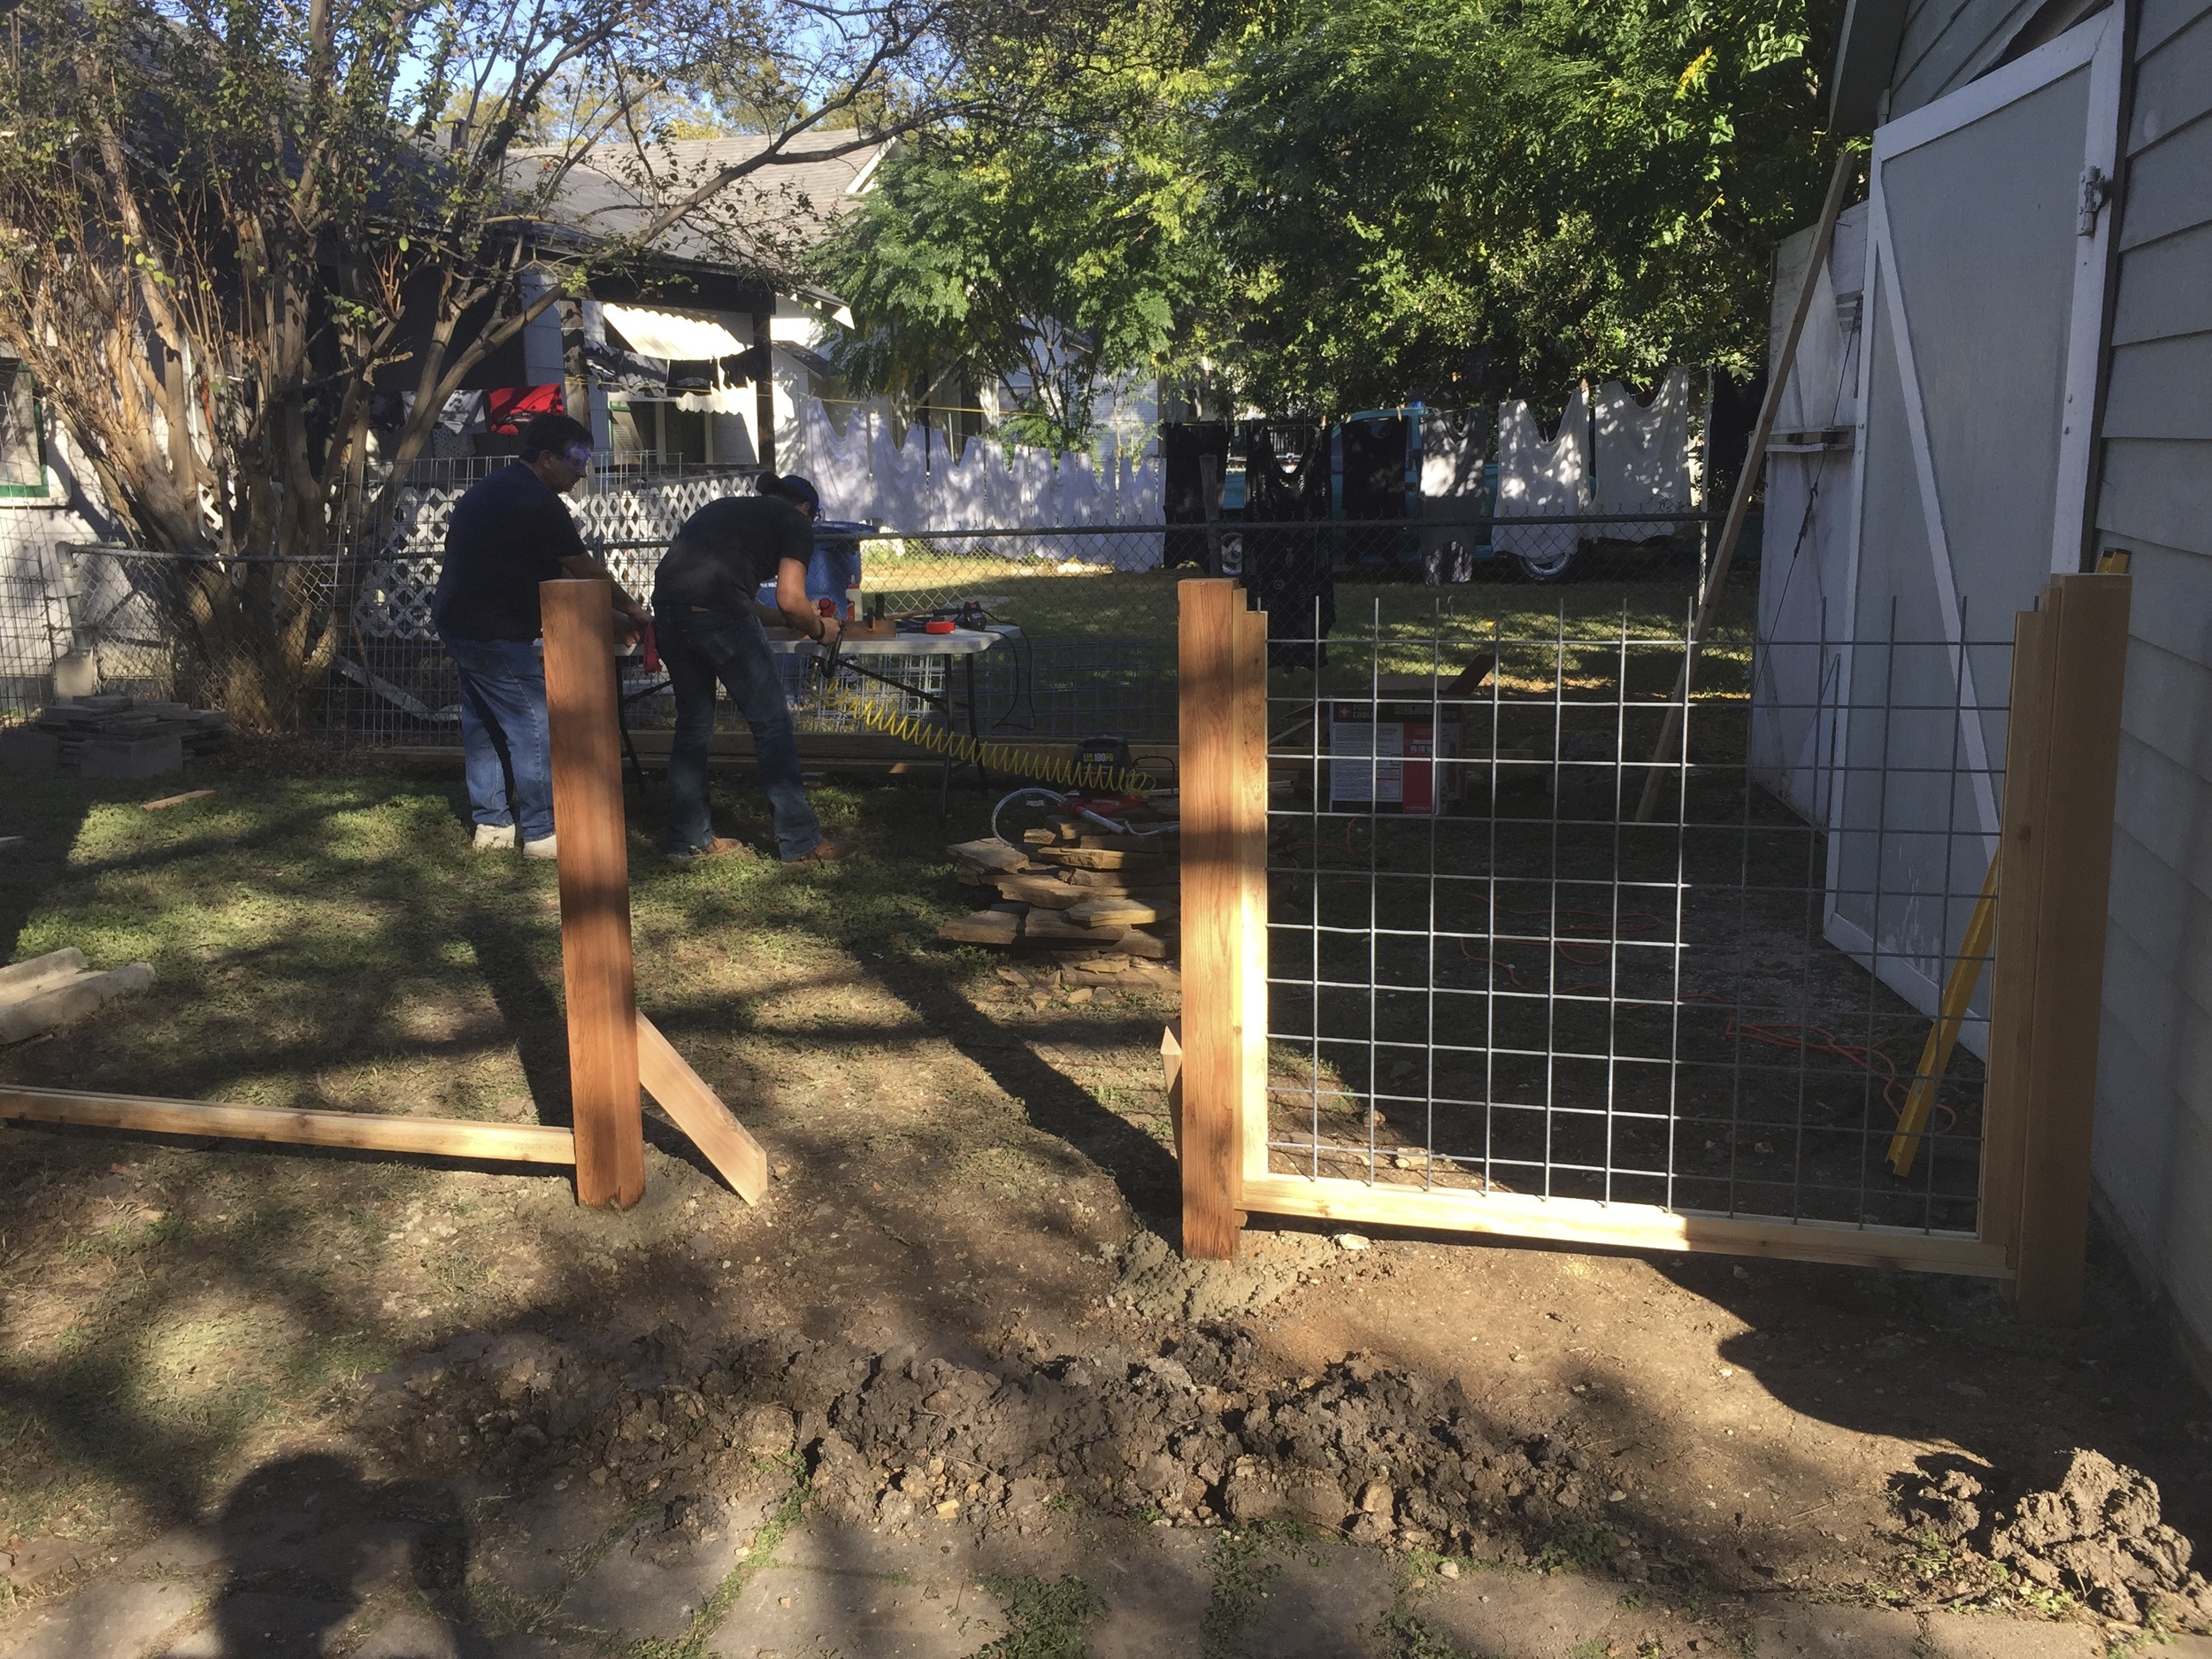
Derek designed the dividing fence and gate with his dad who was in town for the weekend. Together they had the posts set and the panels constructed in no time.

What. A. Hunk.

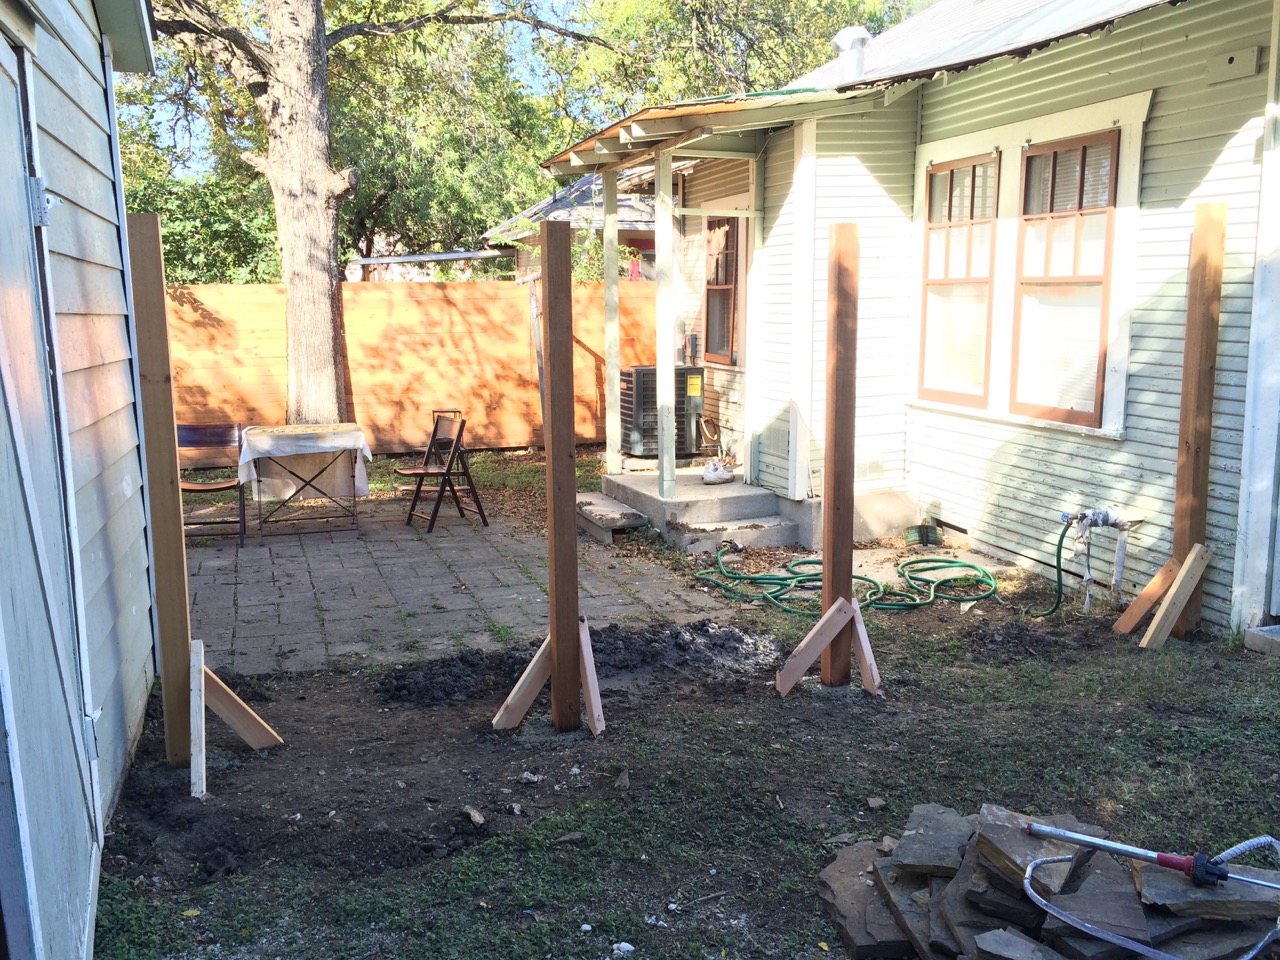
First they spaced the cedar posts so that there were two equal sides with a 3 foot gate in the middle. They left the posts at full height so that they didn't have to worry about making them all level until the very end.

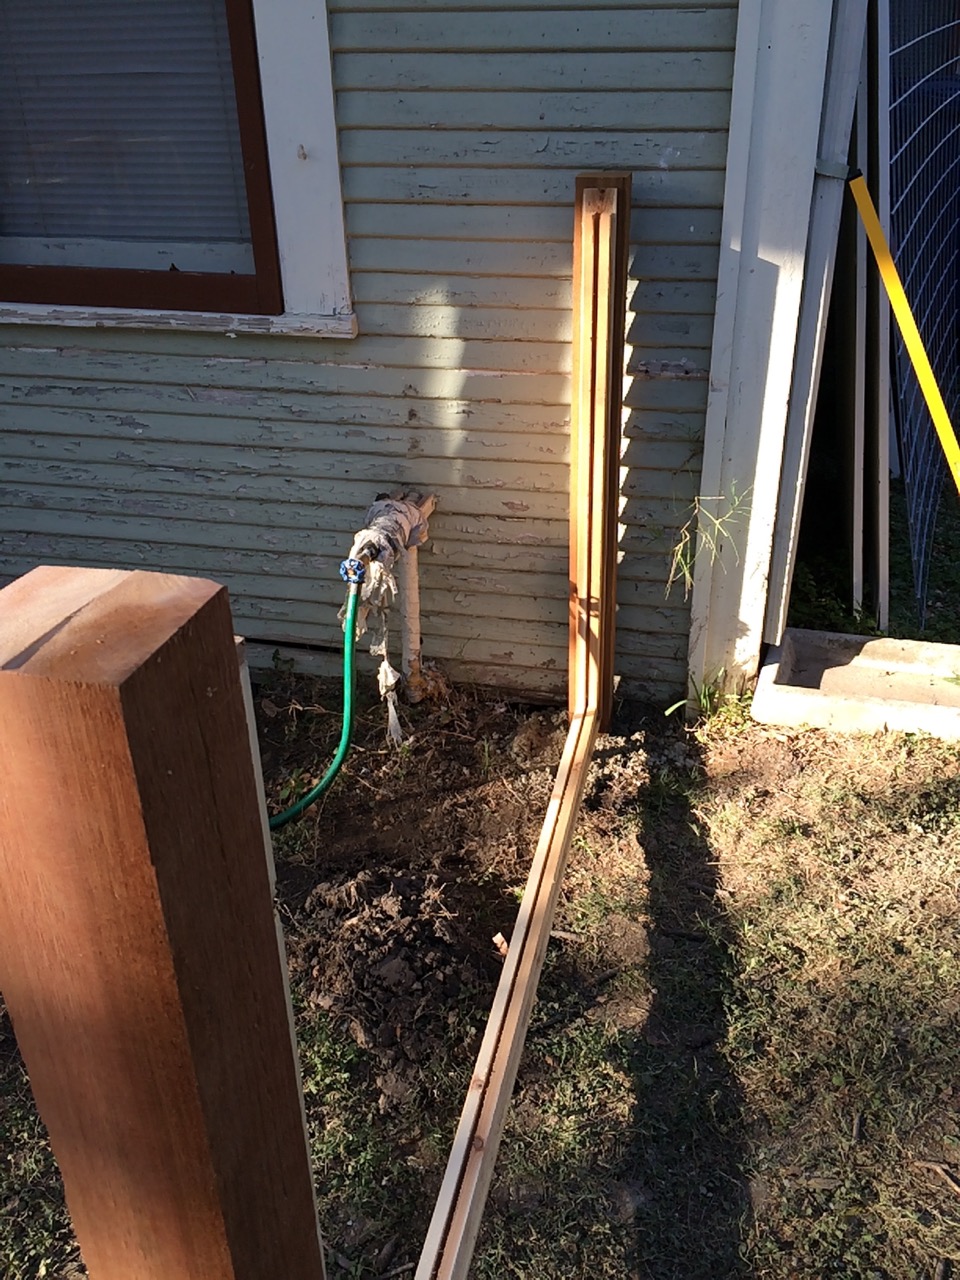
They whipped up a quick batch of concrete and used "kickers" to brace each post while the concrete set overnight.

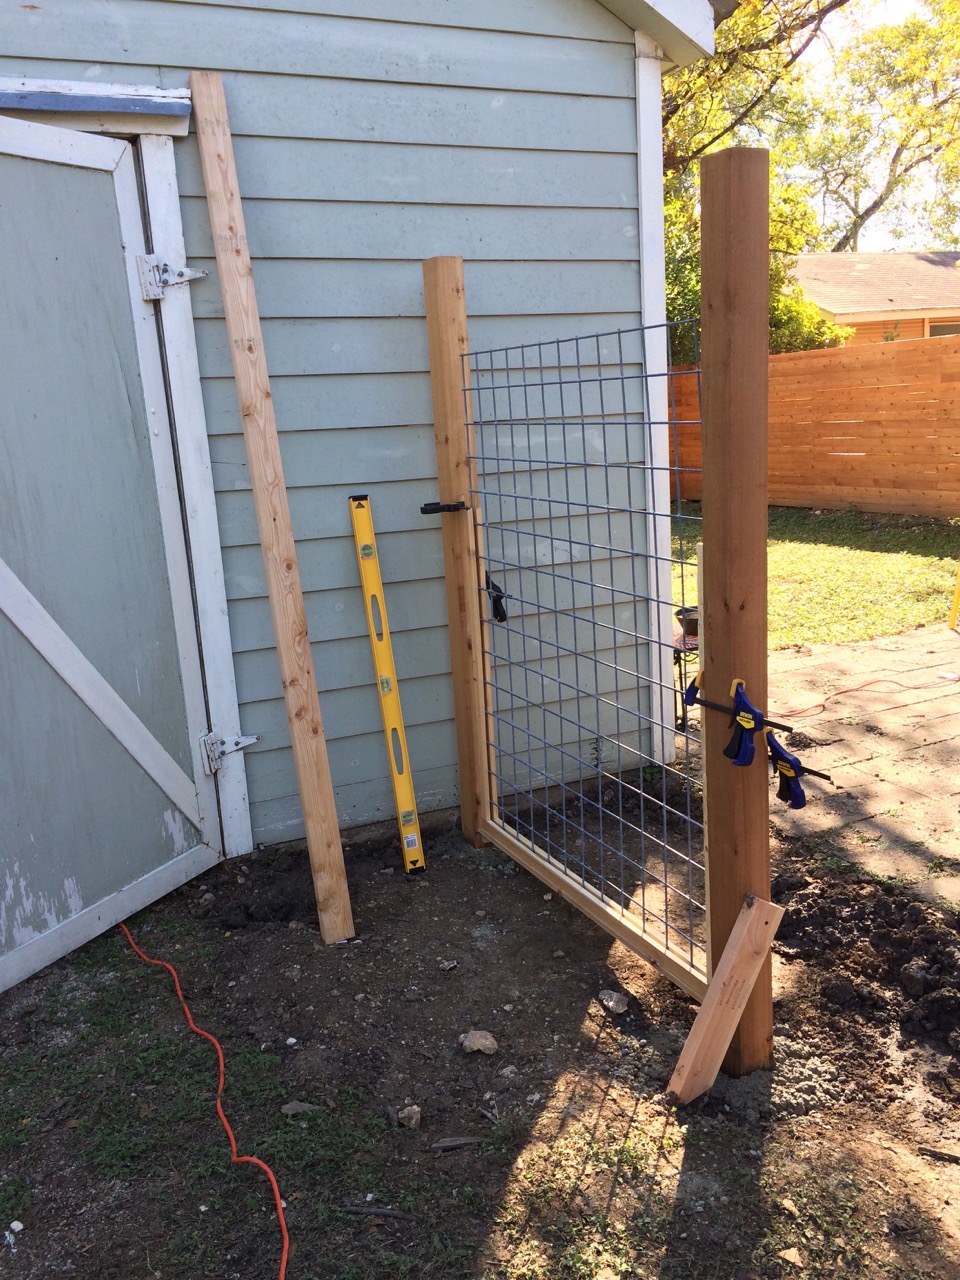
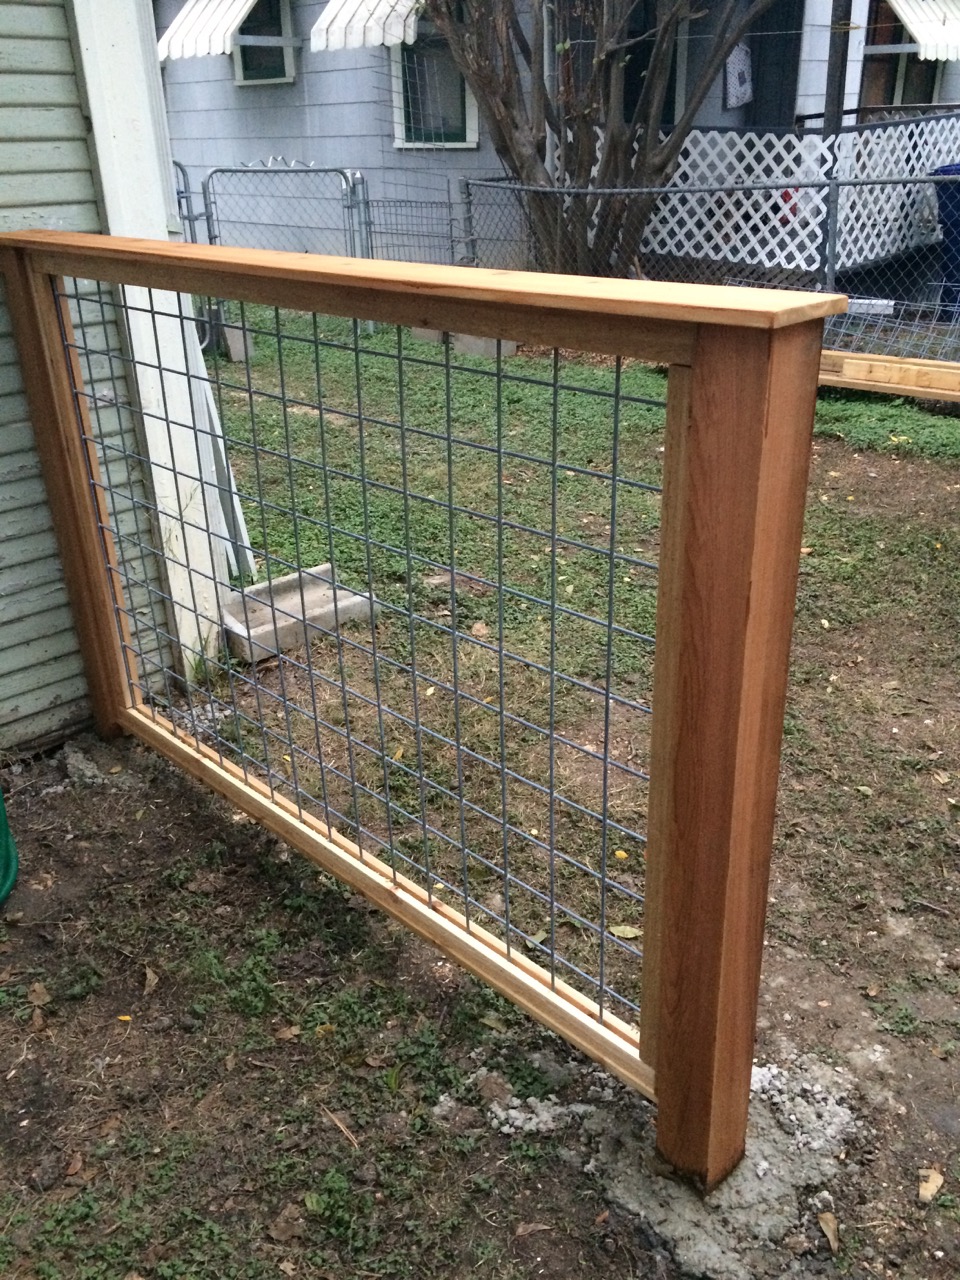
We wanted the hog panel to be framed out nicely, rather than just attached on one side since this would be seen from both sides very regularly. So Derek "sandwiched" the hog panel between two sets of cedar 1x2 frames. This created a nice finished look.

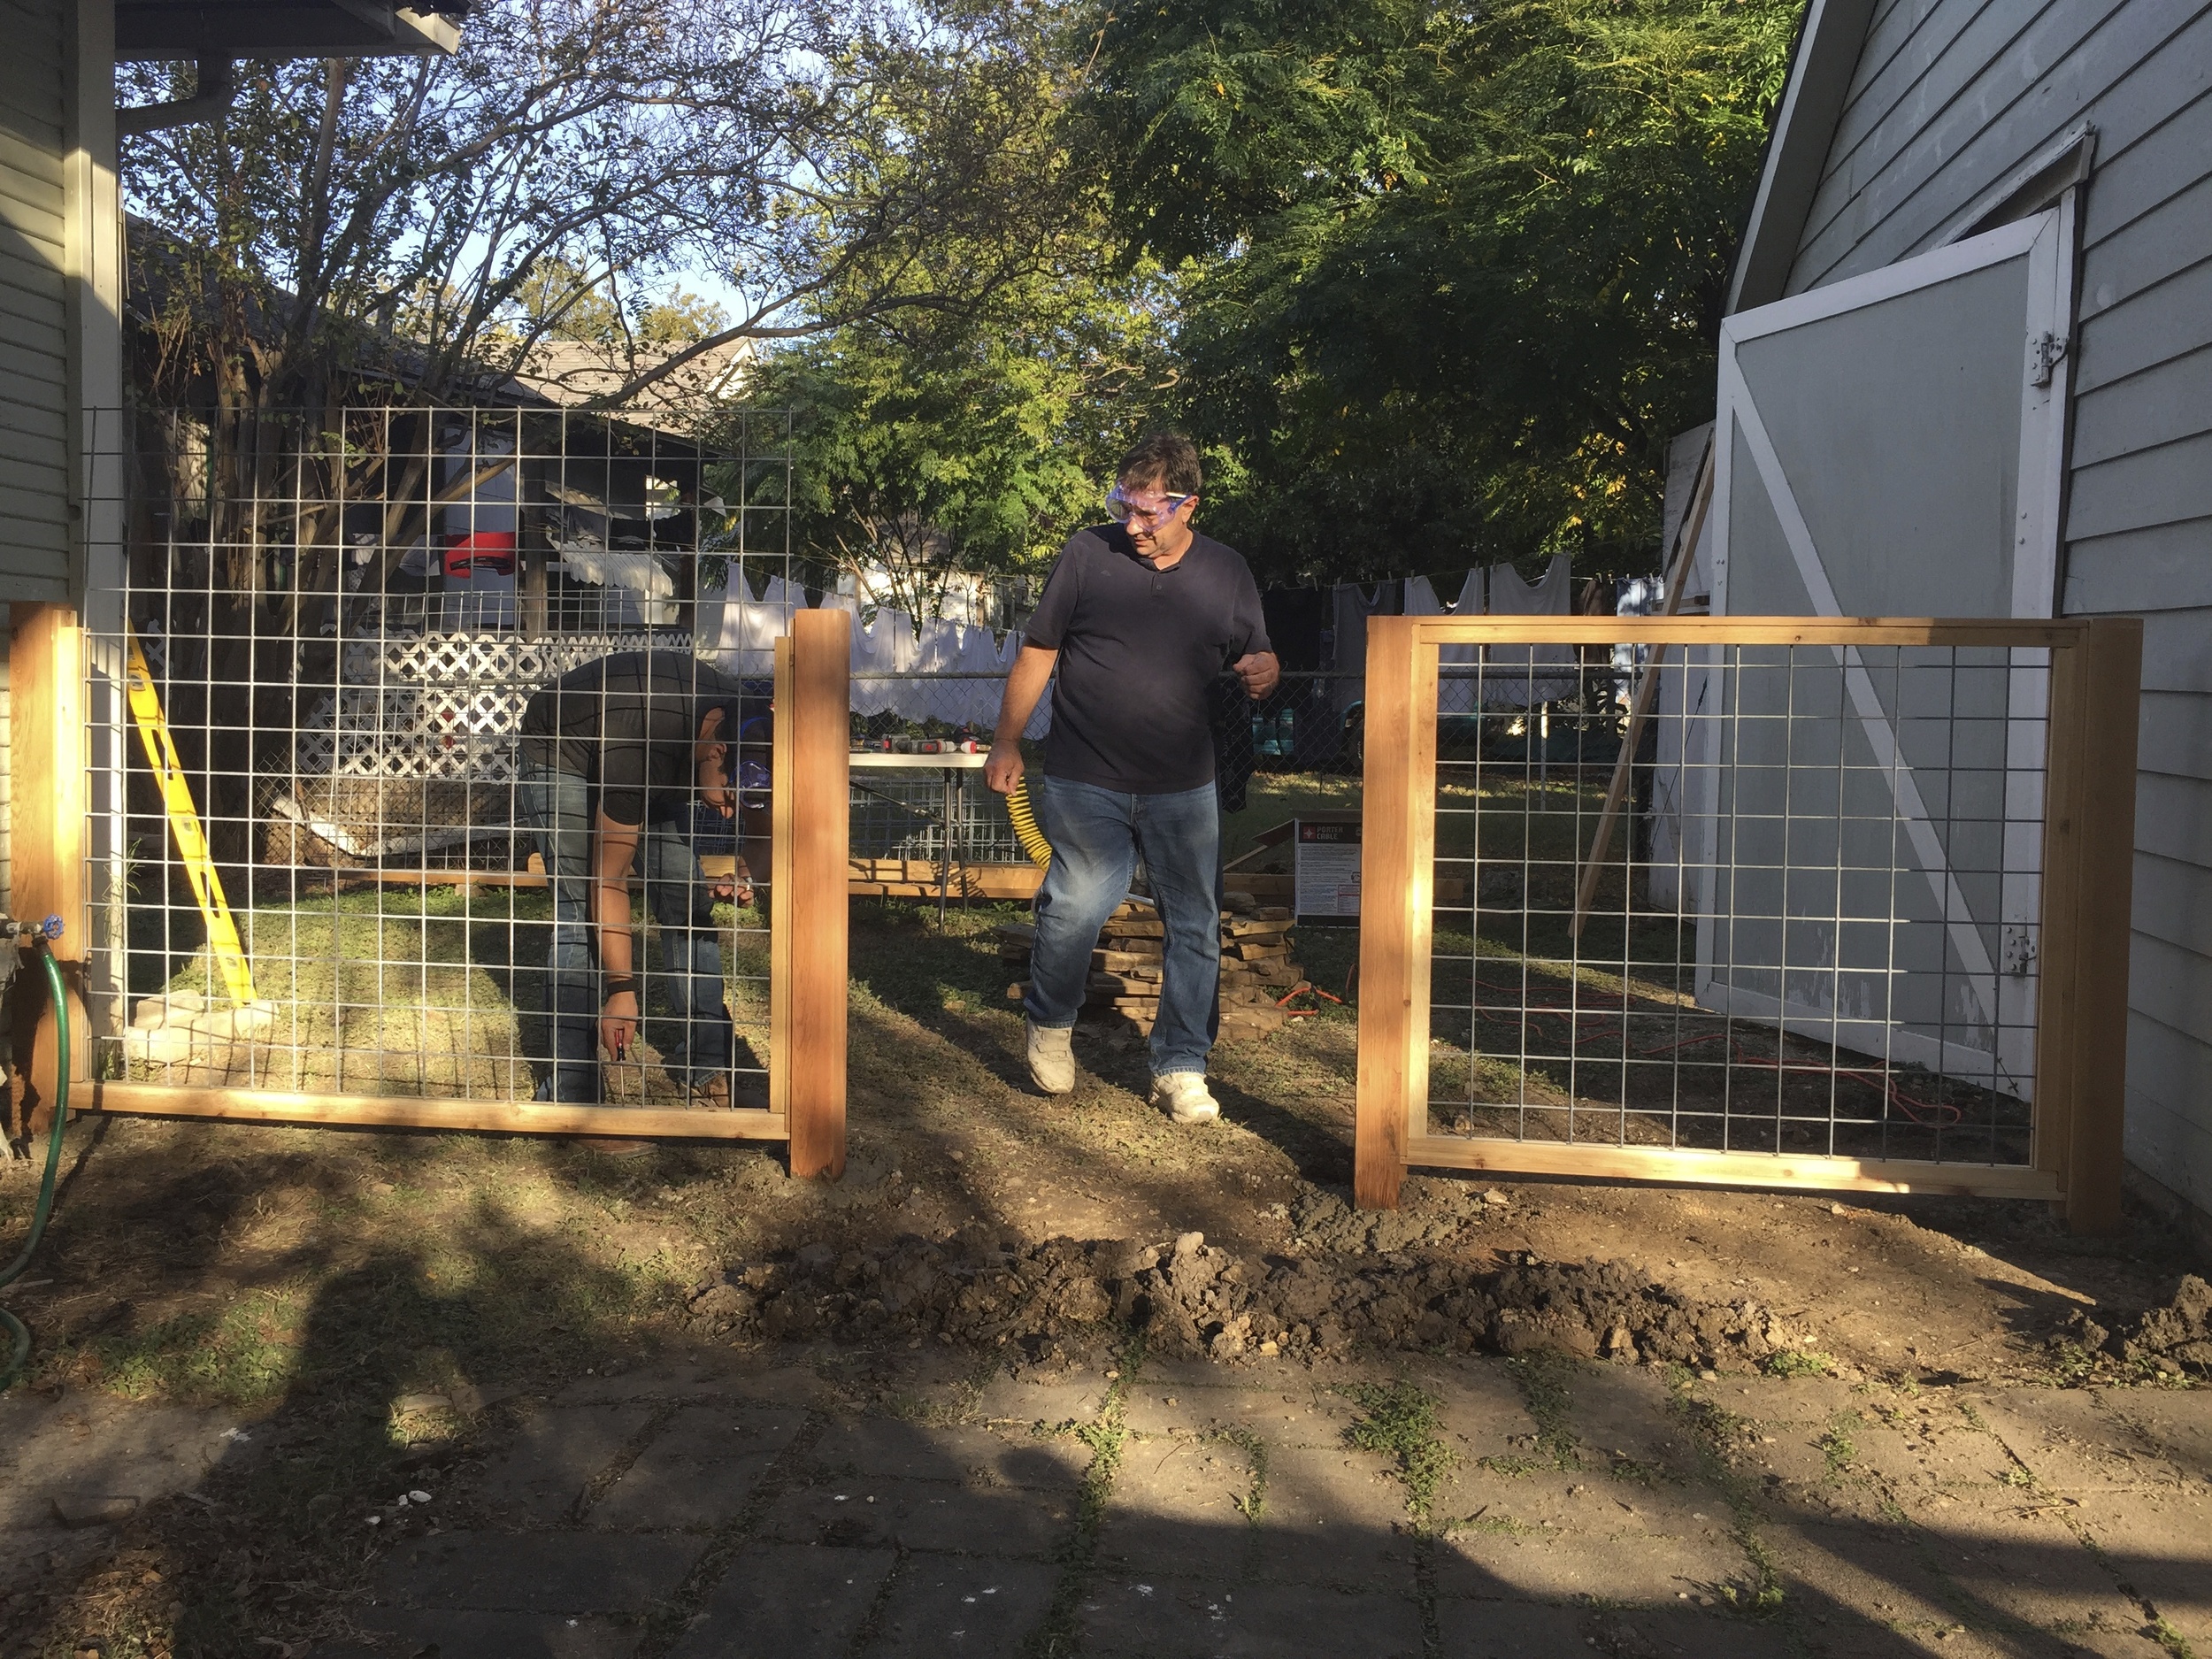
After framing out each hog panel, they added an additional larger frame using cedar 1x4 framing which added a little depth to the overall look. It also provided additional blocking which helped when attaching each panel to their posts.

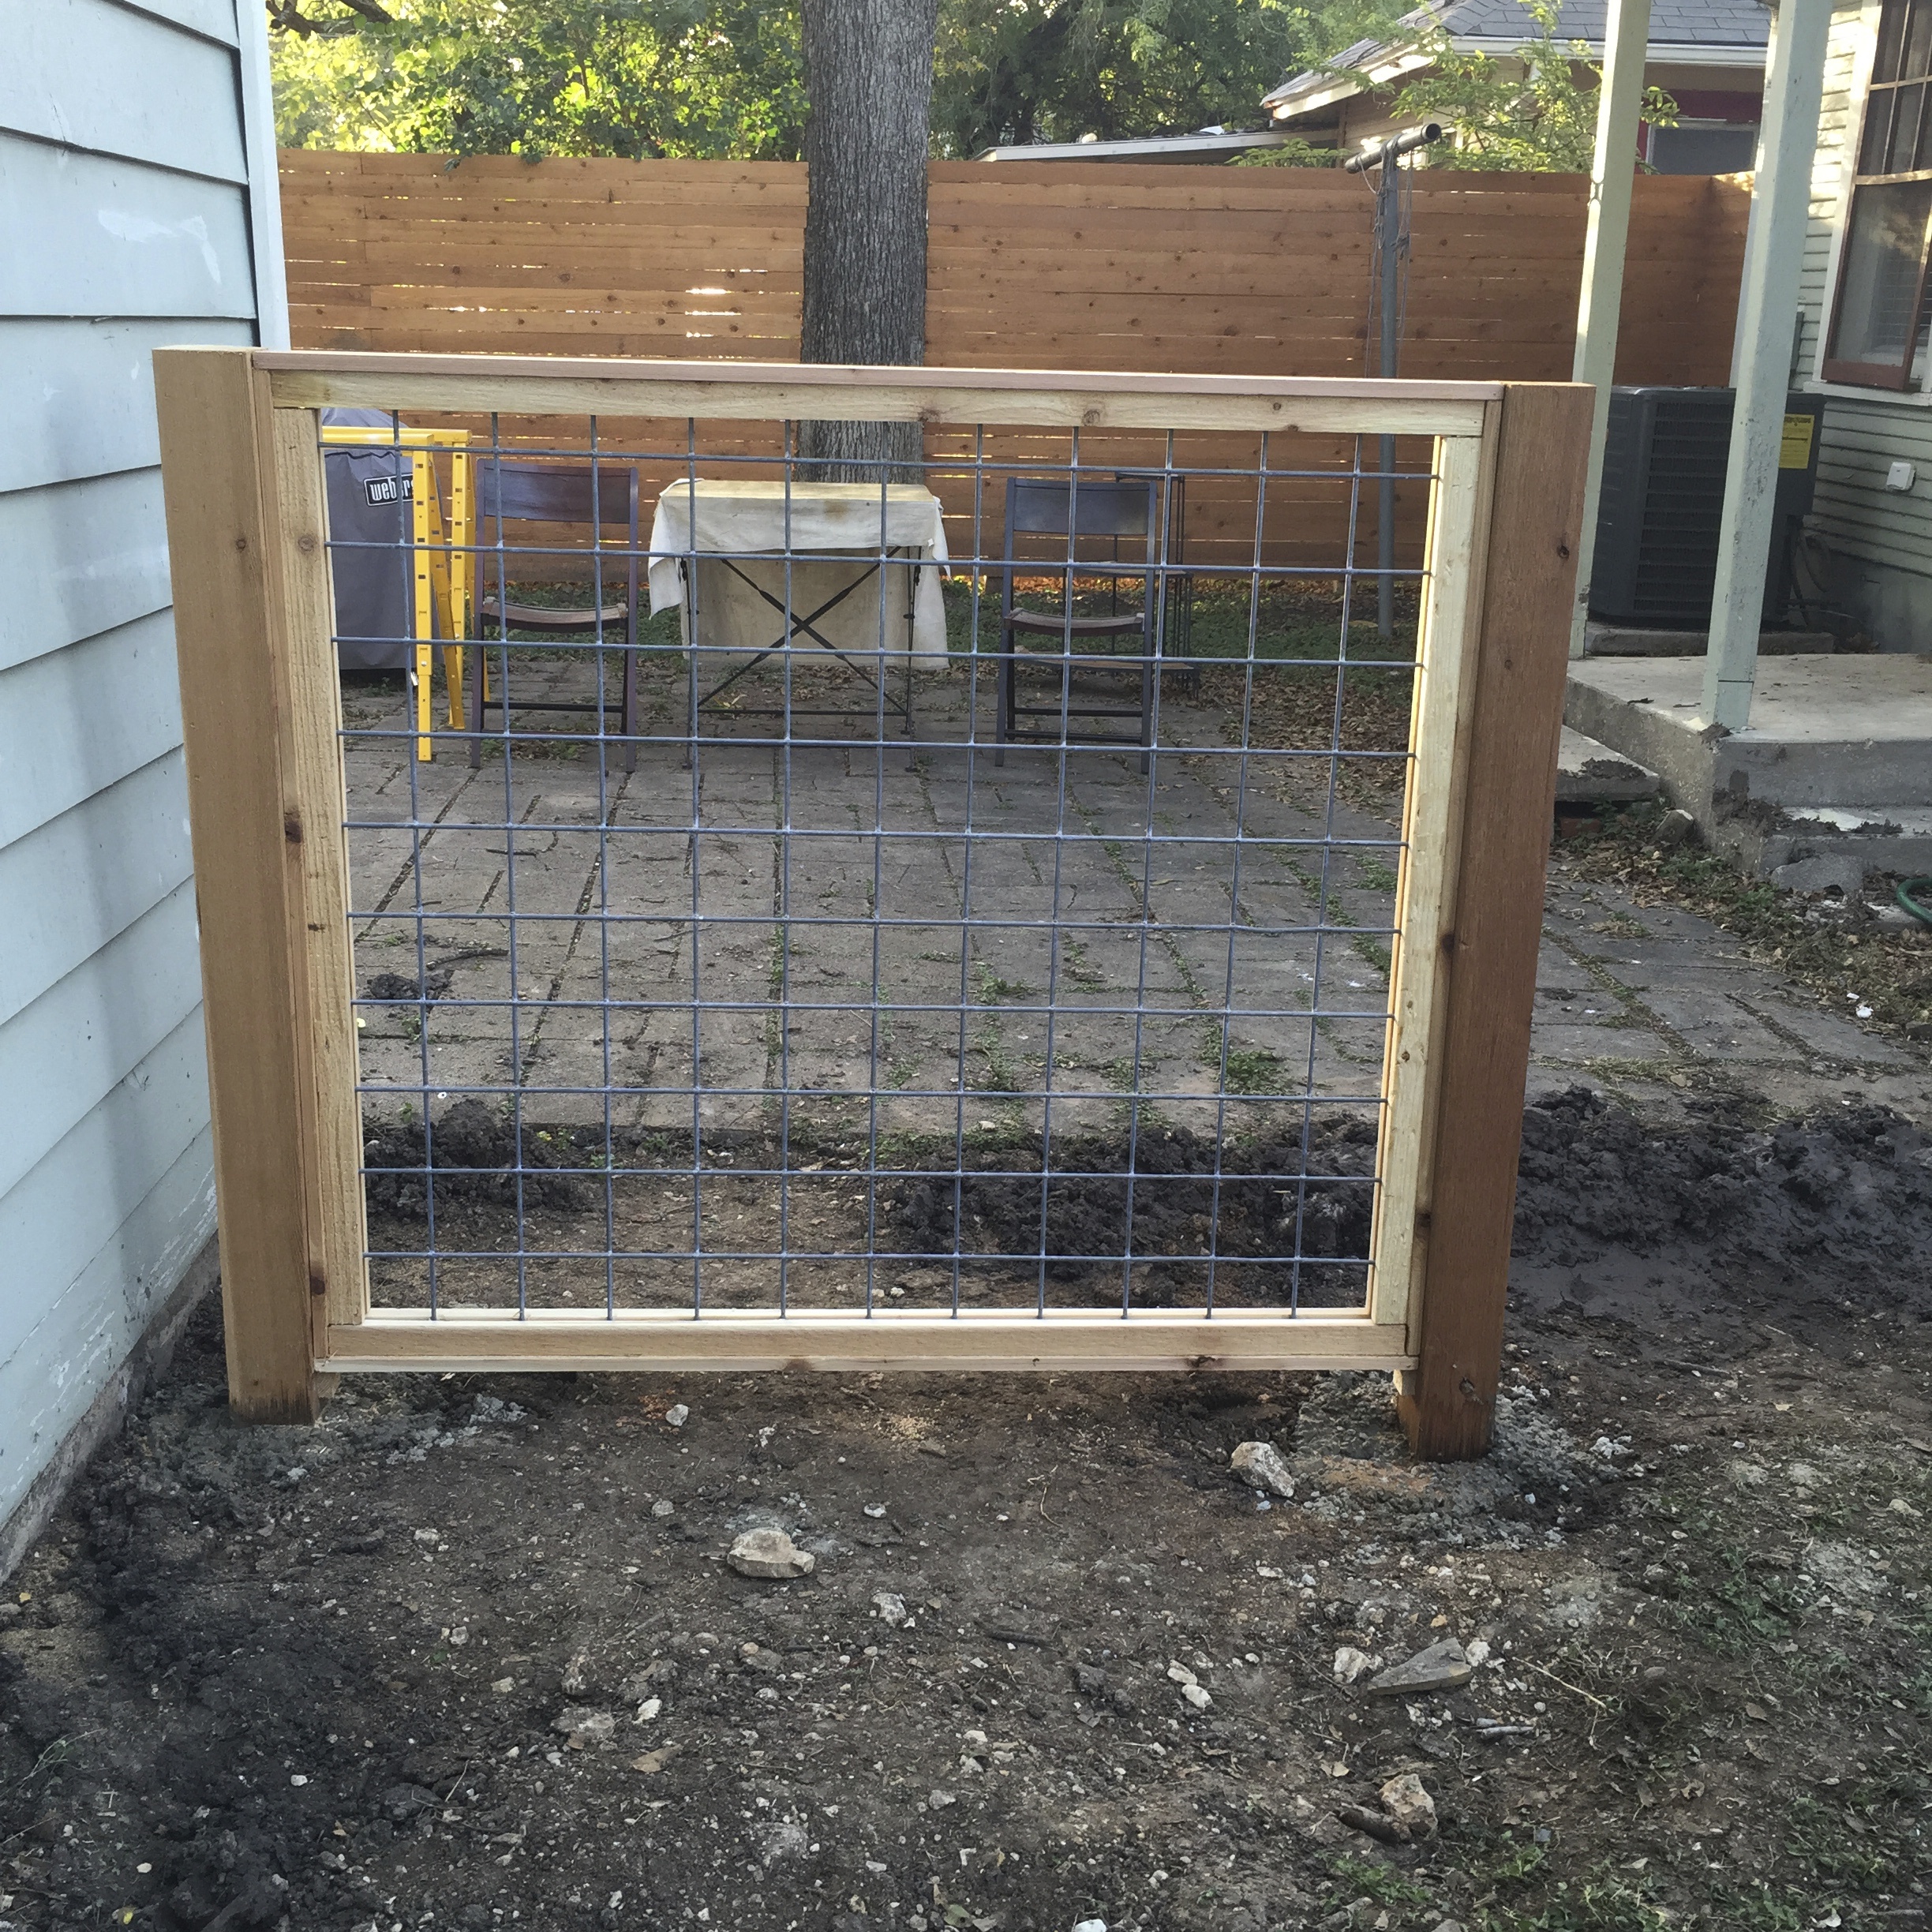
To finish of each panel, they added a cedar 1x6 cap to protect the end grain of each post and finish off the overall look. Plus I can set my tiny cactus menagerie on it. So there's that.

Geoffrey approved of the missing gate.  

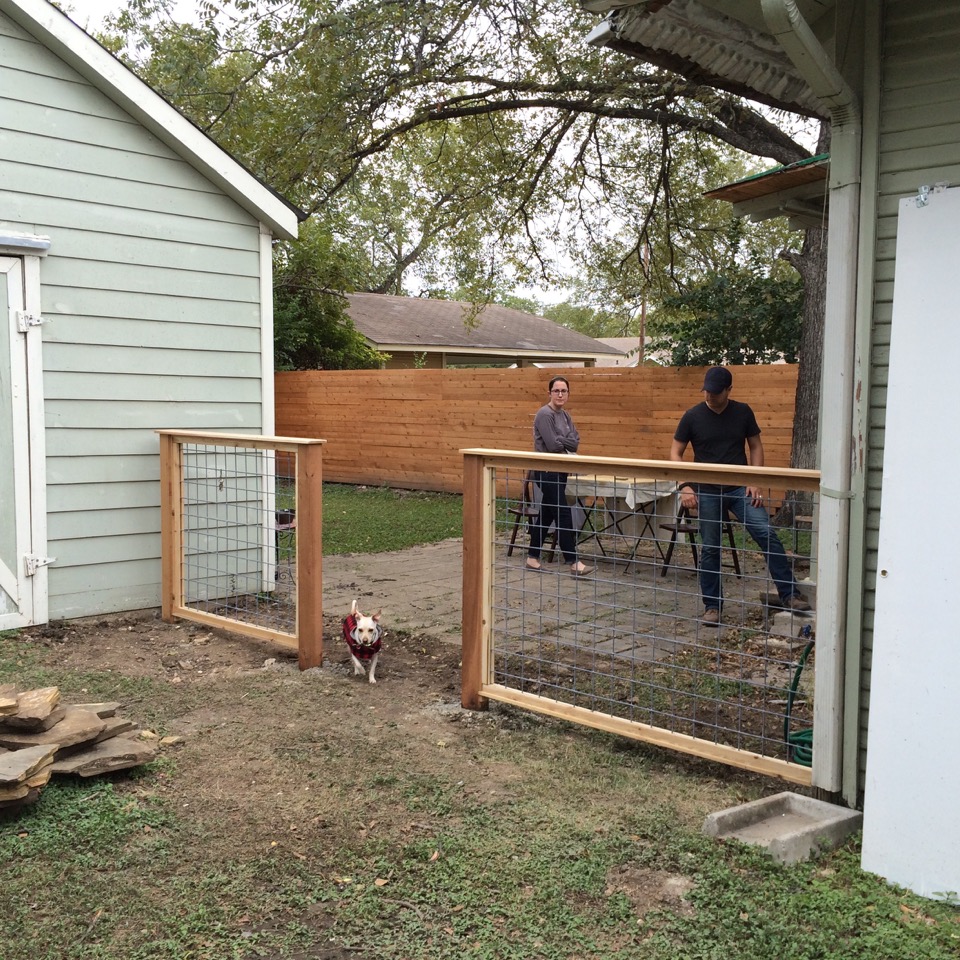
The gate was fabricated using the same process as each side panel. They added metal L-brackets to each corner which are covered by the 1x2's. This added extra stability since the gate wouldn't be mounted directly to any posts, and needed to remain square. 

Once the gate was complete, they added a turnbuckle that ran diagonally across the gate to prevent the gate from sagging over time. Then they added hinges and a puppy proof latch. 

Meanwhile, on the other side of the driveway we had Alamo Deck & Fence finish off the other side of the horizontal fence. We had them start at the edge of the garage and continue around to  go across the driveway where the gate would be.

We really wanted the gate to look like a seamless horizontal fence from the street, while having minimal exposed latches, hinges, etc. This took several designs before we landed on the look and function that we wanted. We divided the gate so that it would have a 4 foot opening on one side and 6 foot on the other. 

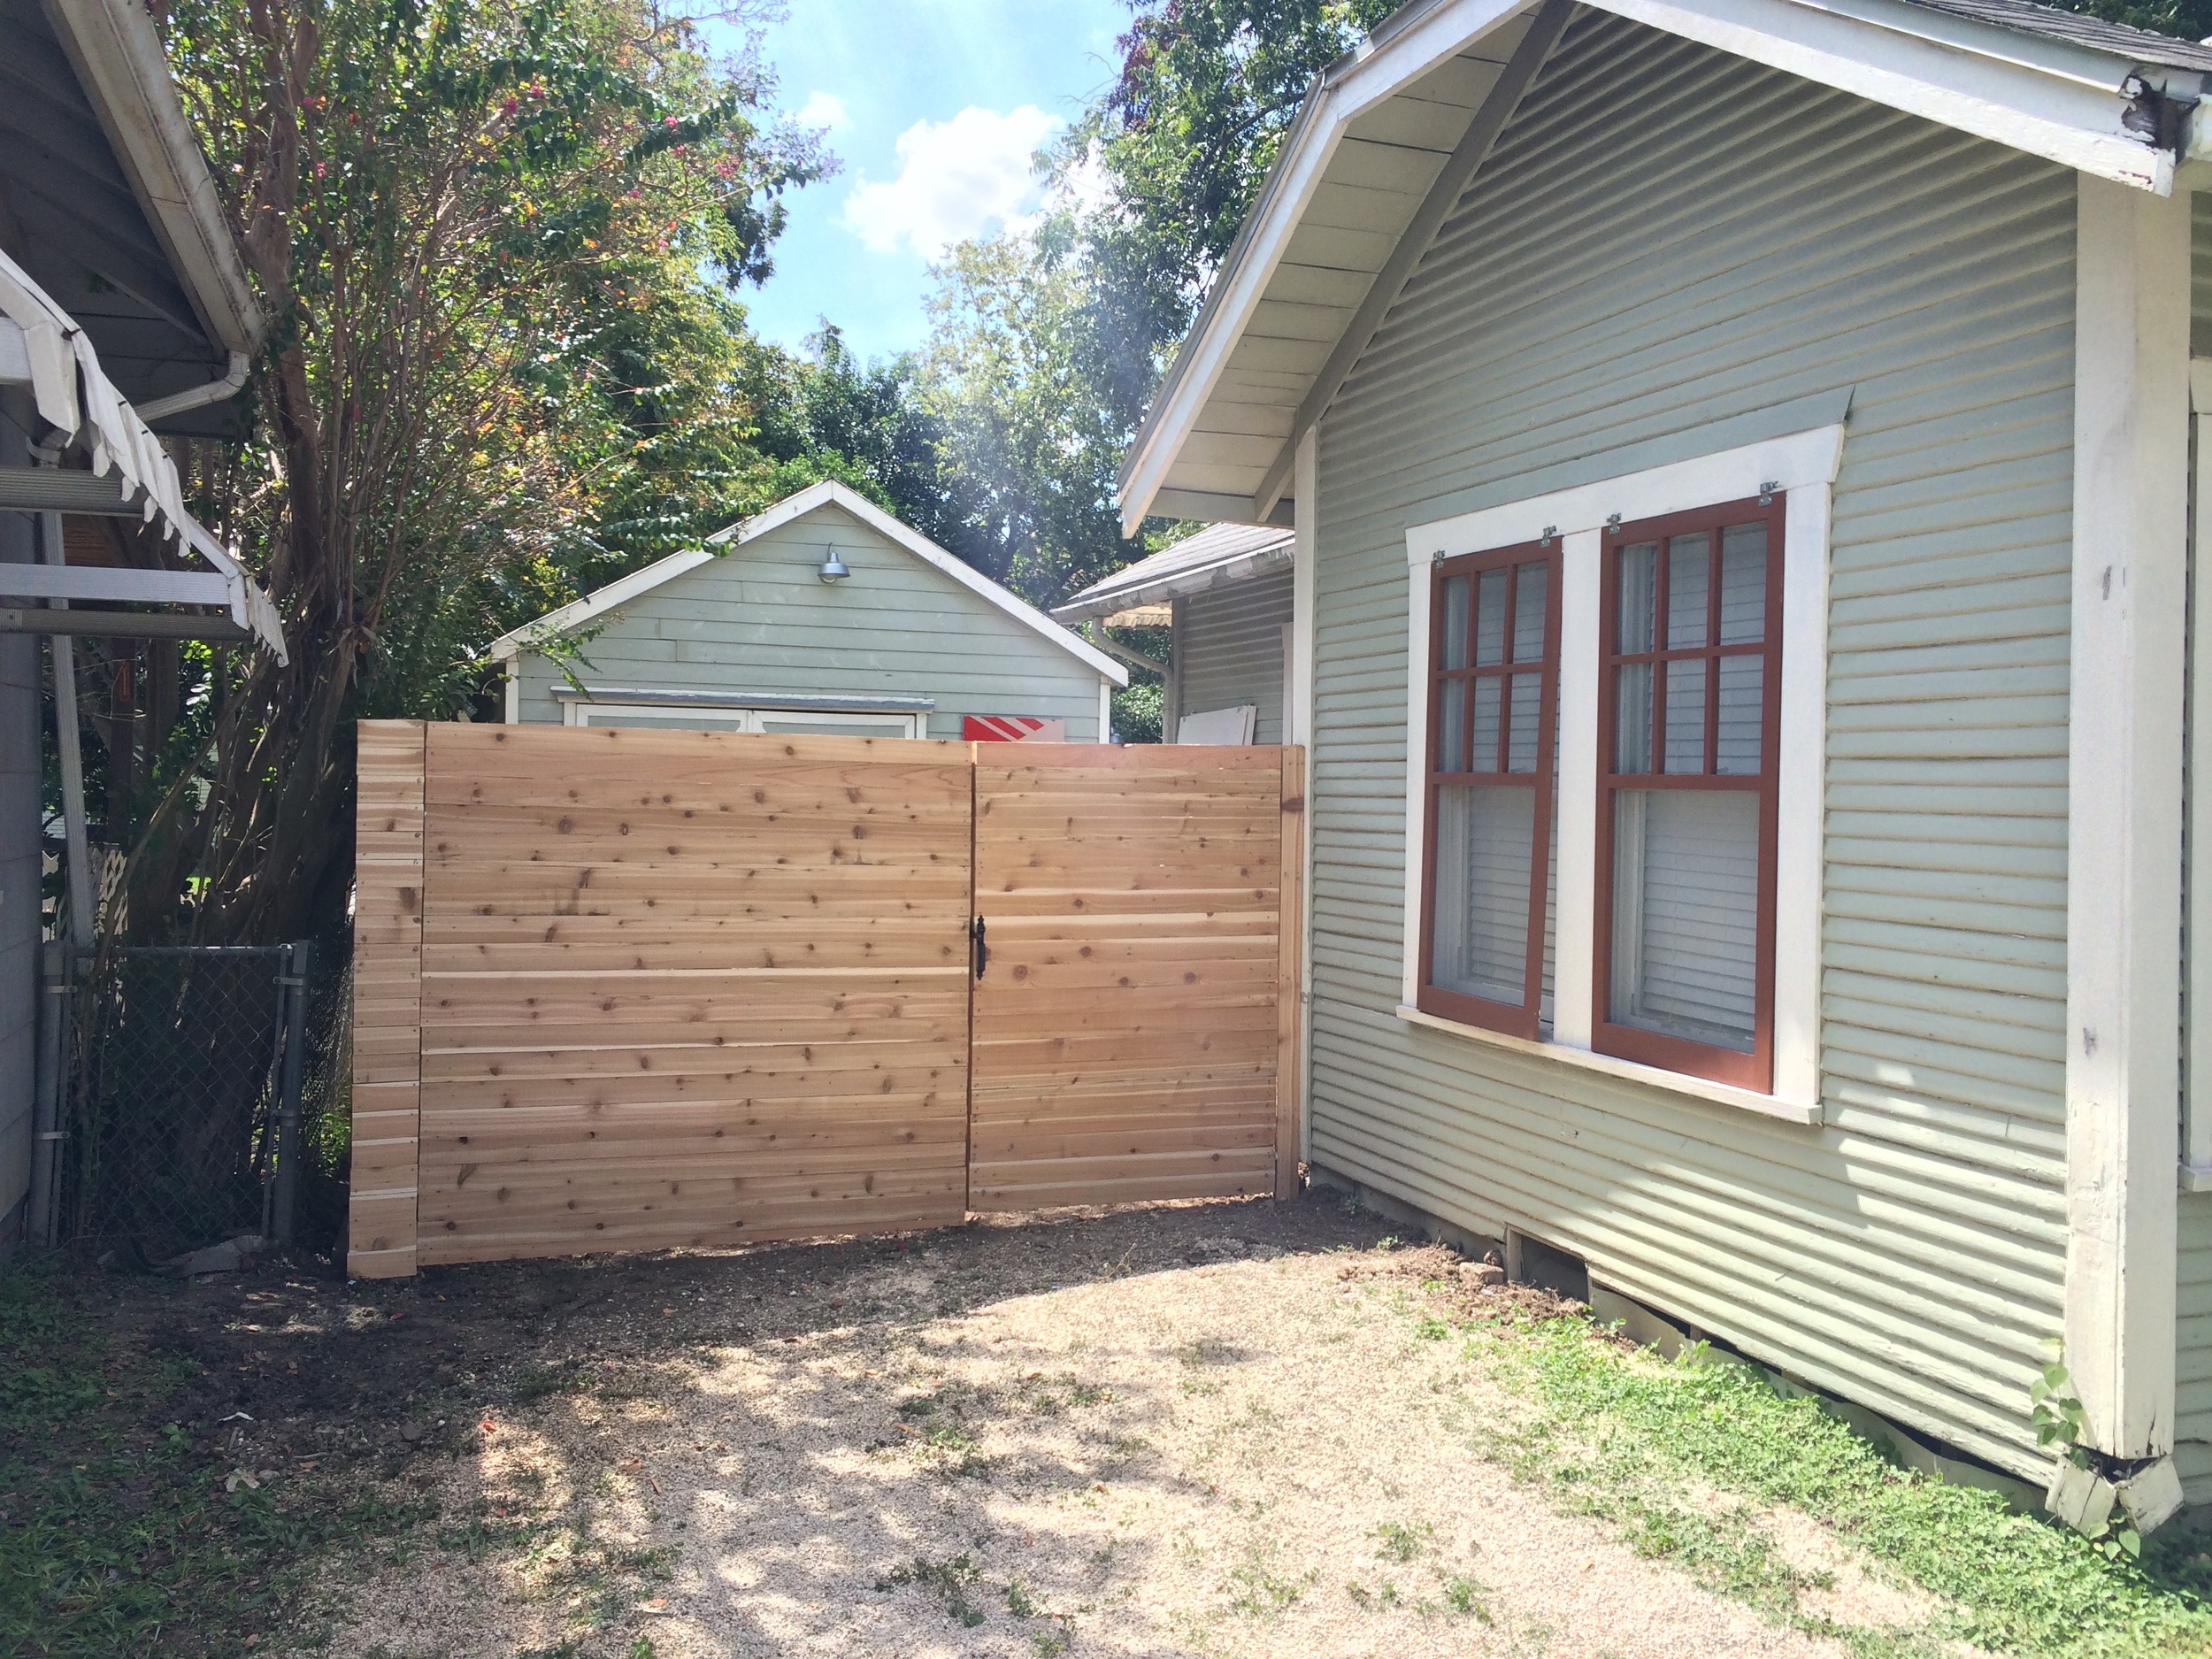
We chose the most minimalist hardware possible in order to keep everything as seamless as possible.

With the permission of our neighbor we finished off the look by taking the fence all the way to the edge of their house. Everyone agreed that this looked much cleaner, while also giving them a bit more privacy in the end.

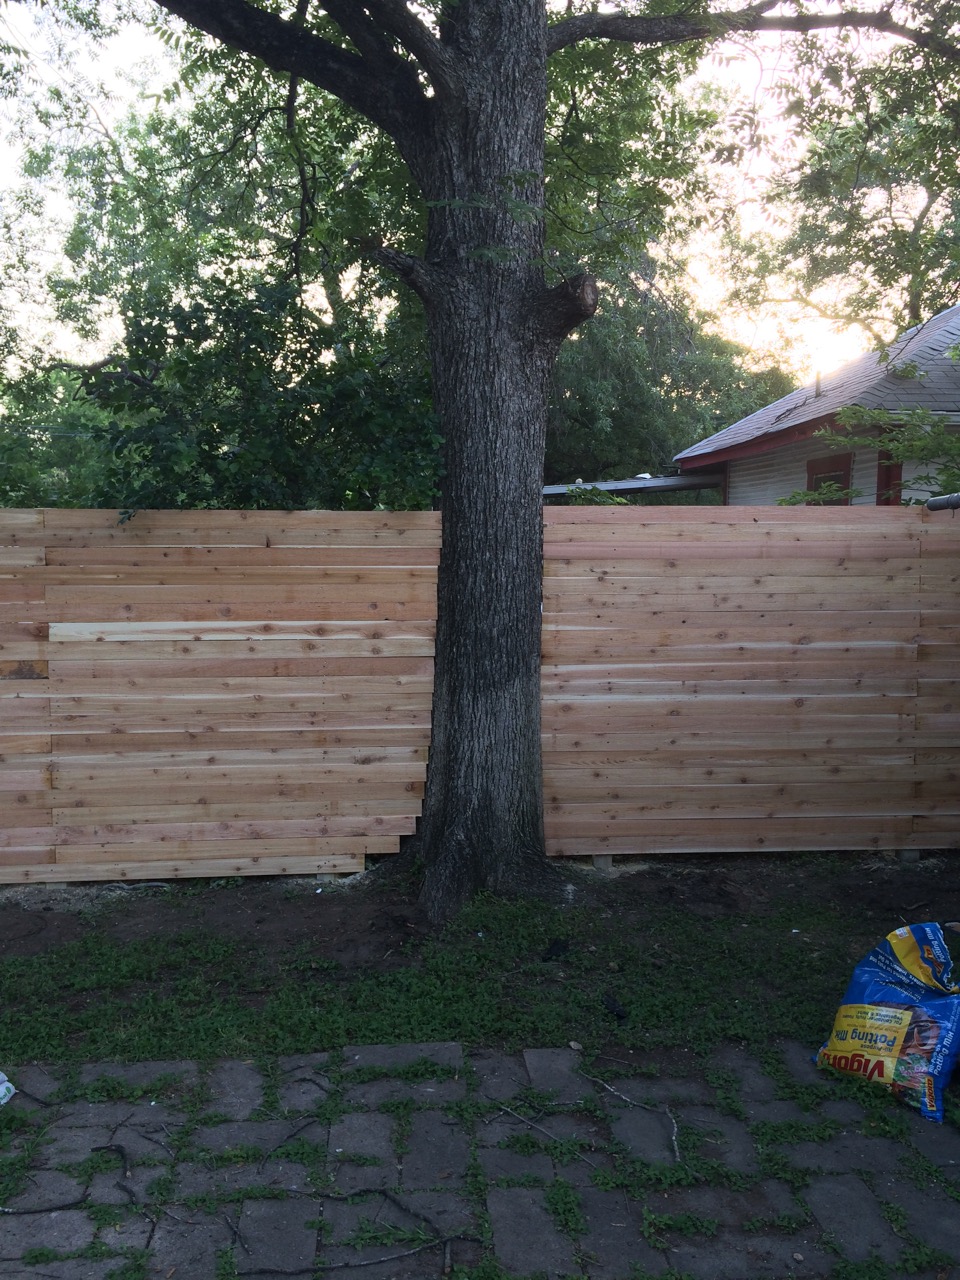
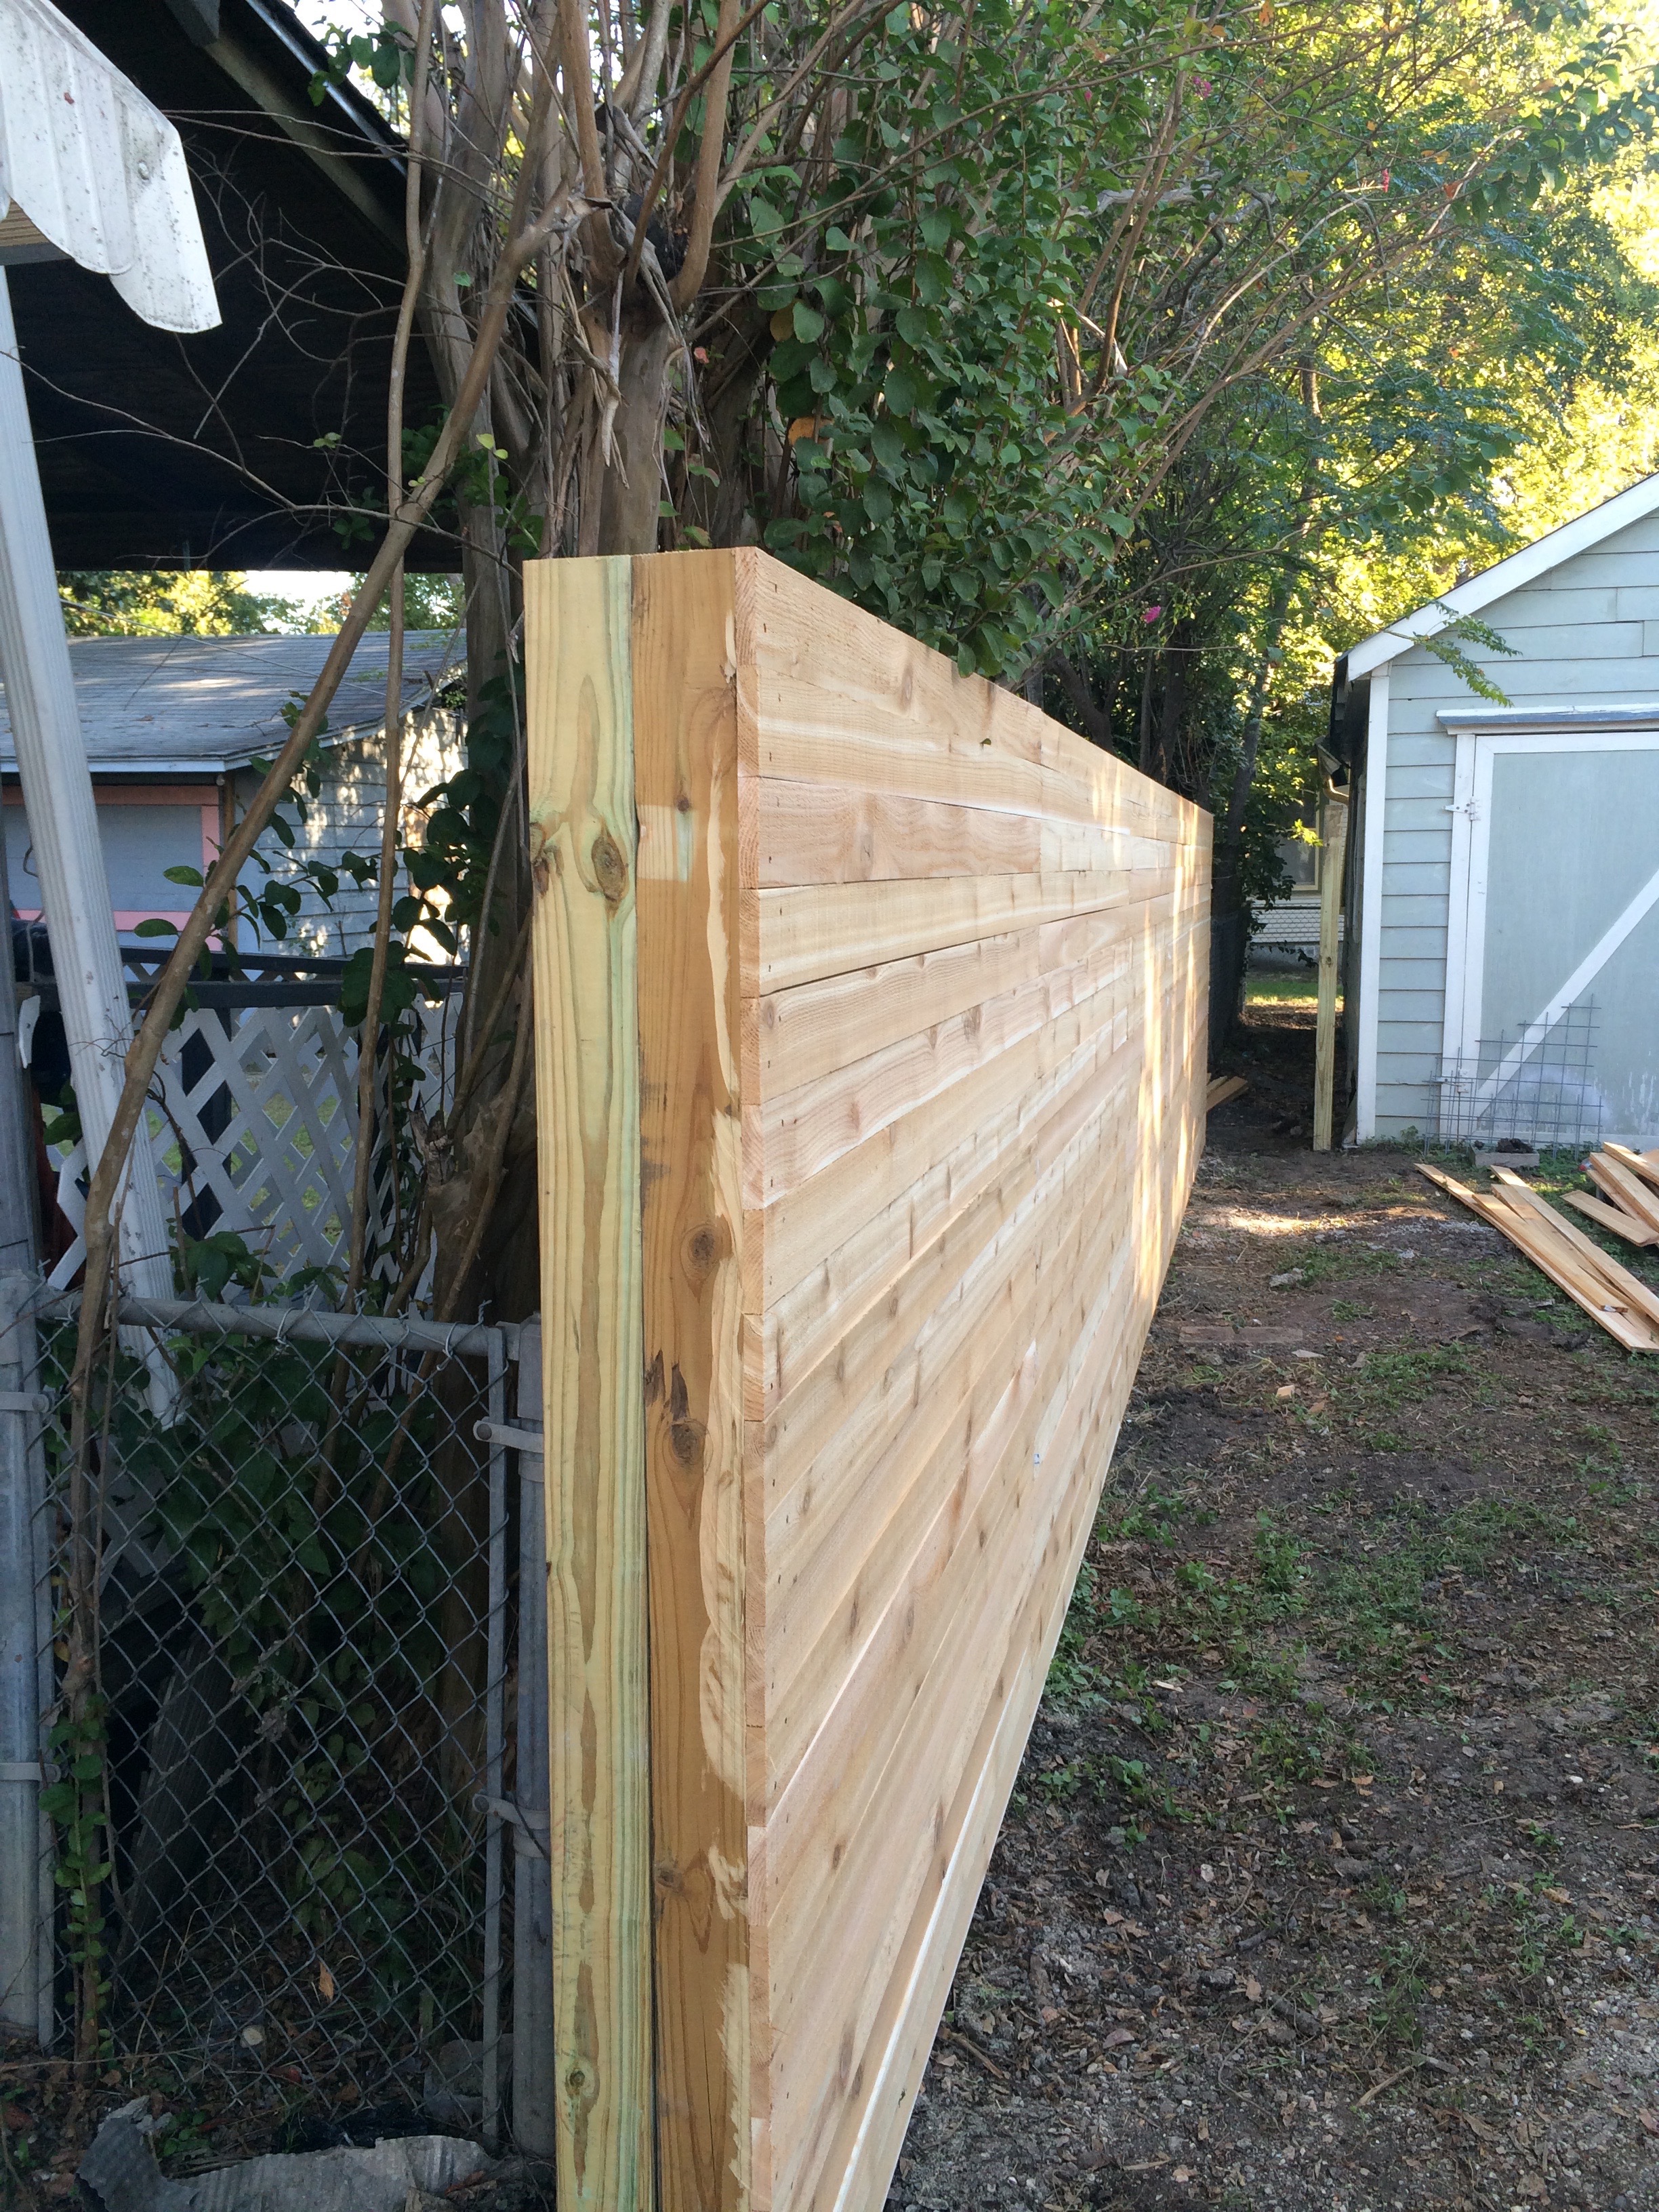
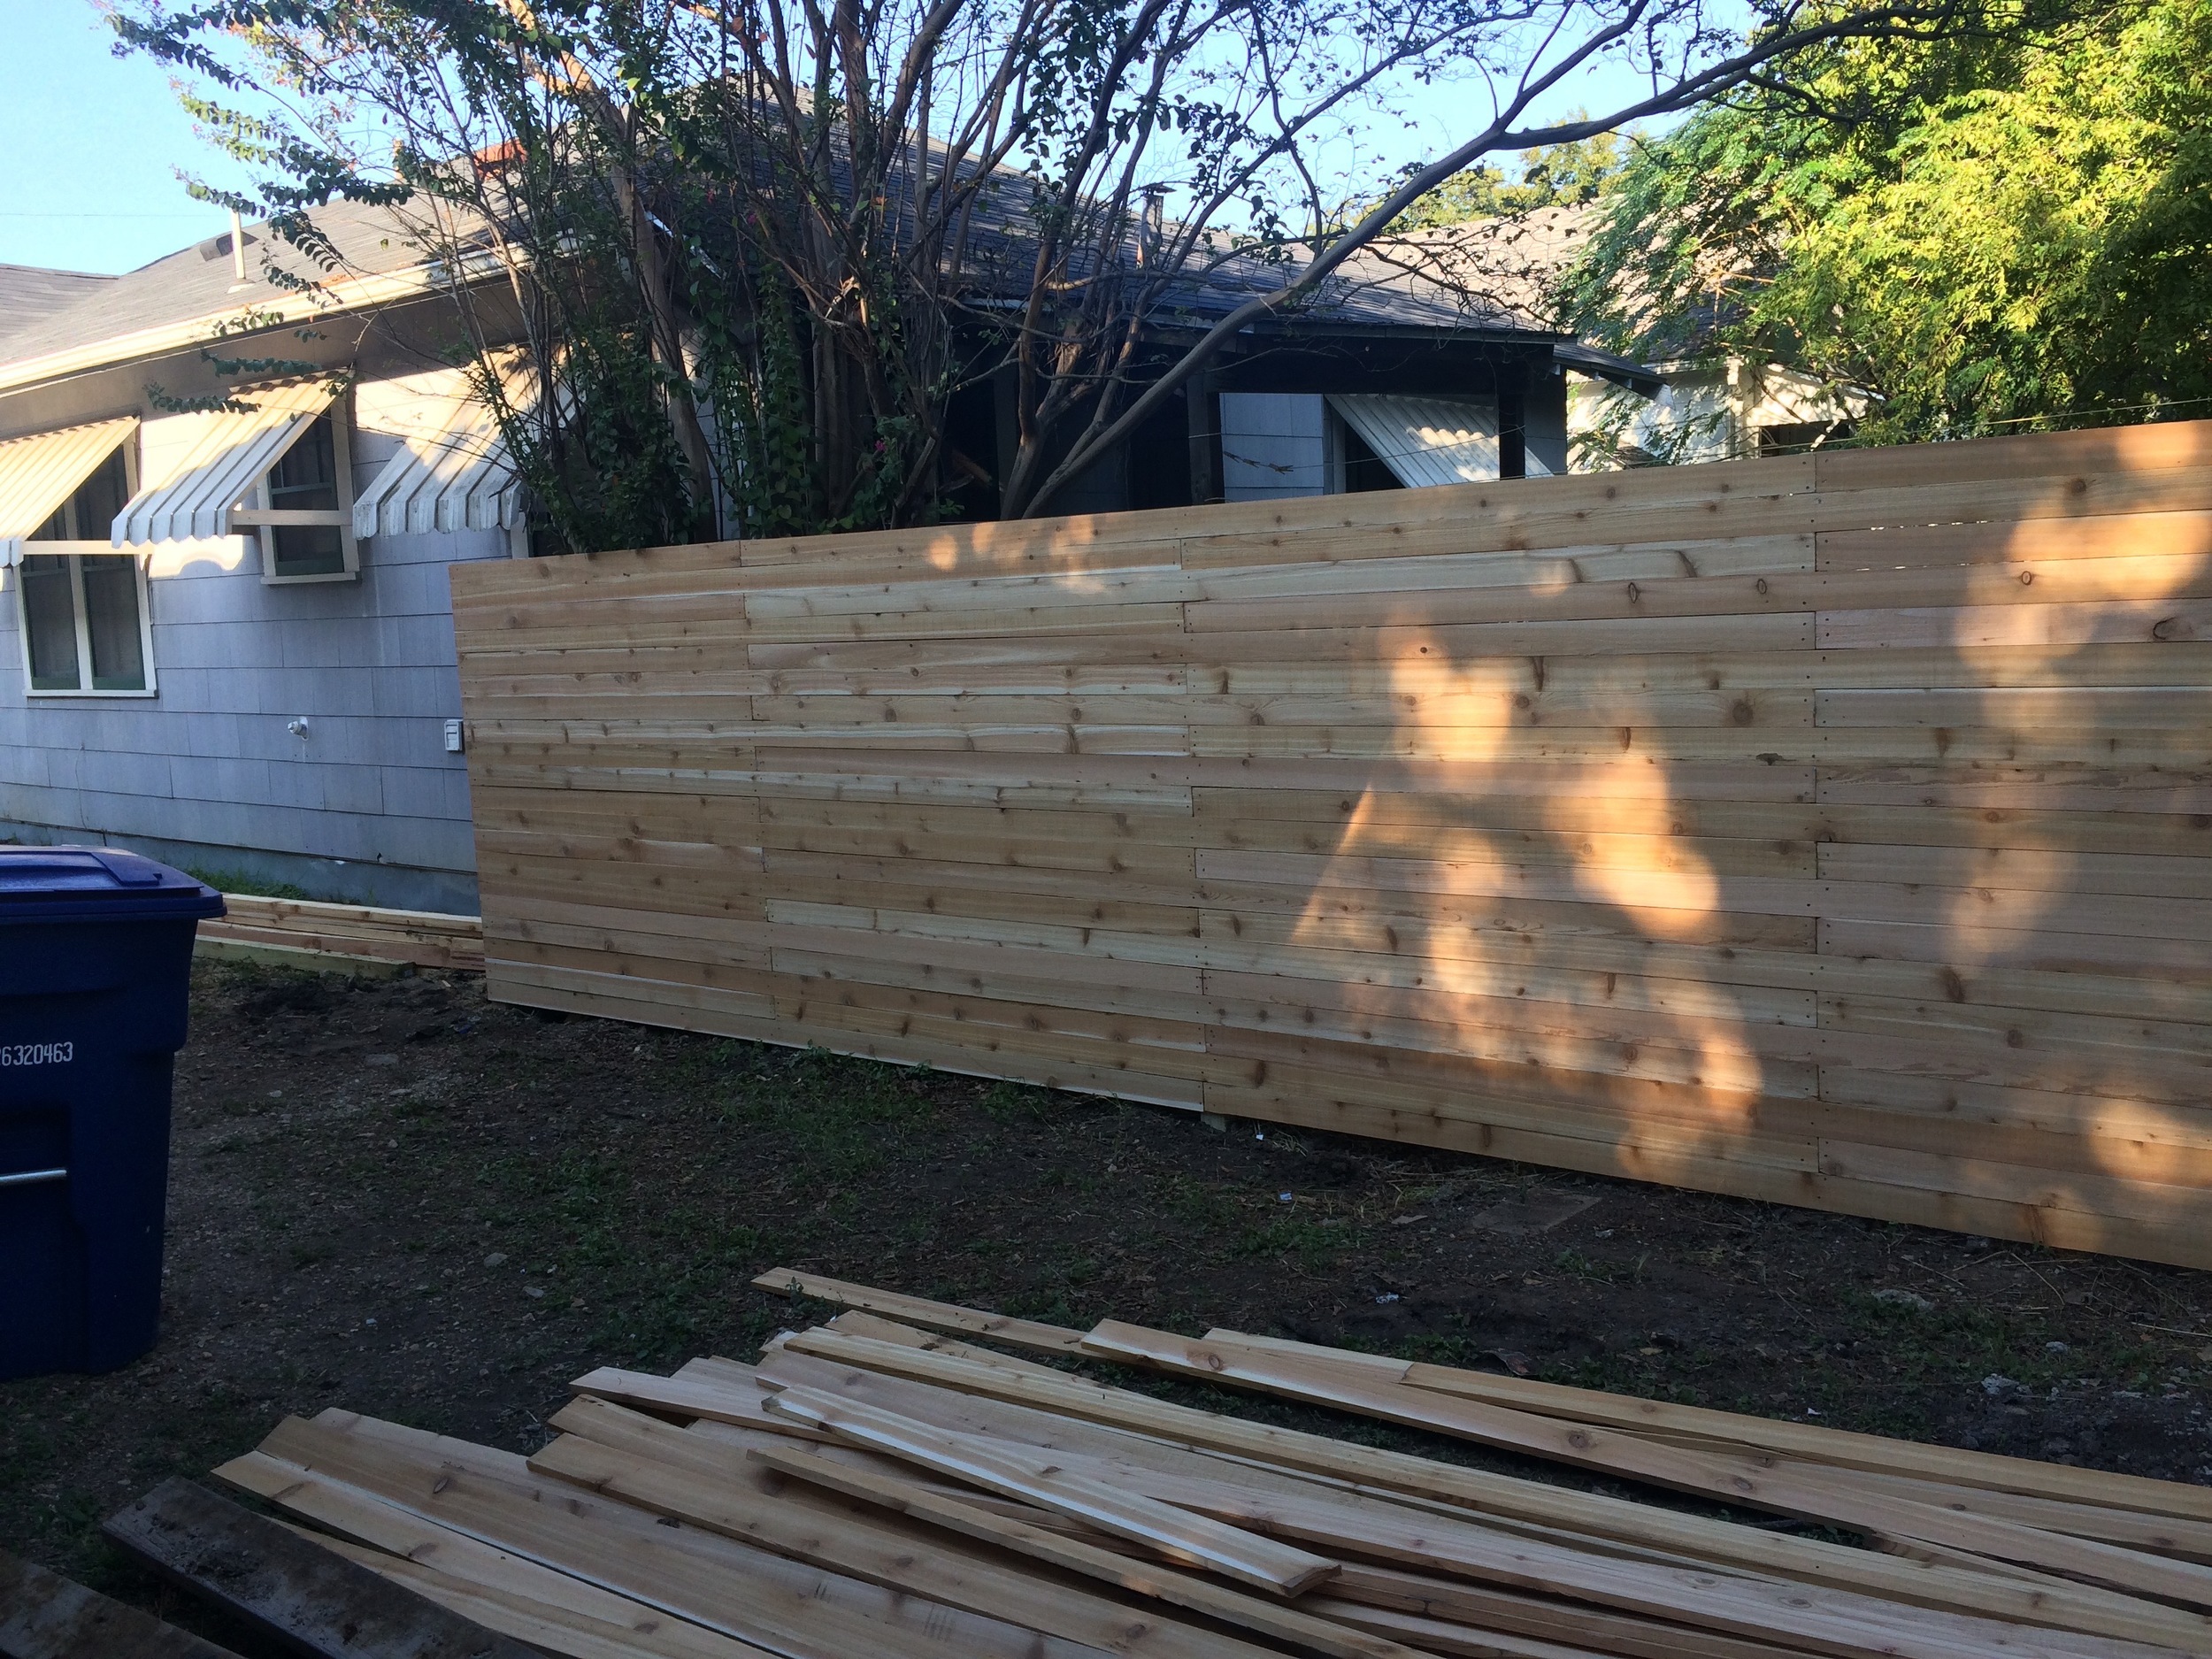
After both the big fence and dividing fence were complete, we stained them to match the main yard fence so that everything tied together nicely.

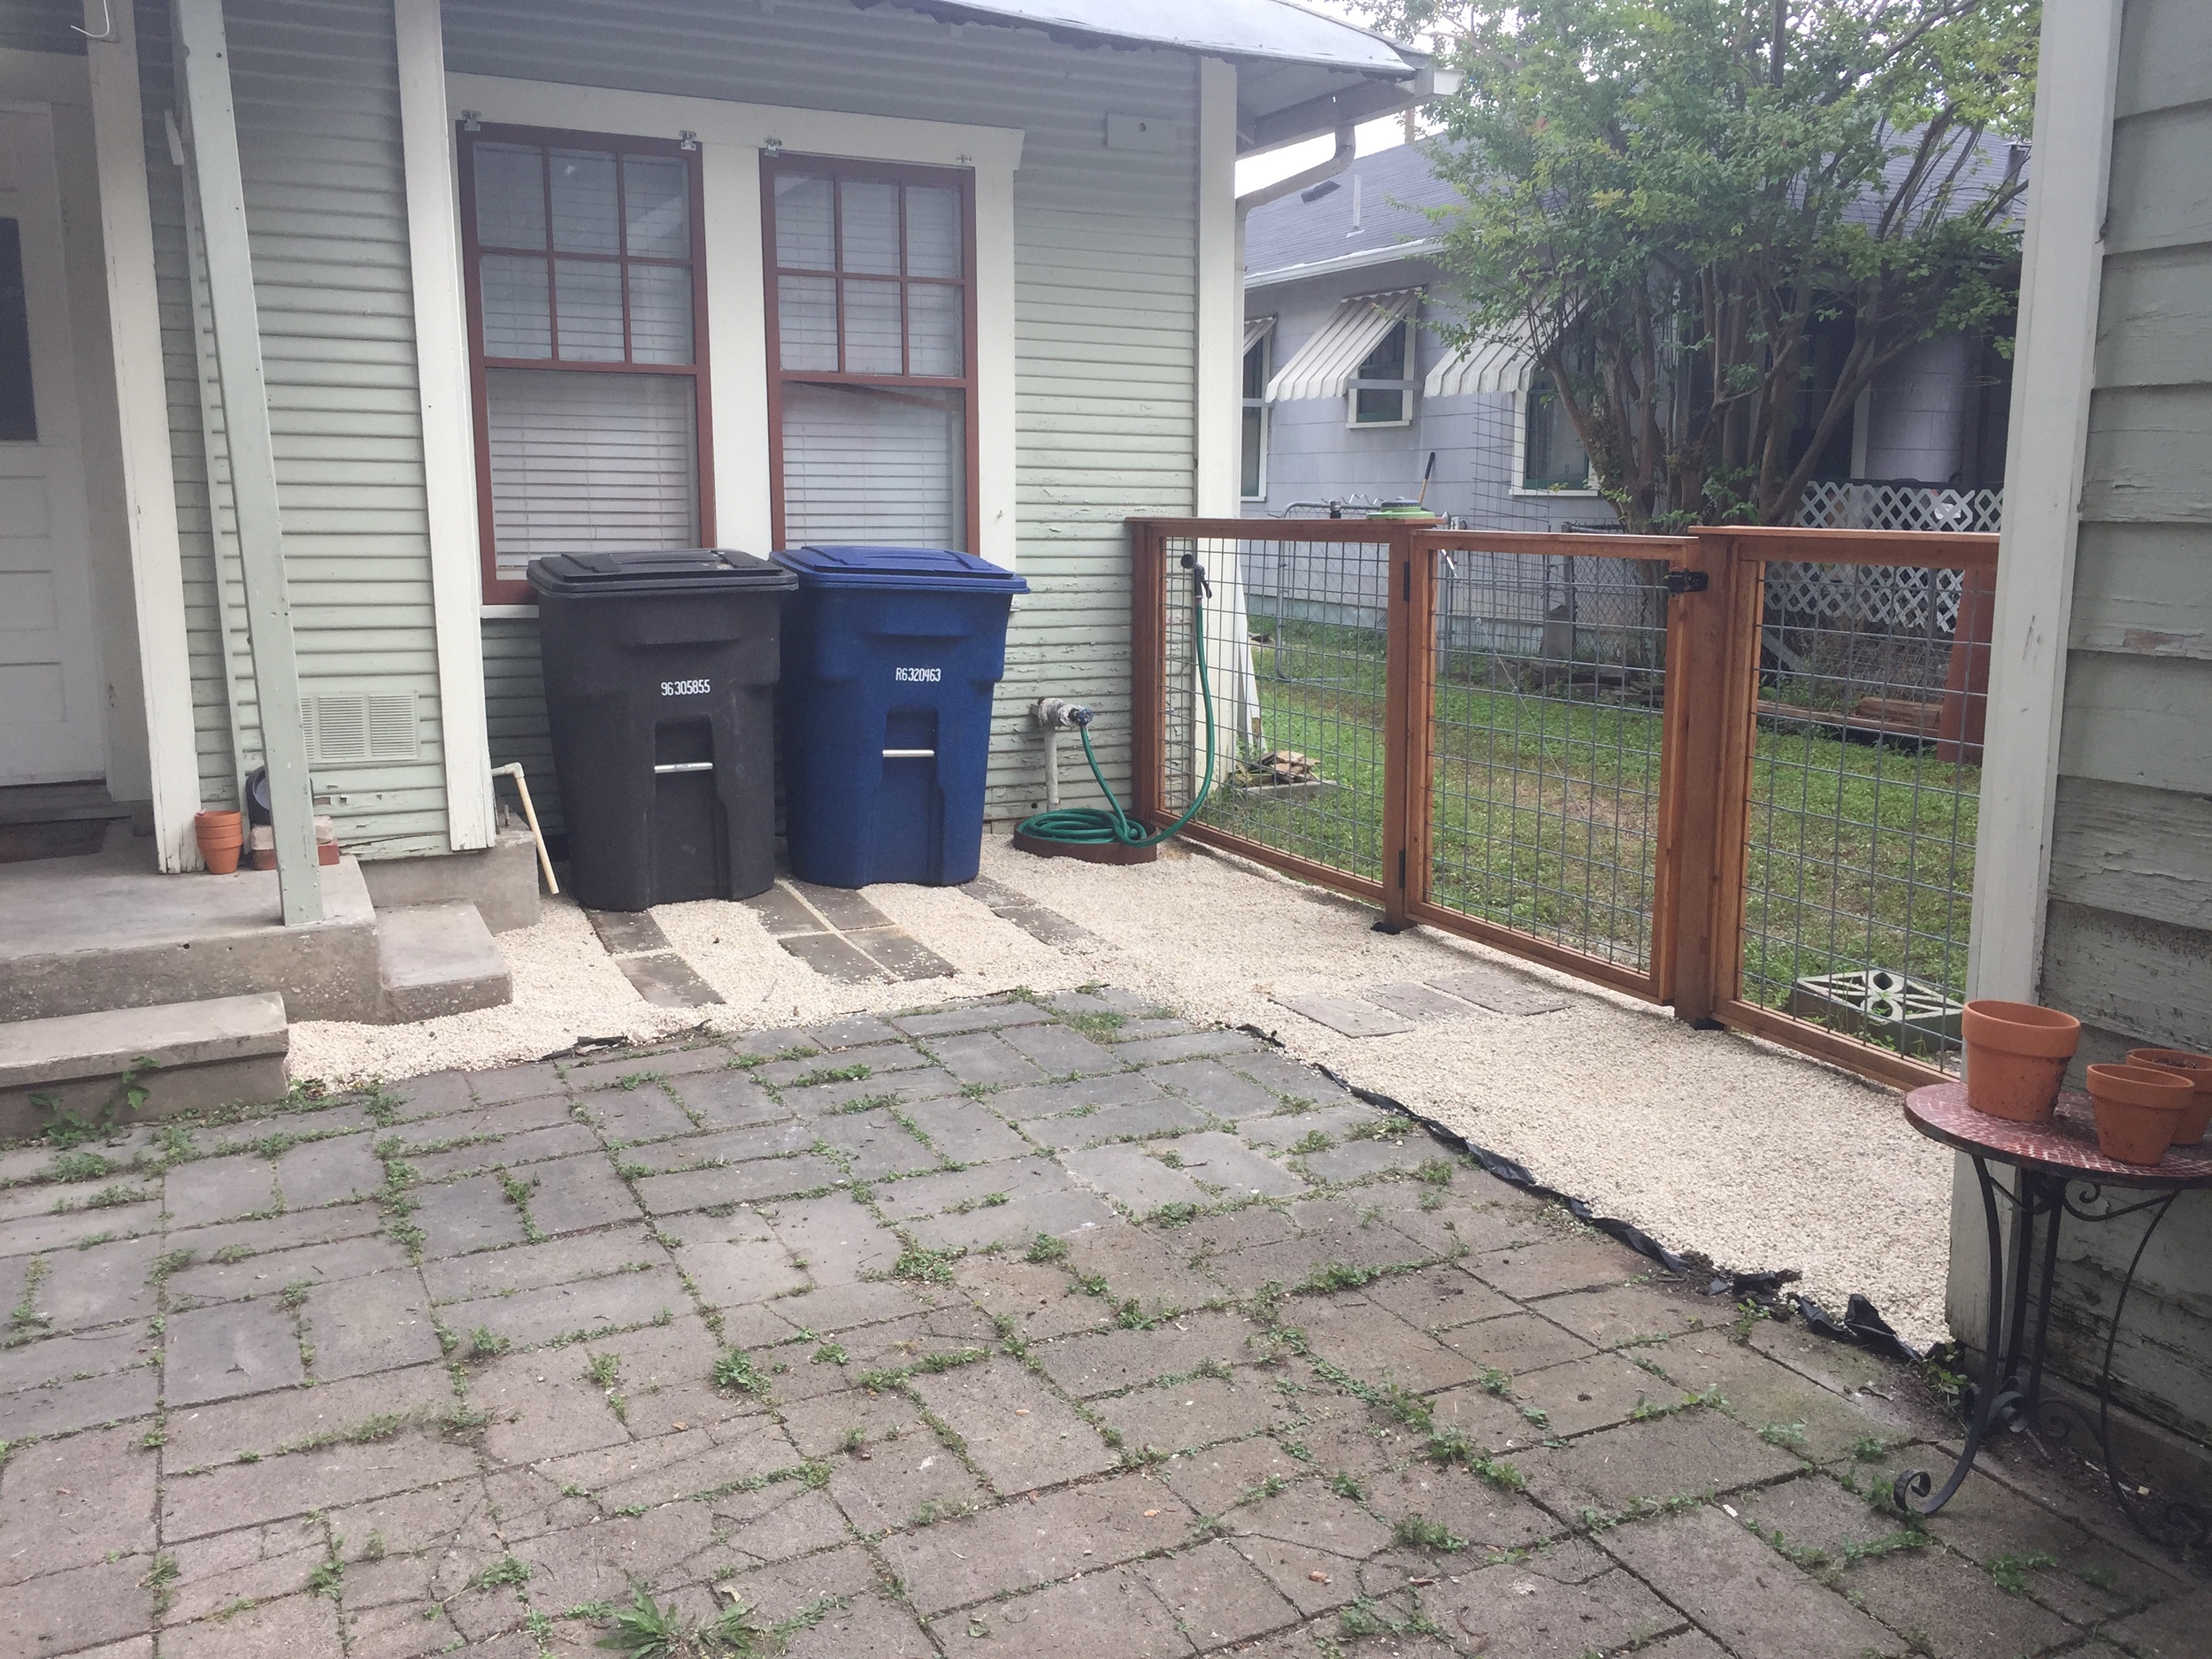
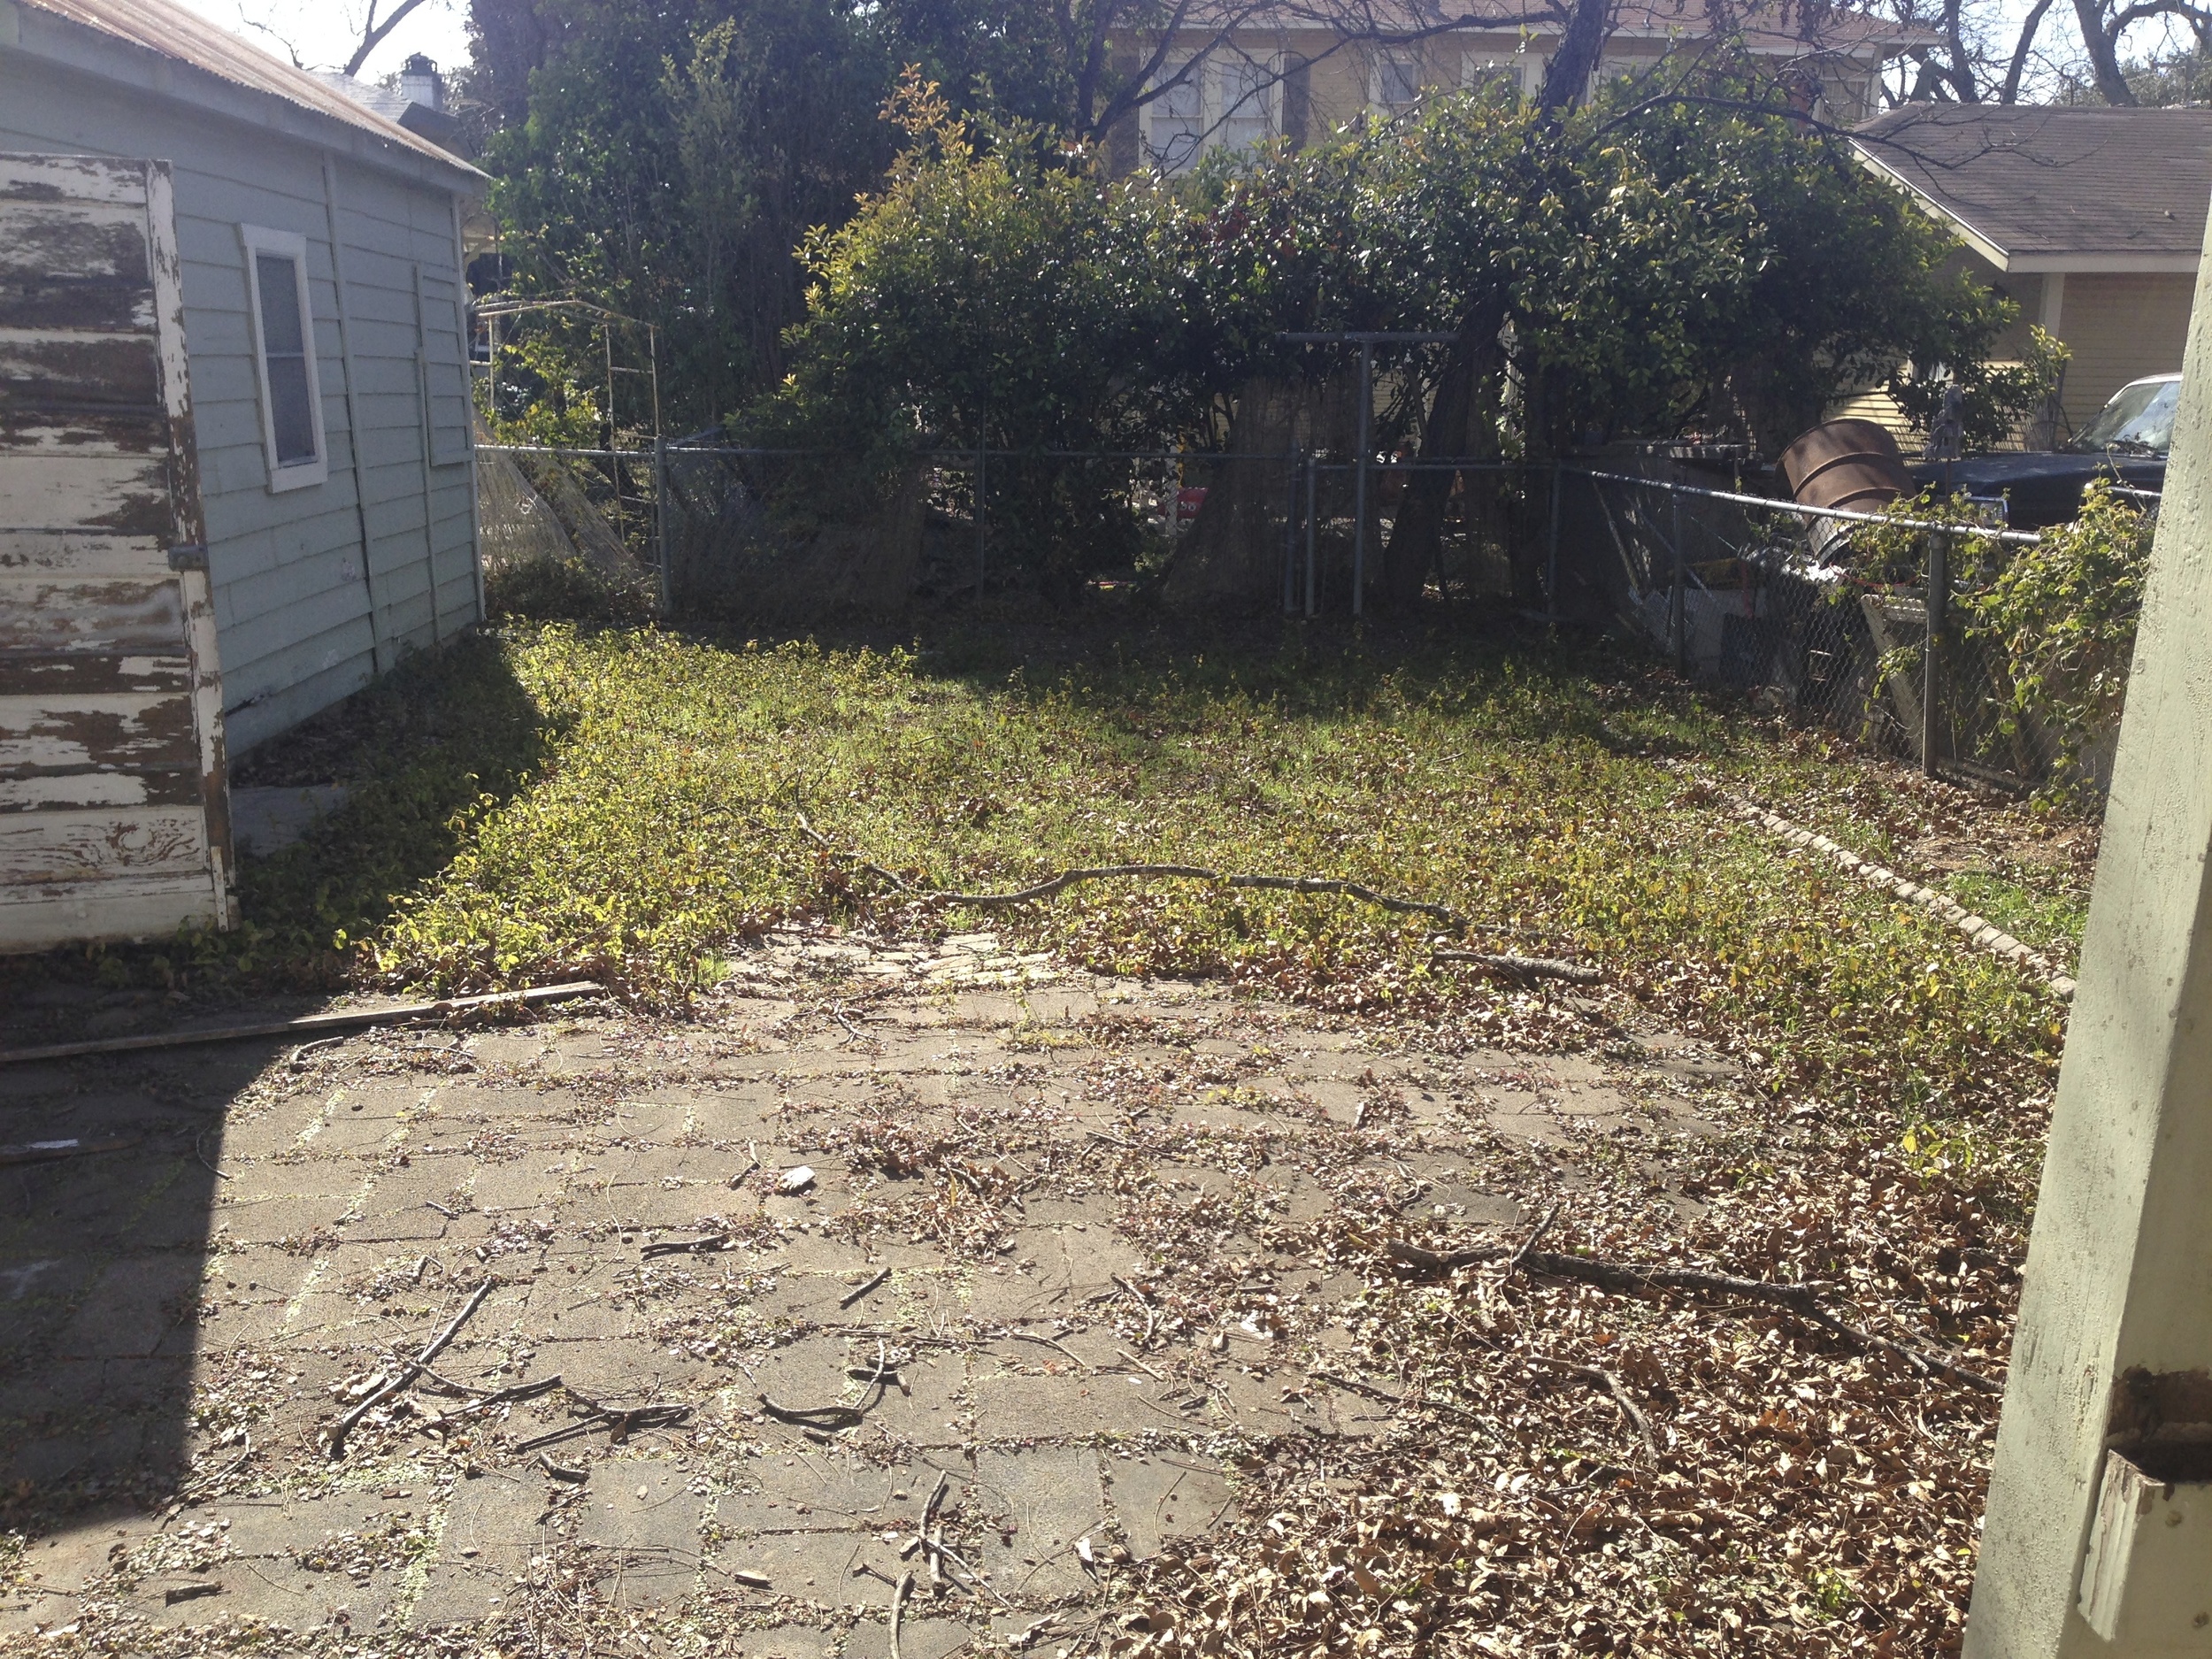
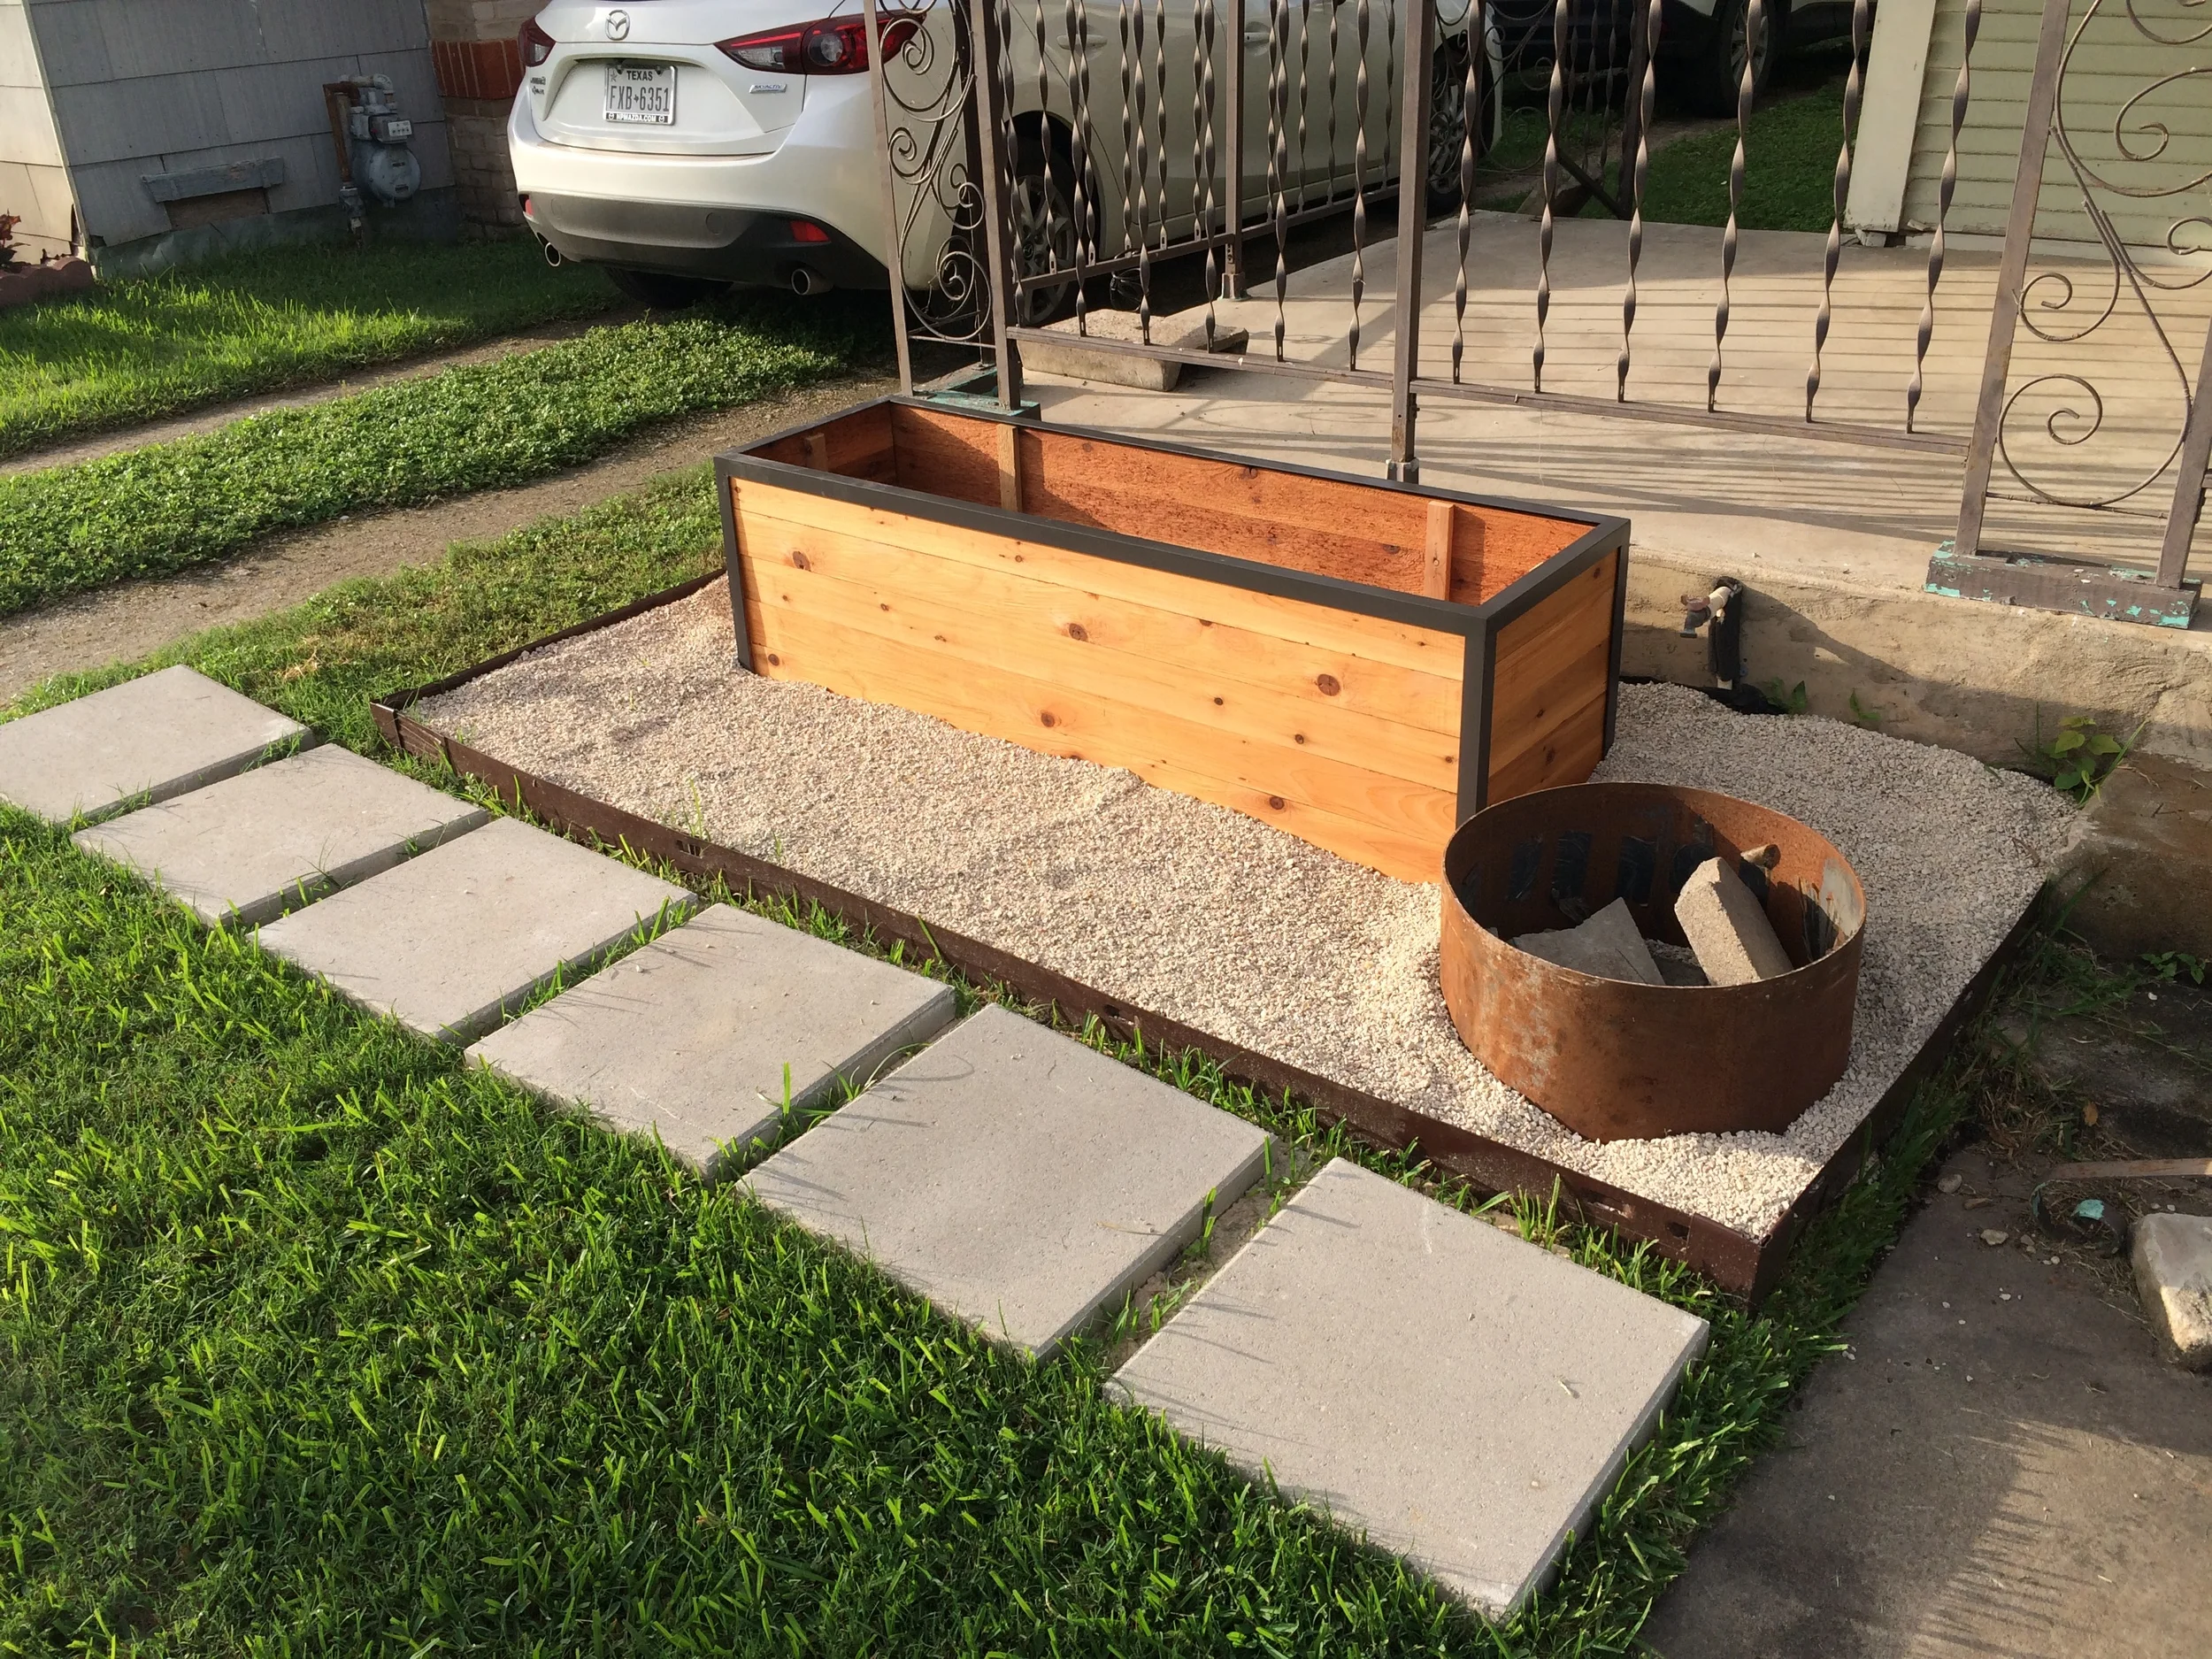
And now for some lovely before and afters. 

On the Fence About Our Neighbors

DIYCatharine KlepacComment

After sharing our front yard landscaping progress (and boost of curb appeal) last week, I felt it was high time to share with you, my favorite spot: the backyard. In all of it's glory. 

It literally does take your breath away doesn't it? Personally it makes me want to vomit just a little. After moving in we we immediately shored up as much as we could so that Geoffrey would be able to use the yard safely without getting tetanus, stabbed with heroine needles, joining wild animal gang, I don't know.

It was looking halfway decent considering this photo was taken around January or February. There was still a huge problem though (besides our lack of grass). Our neighbors are hoarders. And by hoarders I mean they are slobs. And if you want to see more of their hoarding/slob tendencies this post has plenty. So needless to say a privacy fence was in order.

Oh and these old school clotheslines had to go.

There is also this super stabby area behind our detached garage that we definitely didn't want Geoffrey getting into. I didn't even want to go back there. Yikes. And what is with all of the random bricks lying around?

A privacy fence sounded easy enough except for one tiny (okay rather tall) detail. This pecan tree that is just on the inside of our chain link fence. 

We called the county in order to get the original site drawings for our house and saw that the pecan tree was literally smack dab in the middle of our property line. Super. So we couldn't build the new fence behind the tree because that isn't our property, and if we built the fence on our side of the tree then we would lose about a foot of yard space, and our yard is already pretty tiny already. So we had to get a little crafty.

We knew that we wanted a horizontal fence. We really loved the idea of combining a modern element with our classic 1930 craftsman bungalow. Juxtaposition and all of that. We also had every intention of building the fence ourselves, but have you ever dug post holes? It's not fun. So we thought we could just get the professionals to dig and set the posts and we would do the rest. So we did our research and received several quotes from reputable companies around town for just the posts. Oddly enough, for some reason it was only about $100 more just to have them do the whole shebang (go figure) so obviously we just let them do it all. No sweat! One thing we found pretty interesting during this process was that several companies either refused to do a horizontal fence for whatever reason, or would charge more for horizontal than a standard dog-ear picket fence. Which is weird because it's less labor and requires less material. Some even said "you do realize this is San Antonio". What does that even mean? We were pretty annoyed by it all. 

We ended up using Alamo Deck and Fence and they were able to get started right away. This was also really nice because it would have taken us several weeks to get the job done, considering we could only work on it after work and on the weekends. The next morning we had a pile of cedar lumber in our yard and a crew of guys at our house ready to go!

We setup a little camera through the blinds so that we could watch the progress from work during the day because we're creepy like that.

I feel like they're flipping a coin to see who gets to dig holes and who gets to nail boards. I think the guy in blue lost.

Or not! They had the posts up in no time, and it all went rather quickly.

A lot of the trees had to be trimmed in the back corner which is why we have a small shrub in the middle of the yard. 

But what about the pecan tree? We ended up deciding to have the fence die into each side of the middle of the tree. It wasn't an ideal situation, but given our options it seemed like the best way go to, and we are really pleased with how it turned out. As long as we couldn't see the neighbors, I was happy as a clam.

It ended up only taking them about two days to get the whole job done. Once they had buttoned everything up Derek and I stained the cedar. We used a sprayer and brush to make sure that the stain was nice and saturated into the wood. We used this stain, and knew that the sun was going to fade the stain rather quickly (yay Texas summers!) so we did two nice thick coats which really helped bring out that nice orangey cedar color we were looking for. 

Just to jog your memory on how awful it looked before, here's a little reminder incase you had already mentally blocked it out.

A few weeks later, we ended up tilling up the yard and leveling it since it was super uneven and lumpy, and added some bermuda grass seed, and here is how it looks today. Clearly this is a yard Geoffrey can be proud of. Wait let's do one more before, just for suspense. 

IMG_0712.jpg

Making That Curb Appeal More Appealing

DIYCatharine KlepacComment

Oh hey, remember me? Apologies for the radio silence, we had a bit of a family emergency at the start of the New Year, and are honestly just now getting back on our feet again. In the meantime we've been slowly working on our little bungalow whenever we get a chance. And with summer officially starting this week, what better time to share with your our landscaping bonanza? 

I call it a bonanza because I went into the project with the following range of emotions "how hard can it be?" "why did we wait until it's 100 out to start this project?" "I'm so excited to finally have a decent curb appeal" "bags of dirt are SO heavy" "you can get fitbit steps for tilling soil? Let's do this!". You get the idea. So just as a little refresher, this was the current state of our curb appeal.

Woof. 

Before getting started we knew this:

  1. We live in San Antonio, and it rarely rains so we need drought tolerant plants.
  2. We wanted a minimalist aesthetic with low maintenance.
  3. We hate unruly rose bushes.
  4. We wanted to stand out on our block.

We sketched out a few ideas. Naturally. 

We decided to have a large planter bed on each side of the sidewalk with crushed limestone as the filler. Each bed would include a rectangular cedar planter framed in angle iron along with some round metal planters in varying heights. Derek designed all of the planters and built them in our shop. For the round planters,he picked up some 1/4" thick 20" diameter steel pipes from our local metal salvage yard and cut them in random sizes so that we could stagger them and add a little height to the overall look. Each cut took about 45 minutes. Phew!

We picked up some metal edging from Lowe's to block out each area that would be receiving the crushed limestone. These will eventually be replaced with 6" plate steel considering the standard garden edging isn't really holding up like we hoped it would. Inside each "bed" we manually tilled up the soil to essentially kill any grass, weeds, rose bushes, etc.

This. Was. So. Hard. 

Once the soil was tilled and our arms were about to fall off, we laid down sheets of weed block followed by a thick layer of sand. This would suffocate anything from trying to grow other than where we wanted it to. We raked the sand and stomped on it it so that it was nice and compact. I mean you can see that weeds are literally growing through our porch steps, so we knew how stubborn these suckers would be.

We ordered a cubic yard of crushed limestone from Keller Material who delivered it first thing in the morning in the cutest little dump truck. I'm sure our neighbors hated us that day. They poured it all in our drive way and we shoveled it and wheelbarrowed it into place. 

This. Was. Also. Really. Hard.

I should also remind you that it was literally 100 degrees out when we decided to tackle this project. See those two little Nalgenes on the porch? Hydration is key.

We started placing some of the round planters first and played with them a bit until we were happy with the look. 

Then we brought in the large cedar planters and placed them in each bed. We also picked up some 18" pavers from Home Depot to connect our driveway to our sidewalk. This required more tilling, leveling, and sand. Who needs to workout when they can just haul pavers all day? Yikes.

That was all day one. Day two was plant day! We went to a couple nurseries around town and looked at the different drought tolerant plant options, asked all of the necessary questions, and then made a game plan. I did a quick sketch laying out what types of plants would be going where. It was sort of like a plant shopping list. The types of plants we had planned to get were a little expensive, so I wanted to make sure we didn't go overboard, and only stuck to the list. 

While our plants started out small, we wanted them to eventually root into the ground. Since we had just completely blocked off the soil with our weed block and sand, we cut slits into the areas that would be under each plant. That way weeds and grass would still be blocked from growing, and our plants would be able to root as deep as their little hearts desired. 

We also filled each planter with extra bricks we had lying around so that we didn't waste a bunch of soil on filling them.

We planted each plant according to their individual instructions (and whatever I could find online), and watered them accordingly. For drought tolerant plants you have to water them a lot while they acclimate to their new home, but after they are rooted and happy you just let nature take care of them, it's pretty great!

In case you forgot where we came from. Let's just take one last look down memory lane at how our little bungie was when we first moved in.

I can't even. 

Do you want to know the quickest way to meet your neighbors? Have a garage sale. But the second quickest way is to do some landscaping or really any exterior home improvements and they are the first to come over and watch you slave over your yard, and ogle at your fresh curb appeal. We've caught several randoms drive by and snap photos, and that's compliment enough for me!

We ended up straying from the plant plan a teensy bit based on availability but ended up with the following from left to right: rosemary (cedar planter), foxtail fern (pipe), blue agave (pipe), yellow lantana (cedar planter), aloe (limestone), pencil cactus (short pipe), prickly pear cactus (tall pipe).

Mirror Mirror on the Window

DIYCatharine KlepacComment

One of the weirder things about our bathroom, is that the only mirror (also a medicine cabinet) is not over the sink. Its actually about 3 feet to the left of the sink. Where you literally have about 10" to stand between the toilet and built in hamper and wall in order to not get toothpaste all over your face. So what is over our sink? A big fat window. So that our lovely neighbors can watch us brush our teeth I suppose. 

You can see how we frosted it here. That way we can still let light in without that awkward moment when your neighbors go out to get their newspaper and you are stepping out of the shower in the buff. That never happened, but it could have.

Derek was very firm that he didn't want to permanently block the window with a mirror. You know in case we have a fire and all of the 26 other windows, and 2 doors are completely blocked and this 15" x 24" opening is our only option. We don't want to take any chances here.  

So I knew that a captains mirror would be the perfect solution and started hunting down the best option that wasn't too big, or too nautical, or too convex.

one | two | three | four | five | six

I was getting a bit of sticker shock considering most of the mirrors I found were in the $200-300 range. When I stumbled on this mirror from Target for $29, I thought it was too good to be true. But honestly, I really liked the black metal since I knew we'd be adding black accents throughout the house and it would help tie everything together. When it arrived I could see why it had been so inexpensive. The strap was made of a cheap-o rubbery plastic material that was already cracking at the fasteners. Considering I really didn't want a broken mirror to deal with, I knew that I had to replace the strap with something a bit more durable. Also since the lowest anchor point we have to work with was the top of the window frame, the strap caused the mirror to be about a foot too short. 

I headed to a local craft store to see what my options would be for the strap. I needed something strong, and easy to fasten back onto itself without worrying that the mirror would fall to it's death one day. After experimenting with several different options, I ended up settling on some black velcro. I know. So glamorous. I used my mad geometry skills to figure out how long the strap needed to be in order to lower the mirror to an appropriate teeth brushing height. I then doubled that distance so that I could fold over the velcro onto itself creating one big loop that was extra strong.

I then re-laced the new velcro loop through the existing fasteners on each side of the mirror and hung it from the top of the window frame with the black hook that came with the mirror.

IMG_0586.JPG

Now that we have two mirrors, we do a little tango every morning of who gets to use what mirror. After almost a year now, have mastered the coreography. The one on the left is reserved for small tasks (i.e.: contacts, face creams, makeup, etc.), while the mirror on the right is for more exciting activities like teeth brushing, hair straightening, and beard brushing.. you know tasks that require lots of elbow room.

Eventually we might remove the mirror on the left, and just have a solid door on the medicine cabinet. I mean. A girl can dream.

Replacing Floors Asbestos We Can

DIYCatharine KlepacComment

Well if you follow me on Instagram, you have probably seen a few little hints of our new kitchen floors. And if you don’t well then you’re missing out on a lot of photos of baby Geoffrey. So. Your loss. Okay let’s rewind to a week before we moved in and decided to pull up the (oh so beautiful) carpet in the utility room.

I mean. It had to go. This photo isn't even edited. It's au naturel. 

We were hoping to uncover some original wood floors that just needed a bit of love, but sadly we uncovered this mess.

Womp womp. It turned out it was a vinyl that was probably added in the 70s, so we peeled up a bit of the linoleum in the kitchen and guess what? More vinyl. It’s hard to tell, but if you look closely you will see that this is actually a fancy gold glitter vinyl. SO fancy.

The problem with this fancy pants vinyl, was that it had been laid with asbestos mastic. I mean. We just can’t get away from this stuff.

We knew we wanted to replace the floors in the kitchen down the road, but we also knew that if we were doing the utility room, we’d have to do the kitchen at the same time so it would all look consistent. After doing a lot of research we learned that the safest option was to just lay new flooring over it. Scraping it up is virtually impossible, it will never be level, who knows what we would have uncovered, and it is super dangerous to breathe. We only had a week before we moved in and we needed to address the situation ASAP considering we didn’t want to walk on this vinyl let alone let Geoffrey walk on it. So we had to act fast. Normally this is the type of project we would have tackled ourselves, but because we were still in the middle of refinishing our floors, still had some packing to do, and had to move at the end of the week, we were clearly running out of time. So we made the executive decision to call in the pros.

Since hardwood wasn’t an option, I knew that I definitely wanted to go in with tile. And because I’m absolutely smitten with our original bathroom floors, I wanted to have a charming porcelain hex in the kitchen and utility room as well.

I contacted my Daltile Rep to see how quickly I could get 130sf of this tile (in 2" hex), and she said she could have it shipped from Dallas and ready to pick up in 2 days. Sold. I struggled with the grout color a bit, and ended up going with Dove Gray (on the left) so that it wasn’t so contrast-y (that’s an industry term).

Our tile contractor laid sheets of HardieBacker board to cover the vinyl mess and allow for the tile to be nice and level.

They applied the mortar onto the HardiBacker and laid out each sheet of hexagons, letting the mortar set for 24 hours.

Then they applied the grout and let it set over the weekend before sealing it.

Yes, I know that the grout looks really thick around the edges, but that is because the tile was left uncut around the perimeter of the room since we knew we'd be going back in with a more substantial base board and shoe moulding, which would end up covering it anyway. So we saved a few dollars there. 

Geoffrey was very upset that he couldn’t walk on it yet.

And now for the truth: I ended up making the mistake of approving the installation before I was able to walk on it (while the sealer was still drying). The next day we ended up finding a lot of issues with some residual grout that wasn’t cleaned properly before the sealer was applied (which you can see the inconsistencies in the photos below).

If you aren't familiar with the process, once the sealer is applied it is to be immediately wiped away so that it only soaks into the grout and not the surface of the tile (per the sealer instructions). That was not done in our case. The sealer dried to the face of the tile and has permanently ruined the surface and cleanability of the tile. Also, anything left on the face of the tile is now trapped under the sealer. So grout haze, dirt, dust, etc. are now permanent. I even had my Rep come and look at it, and she was absolutely shocked at the improper installation. She gave me some tips and chemicals to use to fix it as much as possible.

So now Derek and I are going to have to strip the sealer, clean the tile, and then reseal it ourselves, which basically means we'll be on the floor with tiny toothbrushes scrubbing the floor until the water runs clear again. We haven't done it yet because let's face it, we'd need a long weekend and will lose the use of our kitchen and laundry room (and have to move some major appliances), so it's been a bit of a back burner item.

It was a very expensive mistake, and I have been dreading sharing this (not so glamorous) detail with you guys. But hey. You live and learn right? I don’t like sharing not so great projects, but I wanted to be honest and up front with why I haven’t shared our floors with you yet, or really anything for a couple of weeks. I have just been really upset with myself over the whole situation, but I’m moving on. The utility room is really the worst part, but I can’t show you the kitchen side yet because that is an exciting post for another day. So here is a snippet..

Screen Shot 2015-11-15 at 10.30.38 PM.png

I think it’s safe to say we’ll be sticking to DIY for a while. Lesson learned.