made X modern

The Kitchen Reveal: Our Not So Custom Cabinets

DIYCatharine KlepacComment

In case you missed Part IPart II, Part III, and Part IV of our kitchen renovation saga be sure and check them out before we dive into our not so custom (but customized) cabinets.

We had been vacilating over Ikea cabinets or Home Depot / Lowes custom cabinets for our new kitchen. We knew we wanted shaker style doors and drawers with soft close hinges and glides. This pretty much only left some pretty pricey options. Even the off the shelf cabinets from the big box stores didn't have soft close hardware, and the Ikea ones were still made of particle board. We were starting to feel pretty defeated that we were going to have to shell out a lot of dough for our cabinets. Until one weekend when we went to our local Habitat Restore to pick up our interior doors for this project. We came across white shaker kitchen cabinets that were solid wood, dovetail joinery, had soft close hardware, and came already painted. I know what you're thinking "um used cabinets?" No. These were still in their original boxes unassembled and they had every size imaginable for a fraction of what we thought we were going to have to spend. 

IMG_8151.jpg

While these were already painted white and had a nice finish coat on them, we still wanted to paint them our olive color. So after doing a little inventory we figured out that we would need the following: five 32" base cabinets with two doors and a single drawer, one 30" base cabinet with two doors and a single drawer, one 36" sink base cabinet with two doors a false drawer and an open back for plumbing, and one 18" set of three drawers.

Screen Shot 2018-08-16 at 9.55.02 AM.png

Then we loaded up the car and were on our way. The cabinets all together came out to be around $1000.

IMG_3483 2.JPG

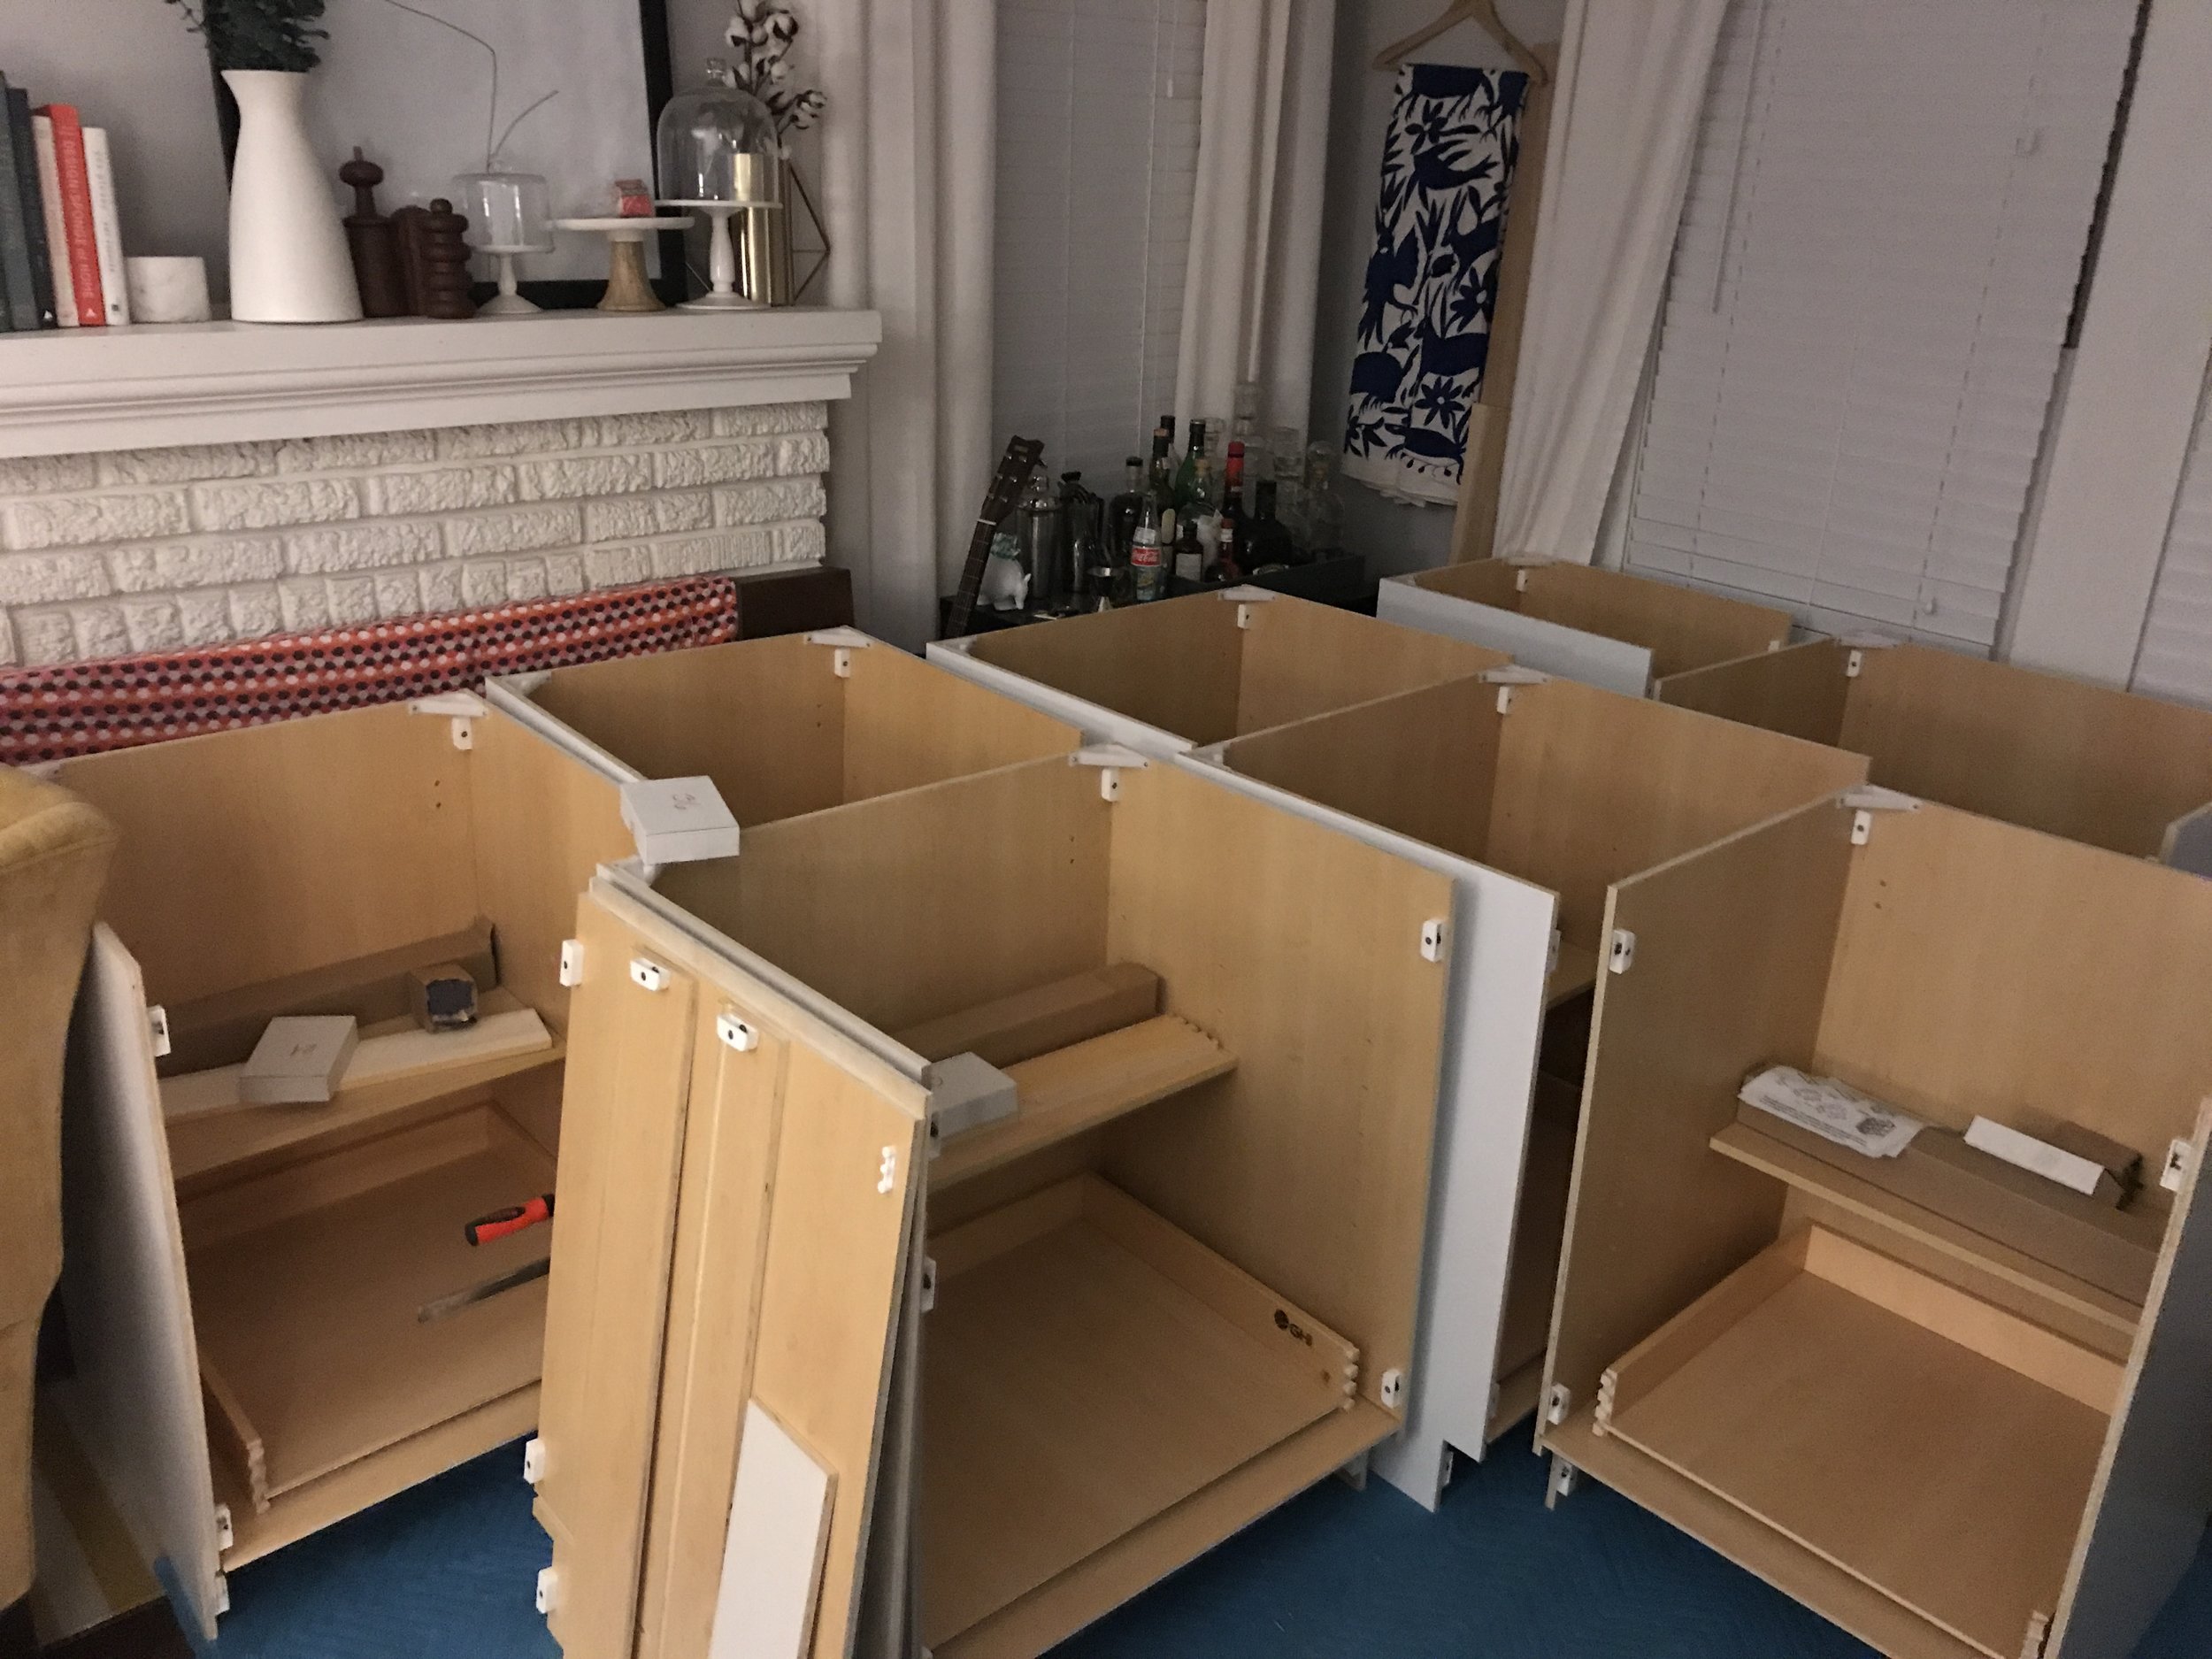
We spent the next few days assembling the cabinet carcasses and leaving off the doors and drawers (which we planned to paint). We glued each piece in place to make them even stronger. No turning back now! 

IMG_8480.jpg

I mean check out my form. Professional cabinet builder right here. And 3 months pregnant ha.

IMG_3490 2.JPG

We were so pleased with the quality of these cabinets and their ease of assembly. And for the price we paid we seriously couldn't be happier. 

IMG_3519 2.JPG

Then came the hard part. Now had we chosen to stay with white cabinets we could have saved all of this time and effort, but we both still think it was worth it in the end to get our beautiful olive color. 

IMG_3551.JPG

We laid out all of the doors, drawer faces, toe kicks, and front frames and sanded them with 100 grit sandpaper to roughen up the finished coat that had been applied to them at the factory. This part was the most tedious. After we sanded we used tack clothes to remove any dust from sanding. Even the smallest spec would ruin our paint job.

IMG_8490.jpg

We used our (favorite) Graco sprayer to spray each of the doors, drawer faces, toe kicks, and frames. 

IMG_3544 2.JPG
IMG_8498.jpg
IMG_3546 2.JPG
IMG_3548.JPG
IMG_3547.JPG

We ended up doing three coats of paint, and in between each coat we sanded and used the tack cloth. This method helped us build up a nice and durable finish, which is so important in a high use area like a kitchen. 

IMG_3512 2.JPG
IMG_3513 2.JPG
IMG_3553.JPG

It seriously looks exactly like the white that was painted at the factory, but olive ha. 

IMG_8533.jpg

Once all of the doors, drawer faces, toe kicks, and frames were dry we installed them onto their corresponding base cabinets, and glued each piece into place.

IMG_8610.jpg

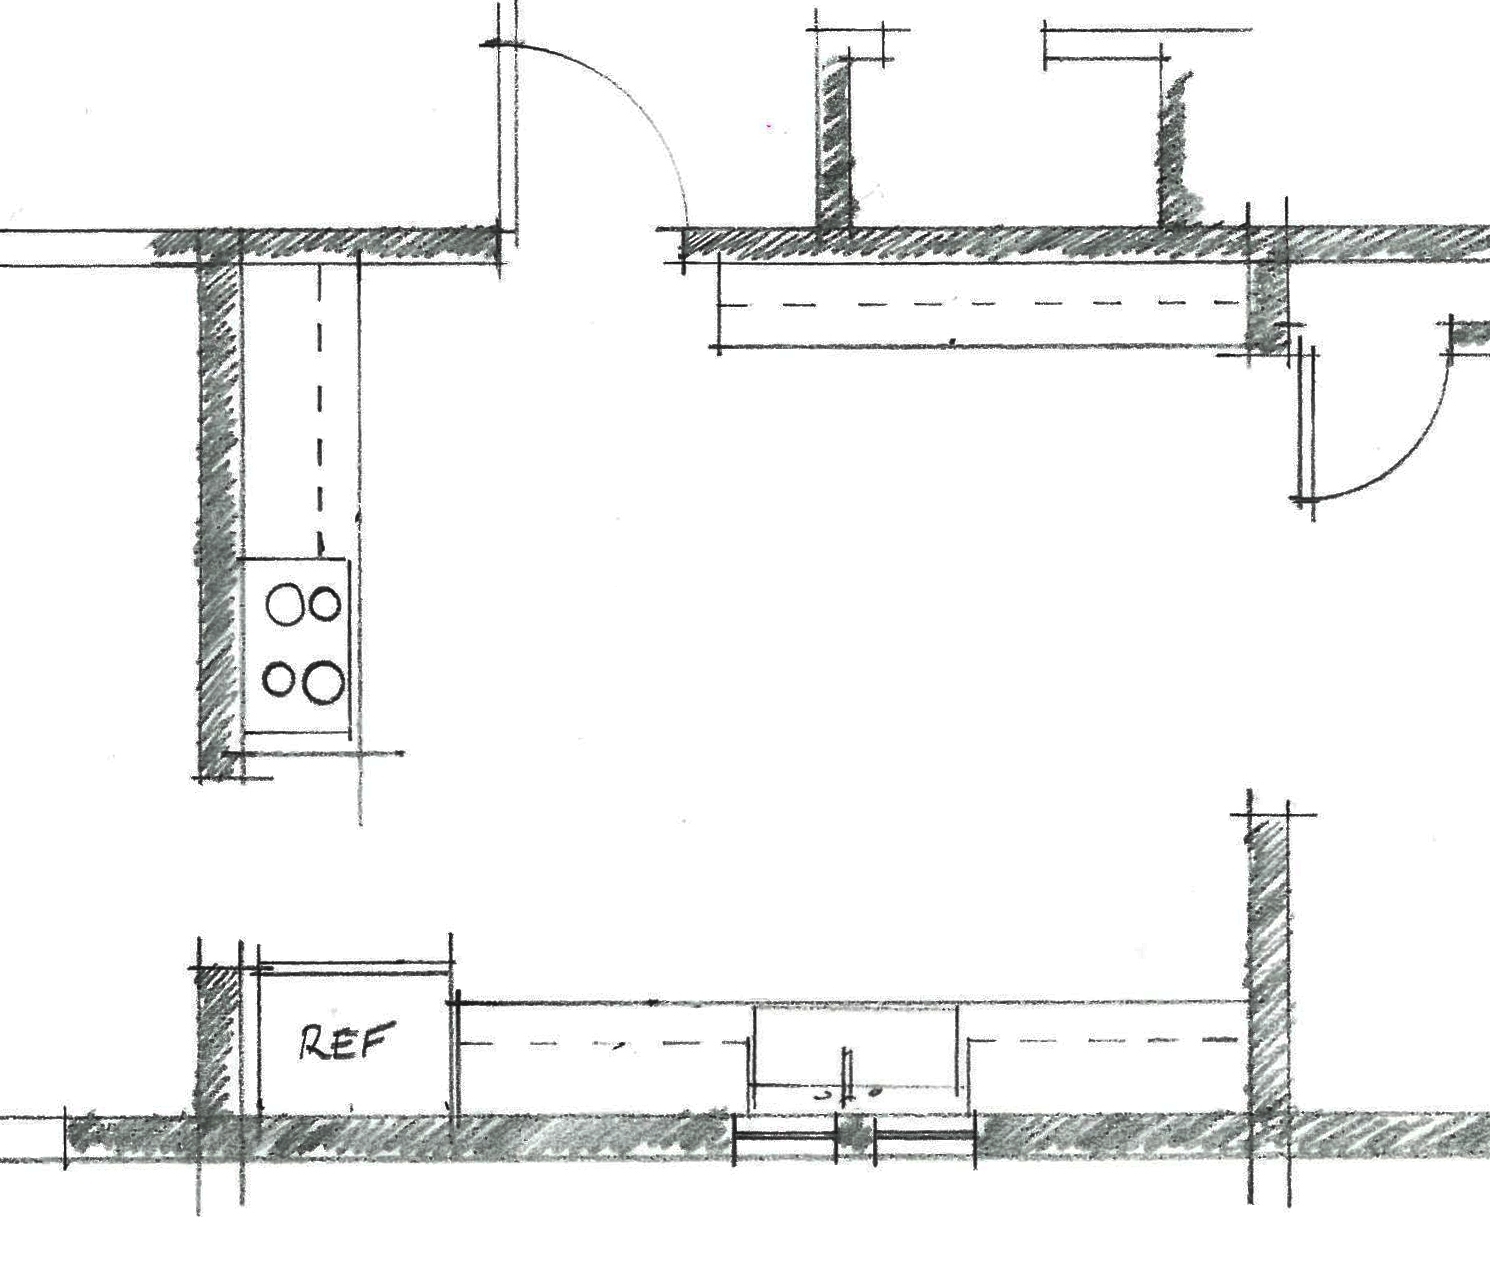
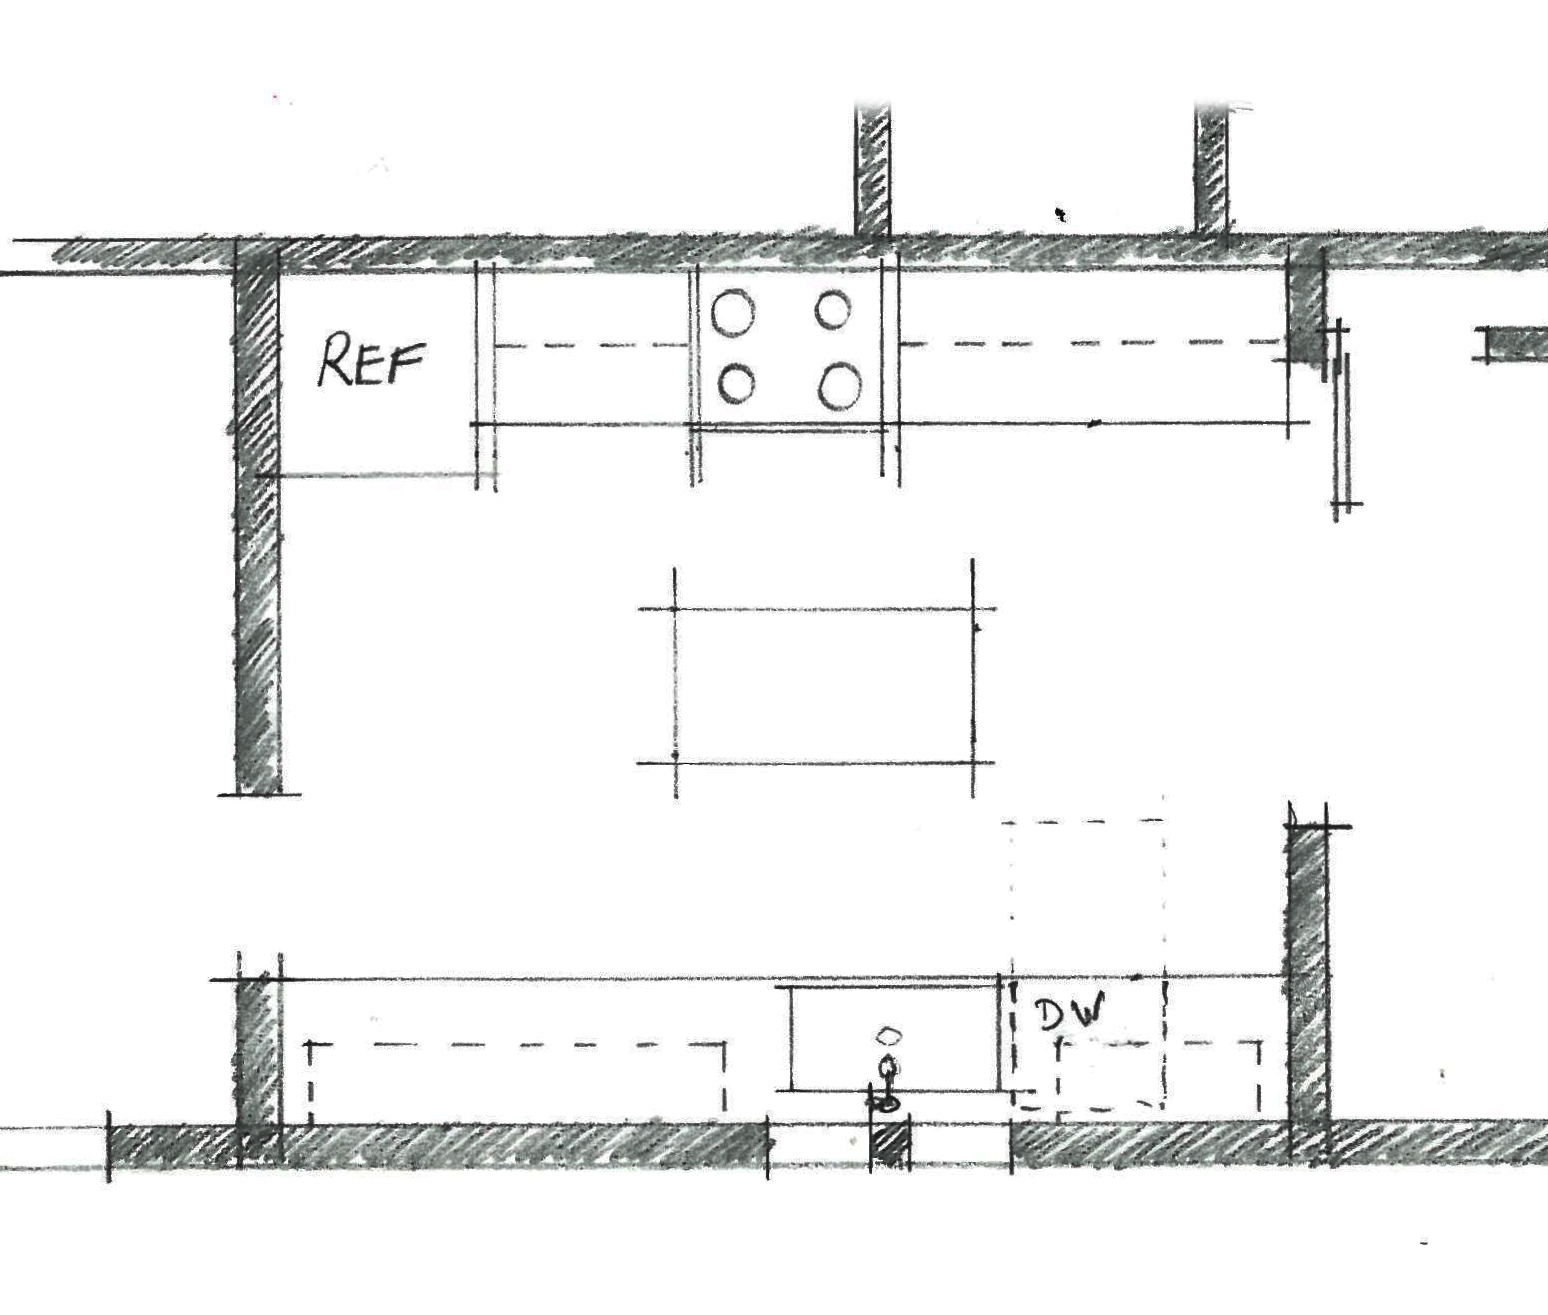
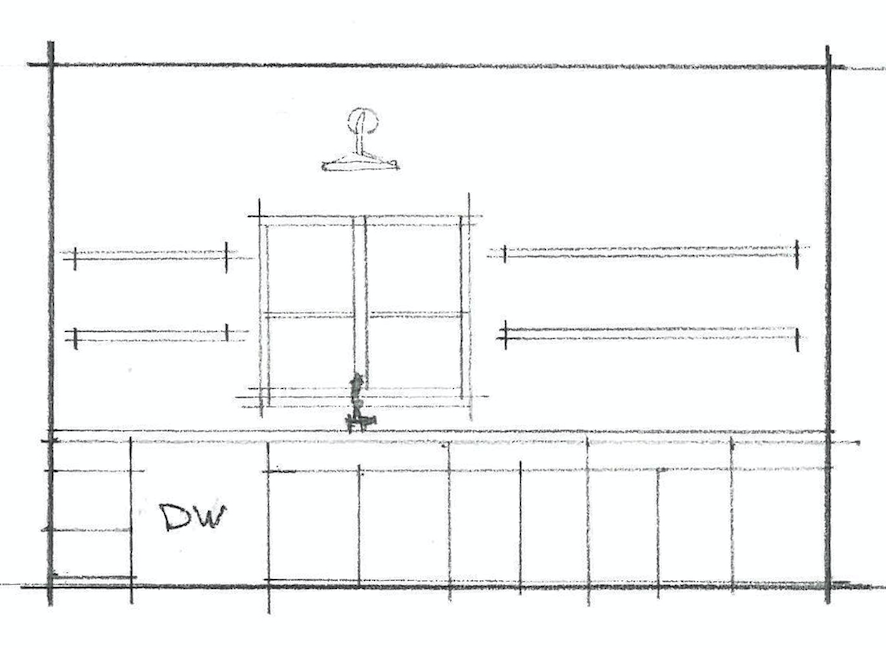
Once all of our base cabinets were ready, we moved our appliances into place and started placing each cabinet where it would be. 

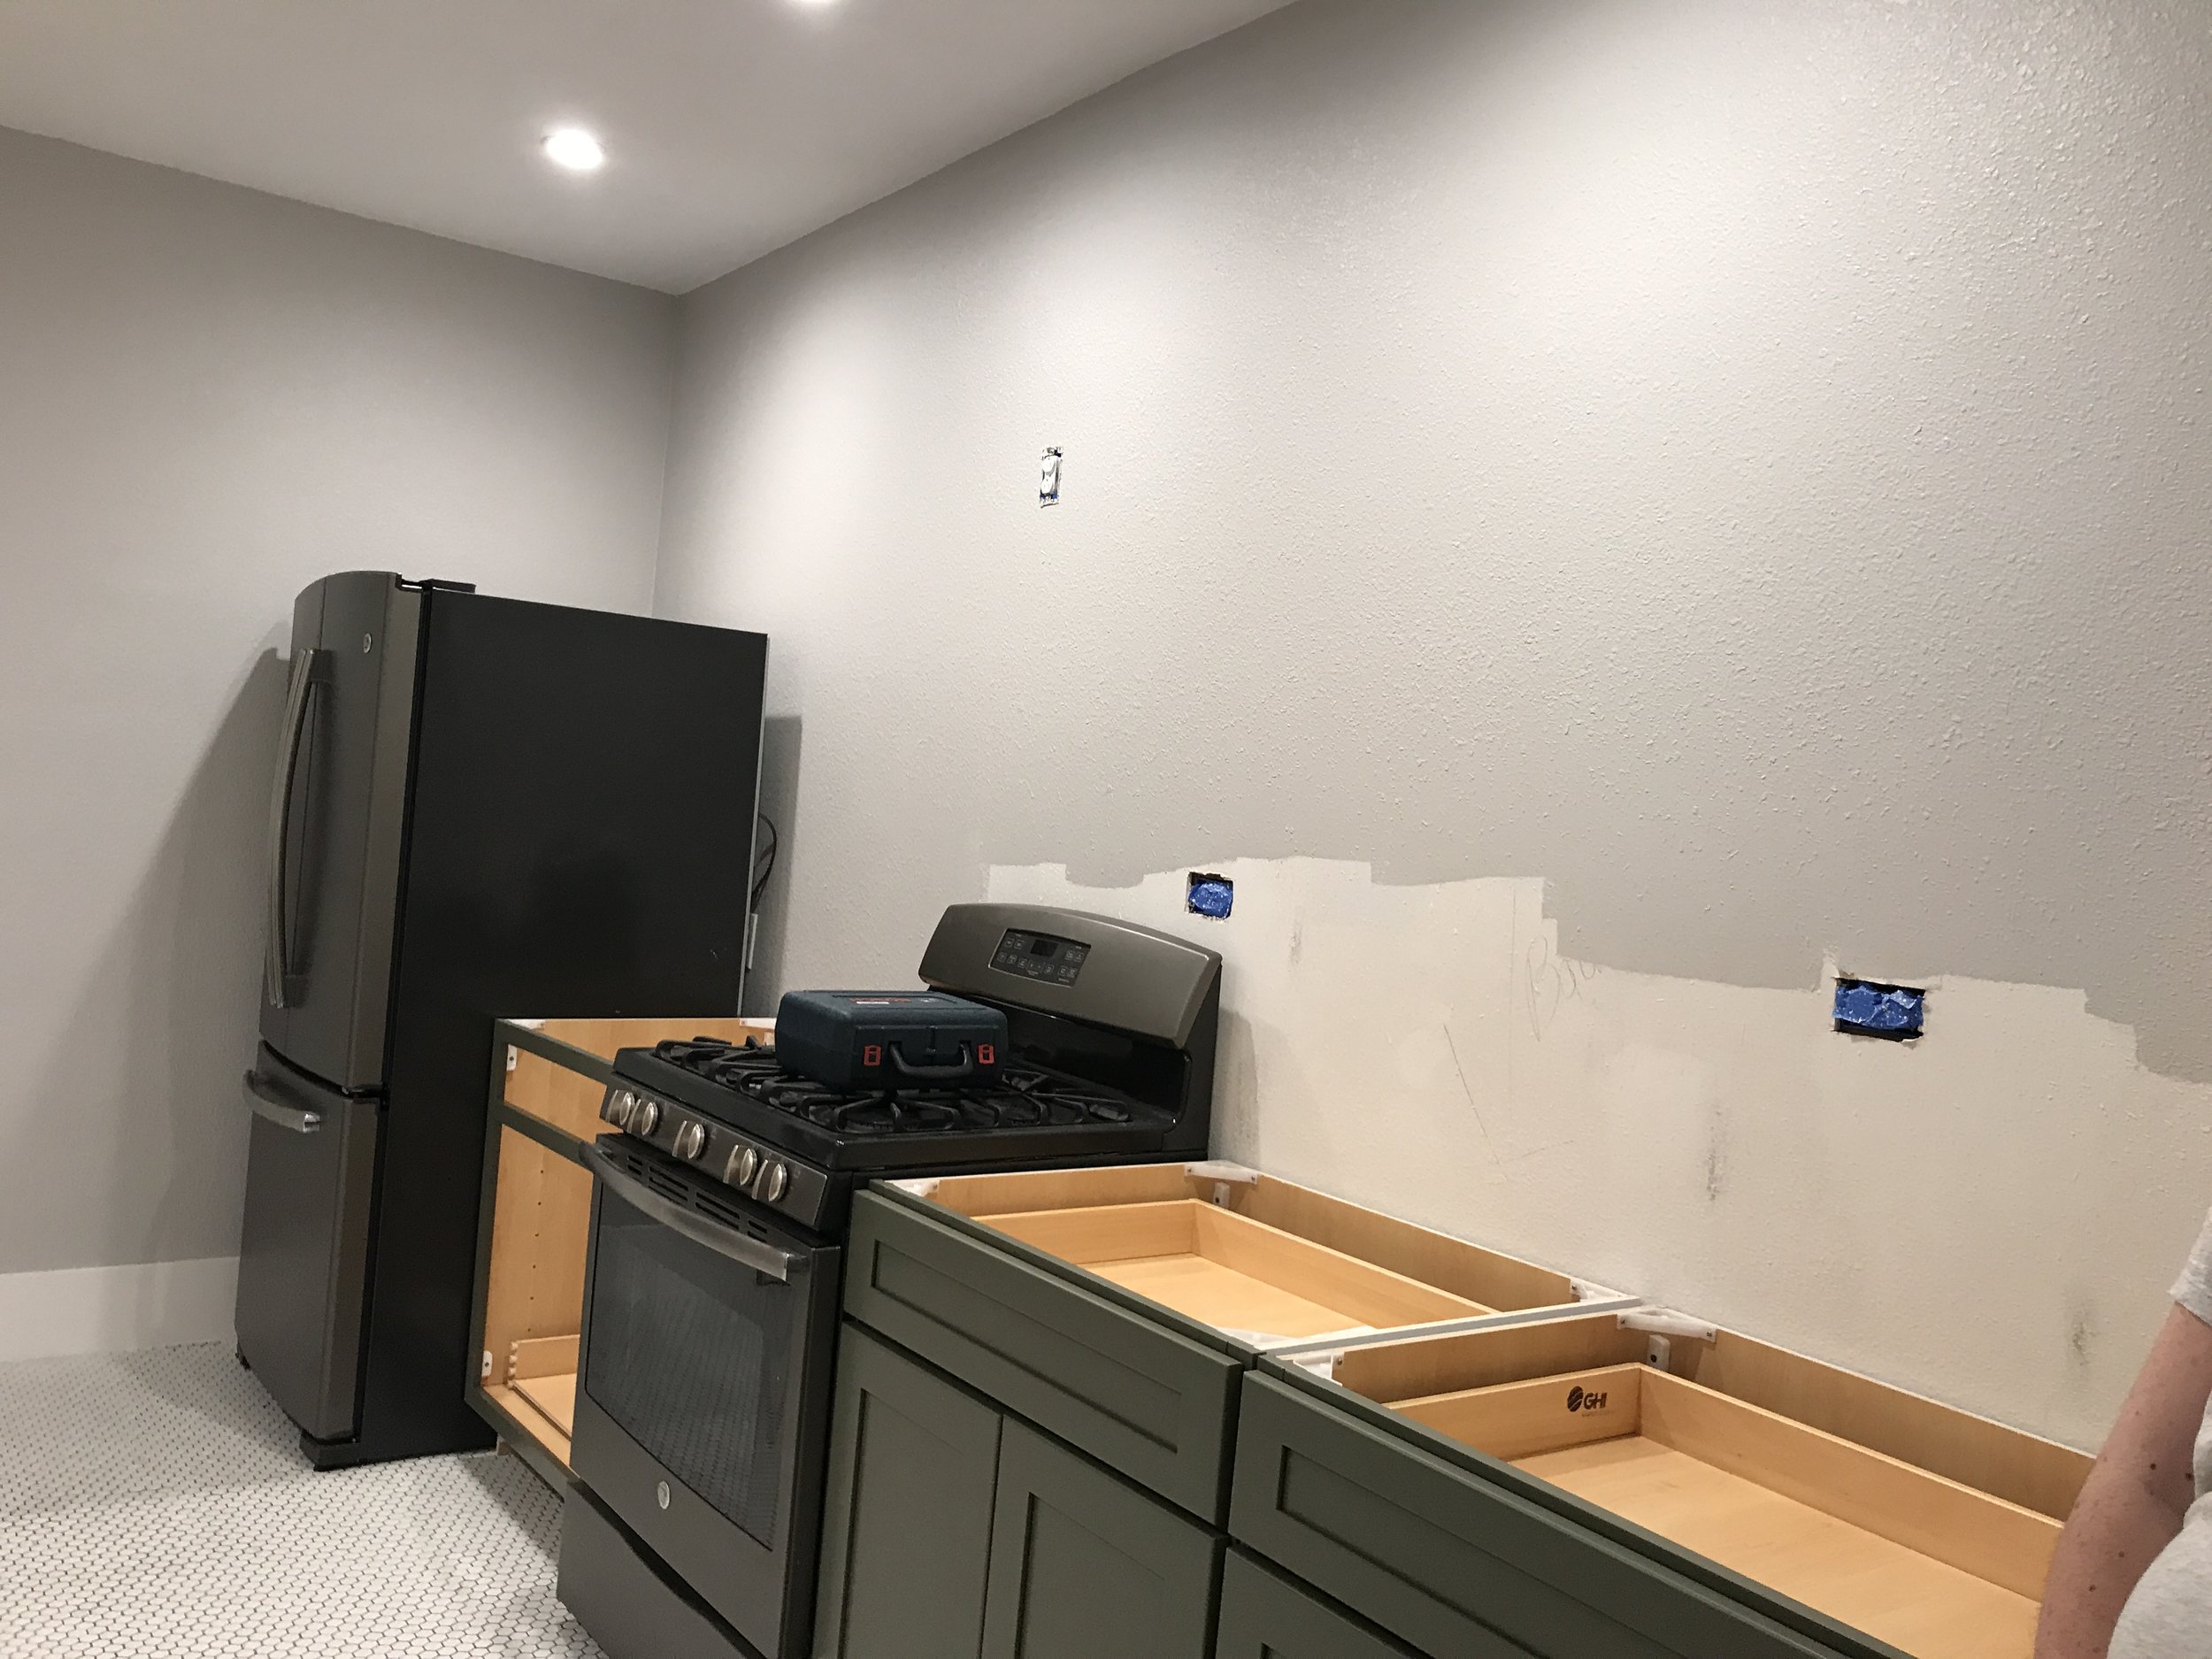
We left the toe kicks off for the time being because we knew how unlevel our floors and walls are (88 year old house), so we wanted to be able to shim any of the gaps in order to create a level enough surface for our countertops. 

IMG_8706.jpg

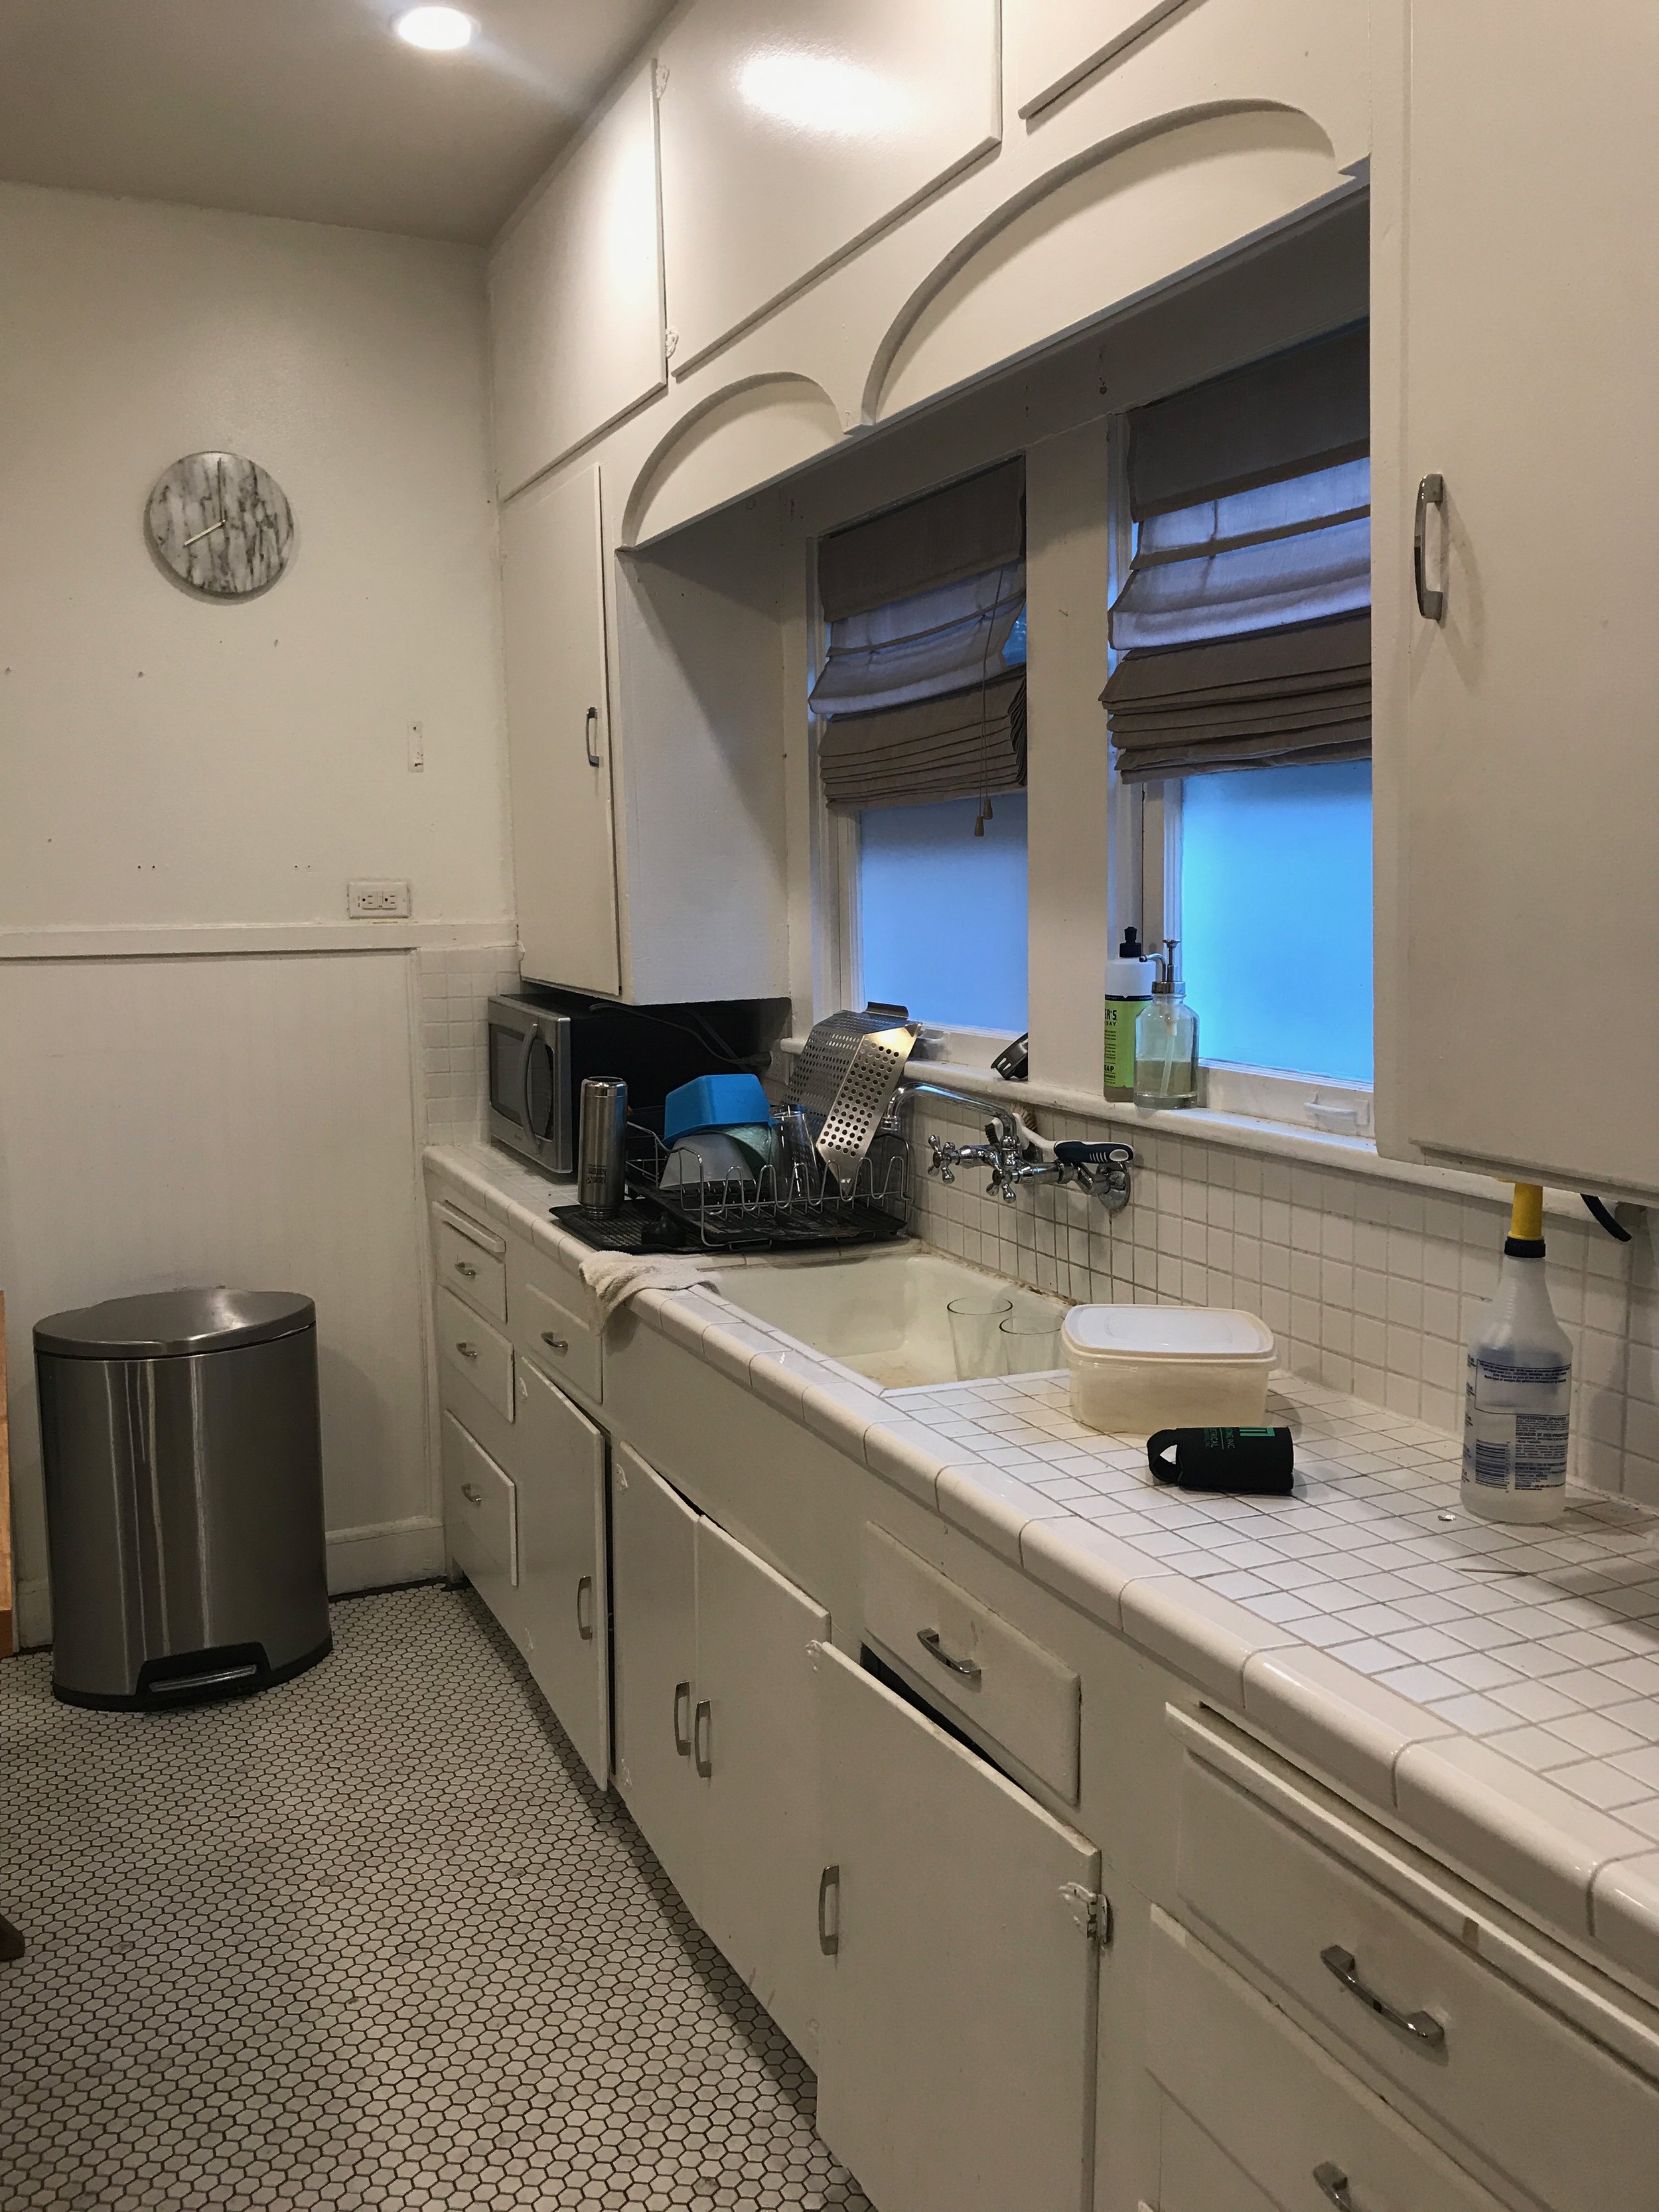
We left a space where the dishwasher would be located because we weren't going to install it until the countertops were in and the plumbing was wrapped up. I was so excited to have kitchen storage again that I started unpacking as much of the kitchen as I could (hence the toaster and lunchbox you see) so that as soon as the counters and sink went in we could use our kitchen again. 

IMG_8931.jpg

Stay tuned for Part VI of our kitchen renovation saga where I'll share how we scored free quartz countertops (designer perks) and installed our cabinet hardware. 

The Kitchen Reveal: #demoday

DIYCatharine KlepacComment

In case you missed Part IPart II, and Part III of our kitchen renovation saga be sure and check them out before we dive into #demoday.

So now that the plans were well underway, it was time to get the sledgehammer out and basically gut the entire space so that we could start with a clean slate. A shoutout to our friend Max who helped with a lot of the demo as payback for when Derek helped demo their kitchen. What are friends for right? As we removed all of the doors and drawers you can see some more of the quirky custom details, and the previous vinyl flooring as a shelf liner under the sink. Why?

See? Literally no backs to any of the cabinets. And that is an exterior wall. So many opportunities for critters ugh.

IMG_8373.jpg

We finally opened the top upper cabinets where we uncovered some water damage and luckily no dead bodies. 

IMG_8376.jpg

And more water damage. 

IMG_8381.jpg
IMG_8392.jpg

As we pulled off the gyp we uncovered some retro wallpaper that was backed with fabric. It almost turned to dust as I scraped it off and it was nailed into place, not glued. Nailed.

IMG_8391.jpg
IMG_8397.jpg
IMG_8400.jpg

We've actually uncovered a lot of areas of our house that used to be this green color. Apparently all of the door and window trim was green at one time. Wow.

IMG_8401.jpg
IMG_8407.jpg
IMG_8410.jpg

That water damage on the far left made us wonder if the original 1930 kitchen had a freestanding sink in the corner like this guy

So once we uncovered this portion of the kitchen, things got a little scary. 

IMG_8418.jpg

Do you see the light from outside? Its like everything was just puzzle-pieced together in this house. And yes. That debris all over the floor was a bunch of pecan shells and rats nests. Awesome.

Speaking of awesome. Look at what a great job our previous contractor did when closing in the bedroom door. This was all gyp'd over by the time we came home and saw it (and signed off on it) so we had no idea. That is literally a 2x4 post with three 2x4s nailed to it. None of which were attached to any framing. It was all just loosey goosey hanging out behind the gyp. No wonder there was a huge crack and wall buckling when the foundation was replaced. This was so scary to find. 

IMG_8420.jpg

Because the tile installer tiled up to the old cabinets there was a big recess in the floor where the cabinets once were. Derek filled in that gap with pressure treated plywood to bring it up to the same level as the tile. We had to do this on both sides where the lower cabinets used to be. 

IMG_8429.jpg

Originally we thought it might be cool to just paint the lath (shiplap) once we started seeing how great of condition it was in. That is until we got to this wall where it was again just puzzle-pieced together. What a shame. Also on the sink wall most of it was missing so we'd have to replace it which would make it look even more hodgepodge. Also from a air conditioning / insect control standpoint, leaving exposed lath on an exterior wall is never a great idea. The more layers of insulation the better.

IMG_8431.jpg

Once all of the walls were down to lath, we had our electrician come in and add outlets where we wanted them and then Derek removed the ones we didn't need anymore. We also had them add a junction box for the barn light above the sink and converted the boob light to a quad outlet for our pendant lights over the island. We had them switch everything so that the pendants and barn light were separate from the can lights. You know. Mood lighting. We also had them add an outlet for the new fridge and oven location. We had our plumber come in and add a water line for the dishwasher and relocate the gas line for the oven. Both of those trades were probably the most expensive parts of this whole renovation. 

IMG_8433.jpg

Derek added more lath pieces and properly filled in the previous door to our bedroom. He focused mostly on making sure there was lath along the top half of it, as that would be where all the strength would come from for holding the upper cabinets. 

Once each wall was structurally sound (as much as it could be) we installed fresh new gyp on all walls. 

Okay do you see how the PVC vent pipe for the sink comes up from the ground and then elbows to the right and then up again? Whenever this update was made and the sink was relocated to under the window, the previous owner cut out all of the vertical studs to run the PVC tubing. Which meant that you could push on the wall and it would wiggle. A lot.

IMG_3463.JPG

So our friend Max helped Derek remove the PVC vent and our plumber rerouted it straight out the side of the house rather than snaking it through the wall. You can see where the original studs were cut and just hanging out. Attached to nothing. So freaky. 

IMG_3464.JPG

Derek and Max then went in and installed all new studs to add strength back on this side of the kitchen, and then covered them with new lath.

IMG_8472.jpg
IMG_3496.JPG

Once all of the new lath was added, we started adding gyp along the bottom half where the lower cabinets would be, and then hardi backerboard along the top half where the tile backsplash would be. By "we" I mean Derek. I was 3 months pregnant. 

IMG_8612.jpg
IMG_8613.jpg
IMG_8617.jpg
IMG_8620.jpg

Once gyp was installed and pieced together, Derek went around and taped and floated all of the gyp.

IMG_8475.jpg
IMG_8622.jpg

He then textured all of the new gyp (which I don't have a photo of because it was very messy), and we painted all of the walls our favorite Passive by Sherwin Williams. 

IMG_8689.jpg
IMG_8687.jpg

Stay tuned for Part V of our kitchen renovation saga where I'll share the cabinets we scored for a steal of a deal and how we made them fit into our design.

The Kitchen Reveal: Lighting Up the Joint

DIYCatharine KlepacComment

In case you missed Part I and Part II of our kitchen renovation saga be sure check them out before we dive into the installation of our snap in recessed lights.

As it stands, the only light source in this entire 160sf kitchen is this single boob light. In all of it's glory. 

IMG_7585.jpg

We knew that with the full kitchen renovation around the corner we wanted to go ahead and update all of the lighting in the kitchen (and bring it to the 21st century) with recessed can lights. Because without good lighting, how were we supposed to start demo? ha

We picked up six of these EnviroLite Easy Up 6" LED recessed lights. They are really cool because they just snap into place with springs and don't require traditional can lighting housing, which makes them 100x easier to install. Plus at about $25 a pop they aren't shabby.

IMG_7586.jpg
IMG_7587.jpg

We measured out the distance from the wall all the way across the room. We wanted the cans to be 24" from the wall so that it would illuminate the workspace. A lot of people make the mistake of lining up recessed lighting with the walkways in the kitchen which causes you to be in your own shadow while working. 24" allowed the cans to be in front of the upper cabinets but still over the counters below. 

After dividing the length of the room into thirds, we marked where each can would be with painters tape. This allowed us to make any neccessary adjustments before it was too late and there were holes all over the ceiling. 

IMG_7589.jpg

On the sink side of the kitchen we subtracted the depth of the upper cabinets so that the tape is still technically 24" from the wall (that's why it looks a lot closer than the other side).

IMG_7591.jpg

After each marker was exactly where we wanted it, Derek drilled holes along the centerline of each light location. Then he placed a dowel through the ceiling into the attic so he would know exactly where each can light hole would need to be cut. 

IMG_7595.jpg
IMG_7596.jpg
IMG_7598.jpg
IMG_7599.jpg

I had the very important job of taping plastic bags around each dowel to catch all of the debris that would be cut out, to avoid more cleanup than neccessary. 

IMG_7600.jpg

Derek used a Rotozip to cut each hole perfectly. See? This would have been a lot to clean up x6.

IMG_7602.jpg
IMG_7604.jpg
IMG_7606.jpg
IMG_7607.jpg

Then Derek used a parallel circuit for all of the new wires up in the attic, and pulled them through the holes to connect to each recessed light. 

IMG_7608.jpg

After all of the recessed fixtures were in place then all that was left was to snap on the magnetic trim piece that came with each light. It hides any imperfections you may have had when cutting your holes for a nice clean look.

IMG_7603.jpg
IMG_7611.jpg

I just love how such a little change completely updated the space, and it's so much brighter now. How did we live like this for so long?

Stay tuned for Part IV of our kitchen renovation saga where I'll share the very terrifying demo process, and the retro wallpaper we uncovered.

The Kitchen Reveal: Our Design Plan

DIYCatharine KlepacComment

In case you missed Part I of our kitchen renovation saga be sure and check it out before we dive into the design of our new kitchen.

Even after closing in the door to our bedroom, and removing the millwork on the oven wall, we still had a hard time figuring out how we really wanted our kitchen to flow. We didn't want to create any major movements to help keep the budget down, but were open to relocating things like gas, waterlines, etc. 

Here is what the floor plan looked like when we first moved in, to help give a better idea of what we were working with. 

Kitchen - Existing.jpg

Then this is how we had it laid out after closing in the door to our bedroom and removing the millwork on the existing oven wall.

Kitchen - Phase 1.jpg

For the longest time Derek only wanted to partially renovate the kitchen, while I was 100% for a full renovation. So we thought about adding an L-shape lower cabinet between the new stove and fridge but L-shape cabinets kind of drive us crazy. They are super deep and its hard to reach things in the way back corner. Plus in our situation it would have to be a very tight L-shape lower which made it even more awkward. I also didn't love how the edge of the stove would be exposed, it all just felt like a big bandaid. So we stewed over several different sketches until Derek finally yeilded and agreed that a full renovation was the only way to have a successful kitchen, and we landed on this.

Kitchen - Phase 2.jpg

The overall concept is an oversized galley kitchen with an island in the middle. It was a simple choice, while also solving all of our problems. No awkward cabinets, a clean flow, and minimal demolition. You're probably wondering why we didn't remove that wall that separates the kitchen from the living room (on the left). Honestly, because the laundry room / breakfast nook also had a wide opening, and we didn't want to see all the way down the house when you first walked into the front door. We wanted to create a separate space. Also, there was a lot of electrical we would have had to relocate and a floor material (and level) change, and it just didn't seem worth it. If this was our "forever" house we probably would have made much bigger moves like that. 

We put together two finish palettes knowing that our main design elements would be steel, our white hexagon floors, gunmetal appliances, black fixtures / hardware, and plywood. I loved the idea of olive green shaker cabinets with a carerra style quartz countertop, while Derek preferred white shaker cabinets with a matte concrete style quartz. We took a poll and (most) everyone loved the olive route which we would have probably ended up doing even if everyone picked white ha. I just didn't love the idea of having white cabinets against our white floors. 

IMG_8250.jpg

We decided that all of the lower cabinets would be shaker style doors and drawers painted Eclipse by Sherwin Williams with these matte black linear pulls and white carrera style quartz countertops with a 3cm square edge.

As the floor plan indicated, the oven and fridge would be on one side of the kitchen. There will be a hot rolled sheet steel backsplash and thin steel shelf for spices and grains. We loved the idea of steel because it ties in with the other steel elements throughout our home, and it's also magnetic which is kind of fun for recipes, hooks, etc. The vent hood will be wrapped in plywood with two plywood upper cabinets on either side, each with sliding gloss white doors. We felt like this helped to ground everything and make the fridge and oven feel more built in.

Screen Shot 2018-08-15 at 12.39.27 PM.png

The opposite side of the kitchen will have a matte white ceramic tile backsplash, to help offset the darkness of the steel. There will be plywood floating shelves on hidden steel brackets on either side of the window, with a black barn light above. We will located the dishwasher (eek!) to the left of the sink in the same gunmetal finish as our fridge and stove. The sink will be nice and deep and under-mounted with a matte black faucet. 

Screen Shot 2018-08-15 at 12.39.36 PM.png

Between both sides of the kitchen will be our antique drafting table that will be used as an island, allowing for more prep area, with two matte black and milk glass globe pendants hanging above. 

For the lighting we wanted everything to be black to pop against the white, while also tying into the color of the steel. 

We plan to order all of the lower cabinets, while Derek makes all of the uppers and the vent hood wrap. We just love how all of the elements reflect the craftsman style of our home with modern industrial elements like the steel and plywood. Yet everything ties together so nicely and reflects our overall style without looking too trendy. 

Stay tuned for Part III of our kitchen renovation saga where I'll share how we replaced our one boob light with snap in can lights. You can't demo without great lighting!

The Kitchen Reveal: A Brief History

DIYCatharine KlepacComment

You guys. It has been 13 months since we started renovating our kitchen. I know. While you're probably imagining us living in chaos for over a year,  it was only bad for about two months. Once our countertops and cabinets were in we were able to use our kitchen it just wasn't as pretty. Throw in some delayed contractor schedules and you know having a baby and now I'm here to say it is DONE.

There is a lot to cover so this reveal is going to spread across a couple different posts. Before we get to the (shocking) before and afters, I wanted to take you down memory lane for a bit.

So a little backstory about our house (which you can read more about here), it was built in 1930 and the kitchen hasn't been updated since probably the late 40s / early 50s. There have been two official owners before us: the original owners who lived here until 2008 (the last 20-30 years of them owning it their kids used it as a rental property after their parents were gone), and then the person we bought it from who had also been using it as a rental. It's actually really cool that the homeowner history is so short because we were able to learn a lot about the original owners. The ex-husband of the woman we bought the house from actually lives across the street from us so we were able to get the scoop! San Antonio can be SUCH a small town. 

The husband was a carpenter and built all of the kitchen cabinets. However, he and his wife must have been short because the counters were pretty low, the toe kicks were almost non existent, and the upper cabinets came down really low. But because it was a custom kitchen, it came with lots of really cool storage features for its time.

IMG_9335.JPG

See how low the upper cabinets come down? The countertops are only about 18" deep (standard is 24") so they are literally in your face if you are trying to use the counters as prep space when cooking. The wood countertop on the opposite side is only 13" deep. So strange.

IMG_9339.jpg

As you can see we were not hurting for storage. However we seriously never opened those top cabinets until demo day. I was so afraid of what we would find inside ha. The entire wall of cabinets just felt so visually heavy and covered up so much of the window with shadows. 

The original recess for the fridge was clearly for a much smaller 50s refrigerator. Which we thought about just getting a cute little Smeg fridge which would fit perfectly. The previous owner left an apartment sized fridge which stuck out about 6" into the walkway. And broke about two weeks after we moved in. 

IMG_9340.jpg

The oven wall had ample storage with built in dividers for cookie sheets. However while the stove was modern-ish, the oven was very vintage. Neither of us had seen an oven like this. It was about 20" wide (it literally wouldn't even fit a cookie sheet or a turkey). And we had no idea if it worked or not. With it being gas, we didn't even want to try. So we knew this side would have to be renovated very soon.

IMG_9337.JPG

Why yes that IS a door to the master bedroom. Why you ask? We have no freaking clue. Our bedroom came with a door from the hallway, a door to the second bedroom, and a door to the kitchen. Oh and two closet doors. We knew that we wanted to close that in ASAP and start to rework the layout of the kitchen. 

IMG_9336.jpg

This is a view from the laundry room looking back toward the kitchen to help get your bearings. Look at how far that fridge sticks out!

IMG_9346.JPG

When we had the kitchen and laundry room floor replaced before moving in (which you can read about here and then about how we cleaned it here) we took this as an opportunity to also have the oven / stove millwork removed and the door to our bedroom closed in.

IMG_9540.jpeg
IMG_9536.jpeg
IMG_9537.jpeg
IMG_9557.jpeg

We made it work this way for three (!!) years. There wasn't a dishwasher so everything had to be washed by hand. The countertops were 2x2 ceramic tile which were impossible to clean. The wood countertop on the opposite side had paint peeling up which was even more impossible to clean. 

IMG_8362.jpg

We replaced the broken fridge and used its nook for storage. We did the best with what we had, until we could save up enough money for the full renovation.

Here are some photos of the custom features. Which honestly would have been really cool if they were new and clean, but they were filthy with decades of grime and I feared putting our clean dishes in them ha. Can we also talk about how intense these hinges are?

IMG_8355.jpg
IMG_8356.jpg

The top drawers all had dividers for silverware, and then pull out boards which I originally thought were cutting boards, but then saw on an episode of Leave it to Beaver that they were actually pull out surfaces to mix things and have more prep space. Fancy!

IMG_8357.jpg

None of the cabinets had backs so there were always bugs coming in from outside through the (many) cracks which just totally grossed us out. Most of the magnet closures were broken so the doors just stayed open all the time. This was a very classy joint.

The upper shelves on the opposite side were kind of cool, but the dimensions made them very tricky. They were about 6" deep and 9" tall so they didn't hold much other than glasses and bowls.

After demoing the original stove/oven wall we bought a new freestanding oven to match our new fridge and configured the appliances like this, which wasn't ideal but it worked for the time being. 

You can really see just how shallow those lower cabinets are, look how much the fridge sticks out. 

Fast forward to the summer of 2017 when we decided to have our foundation replaced. They ended up cranking up our house 7" which is why you'll see a ton of cracks in the walls in some of these photos. We had left the house one morning while they were working because it was so loud and freaking Geoffrey out, and when we came back the upper shelves next to the fridge were literally hanging off the wall (with everything still attached ha!) So we immediately took the shelving down (which by the way was hanging on by one screw and about 40 years worth of paint) and knew it was time to renovate the kitchen. 

IMG_8369.jpg

Stay tuned for Part II of our kitchen renovation saga where I'll share the design plans and inspiration for our new kitchen.