made X modern

Your Modern Baby: That's Right.

MotherhoodCatharine KlepacComment
File_000-1.jpg

Well I haven't posted much (or like at all) these days, but we have just been so so busy with house projects, me closing my Etsy shop, client projects, oh and creating a tiny human.

Which I'm sure a lot of you already knew about if you follow us on social media. And as I mentioned in my latest Instagram post, this was a much anticipated and longed for baby. We are just beyond thrilled to finally share our news, and we promise this won't turn into a baby blog, but there will be a few posts here and there and our lives start to shift in priorities. 

Side note: my sweet friend Adrienne from college knitted this adorable hat and mittens, go here to see more of her work she is seriously a knitting wizard.

How To: Modern Gallery Wall

DIYCatharine KlepacComment

After receiving several questions and sweet comments about our gallery wall, I figured that I should share a little tutorial on how my favorite gallery wall to date, came to be.

Our dining room and living room share a long wall that needed some sort of division. I wanted to break up each room with my art selections, while still allowing for the two rooms to look cohesive. I knew that I wanted a large single piece over the sofa, which meant that I would need something a little different (but still large in scale) to balance this out on the other end of the wall. The solution: a gallery wall. I had toyed with a couple of different options before landing on what it is now.

My friend Lauren over at Copper+Walnut had posted her freshly hung gallery wall on Instagram, and I knew that I wanted something similar for our dining room. I had about a 6 foot wide space to work with, so I sketched out a few ideas, and ended up landing on this:

IMG_6362.JPG

I ran over to Ikea while visiting Derek's parents and picked up twelve 16" x 20" Ribba frames in black. Which was a feat in itself because that Ikea (Houston) doesn't let you take your shopping cart to your car so you have to carry everything in your blue bags. And 12 large Ribba frames was a bit of a workout. 

You should know that although Ikea markets these frames as a true 16"x20", they are actually 15-3/4" x 19-3/4". Because. Sweden. Which I didn't realize at the time so I had a bit of trimming to do, but we'll get to that later.

I decided to print my photos as 8x10's which let my frames be more mat heavy and created a bit of a minimalist approach to my gallery wall. This allowed me to highlight each photo individually in a smaller format, rather than keeping them large and busy. The Ribba frames come standard with a 11" x 15" mat opening so I ordered custom mats from Matboard & More

I went through their zillions of options (seriously, you can get any type of mat there) and set the overall dimension to 16"x20" (see warning above) and the opening to 7-7/8" x 9-7/8". I did this so that the mat slightly covered all sides of the 8x10 photos by 1/8". I could have made this dimension a little larger, but I wanted to see as much of the photo as possible. While my frames would be hung vertically, I wanted each framed photo to have a bit of a museum quality so I also chose to have each opening placed horizontally on a vertical mat and offset the opening to the upper 1/3 of the overall mat (also known as Top Center on their website).

They let you set the dimensions as precise as 1/8" so really the options are endless. Ideally I should have ordered my outer size in 15-3/4" x 19-3/4" and I wouldn't have had to trim off 1/8" off each side of my mats when they arrived. Which if you've ever cut mats, it's pretty tough. 12 mats x 4 sides = 48 total cuts. #math 

When it came time to hang all of my frames I took the overall dimension which was 64" (16" wide frames x 4 frames) and then knew I was going to space everything 1" apart, so I added 3" to that width as there would be 3 spaces between the 4 columns of frames. Then I centered the entire dimension within the space and lined the top row up with the door frame to create a nice clean line visually, and worked my way down the wall. I made templates for each frame using the faux photo included with the frames because it was the exact size of my frames (minus an 1/2" on each side where the frame would be) and with a little bit of math, I placed each template so that it would end up having each frame 1" apart between each column and row of frames. I marked on each template where the hanging wire sat so that I knew exactly where to place each nail without having to make a bunch of random holes in the wall.

With each frame at $9.99 each, and the custom mats at $4.00 each the overall cost for this quick and easy project was about $160. It's such a fun conversation piece when we have guests over, especially with the photos from when we were little. Hello cowlick (this is why I can't have bangs). We choose photos that varied in composition, and I arranged them so that there weren't a bunch with similar scales right next to each other, or three Geoffreys in a row. This really helped the overall gallery feel balanced. 

My parents loved our gallery wall so much that they ended up making a similar one for their front entry and had the mats ordered with the right outer size so their gallery wall took half the time.

Playing Tourist: Marfa, TX

TravelCatharine KlepacComment

If I had a dime for every time someone asked me "what should we do in Marfa?", well. I'd have a lot of dimes. I finally put together the ultimate list of what to eat, where to sleep, and things to see while visiting our most treasured town in Texas. If you haven't made the 6 hour* journey, you definitely should. 

* I can say 6 hours because unless you live in West Texas, Marfa is literally at least 6 hours away from absolutely anything. But the drive is beautiful. 

What can I say about Marfa? It's an anomaly. I don't know how else to explain it. It's a little blip of funky art, hand crafted goods, the coolest people you'll ever meet, and tumbleweeds. The main strip (San Antonio Street. Imagine that.) is only about 1 mile, so everything is completely walkable. You will go from gallery, to shop, to restaurant and run into the same people. Every little rundown building or house is actually a hip art gallery or soap shop. There is so much to do, but at the same time, you can see everything there is to see in a long weekend. These are our top recommendations. Which pretty much cover all of the sights of this teeny town in West Texas.

- S T A Y -

El Cosmico - This is Glamping. If you don't like to go outside to use the bathroom in an open air facility with strangers, then this is probably not your bag. Especially if it's cold out. El Cosmico has several options for shelter: safari tents, tee pees, yurts, trailers, and self camping. Everything books up really fast so if you want to stay in a tee pee (which I highly recommend) you need to book early. If you are completely against using a communal bathroom there are a few trailers that have sinks and toilets and outdoor showers. But come on. There is a fire pit in your tee pee. It's a tee pee. There is also a killer gift shop, outdoor kitchen, hammock grove, and wood-fired hot tubs.

Thunderbird - This is your typical motel with a pool and Acapulco chairs that was recently renovated by Lake Flato. Each room has a record player and typewriter for you to write your memoir or screenplay, or some other hipster activity that requires a typewriter. The gift shop is the best part. They also have bikes that you can rent which makes getting around a lot easier.

Hotel St. George - This was under construction last winter when we were in Marfa, but we could tell by the marble mosaic exterior that it would be a showstopper. Now that it has officially opened we can't wait to stay there for a night. Texas Architect did a really great write up on it last month if you want to check it out. This hotel is a lot more high end than the other options in town, and you don't have to pee outside. So there's that.

Airbnb - There are so many cool houses throughout the town that rent out their spaces for Marfa tourists. This is a great option if you are traveling in a group. If you want to truly live like a local, this is the way to go.


- E A T -


Food Shark – Probably one of the best food trucks I've ever had. I mean Beyonce has eaten here so. Also, the Marfalafel is the best falafel of my entire life! And as a former vegetarian, I've had a lot of falafel. Besides that the menu constantly rotates, so you never know what to expect.

Frama – It's Marfa spelled backwards, get it? If you've ever wanted your laundromat to also serve ice cream and coffee, then look no further. 

Squeeze - The perfect breakfast destination. Their menu is full of juices, coffees, smoothies, and light breakfast items. They also have lunch, but I'd hit them up for breakfast if you have to choose.

Do Your Thing - This is an excellent place to grab a cup of coffee and a quick bite before heading out to explore. You can also buy some cool pottery from local artisans. 

Pizza Foundation – So the original location is permanently closed (pictured), but the pizza is still the same. I can honestly say this is some of the best pizza I've ever had. In America. Be sure to call ahead before you journey over to their new location off the beaten path, as they tend to be randomly closed.

Cochineal – Be ready to drop an entire Benjamin on your meal. This is the fanciest place to eat in Marfa. You should probably dress nice, or they'll seat you by the kitchen instead of the super cool main dining area. The drinks are perfectly crafted, the food is flawless, and the wait staff is annoyed to be serving anyone. It's Marfa at it's finest.
 

- D O -

Chinati Foundation – There are several large buildings planted in the middle of a field filled with art and Donald Judd's sculptures. Pro tip: the concrete sculptures surrounding the galleries are free to look at (pose inside), but the actual galleries are about $10 per person. They close early though so be sure to do this early in the day.

Ballroom Marfa – This is a rotating art gallery. There is always something fun on exhibit to ponder at.

Marfa Contemporary – This used to be in the back of Pizza Foundation, so you could peruse it while you waiting on your pizza. Now it's just a gallery, but some of the coolest pieces are there. The first time we went there were floor to ceiling sculptures of laser cut plastic laminate. I know right?

Mystery Lights – Once it gets dark (regardless of the weather) drive out to the observatory and look for the eerie Mystery Lights along the horizon. It's a pretty creepy observatory, especially in the dead of winter when we first visited. We were literally the only people there and you could hear a pin drop. It was so dark we couldn't even see each other. But totally worth it!

Prada Marfa – So this isn't actually IN Marfa. It’s about an hour away in Valentine, TX. It's definitely worth the drive to see the random prada store in the middle of the desert. Note that this isn't an actual Prada store. It's an art installation where there is only one of each shoe, the purses have holes in the bottoms of them, and the back of the "store" is covered in graffiti. It makes for fun photo ops too.

- S H O P -

Cobra Rock Boot Company - You can watch these cobblers hand make the most beautiful leather boots you've ever seen. They have some clothes and accessories for sale too.

Wrong - This is a store full of quirky home decor and prints. It's always rotating, but they are sure to have gold guns and gold security cameras. I know. Just go see for yourself.

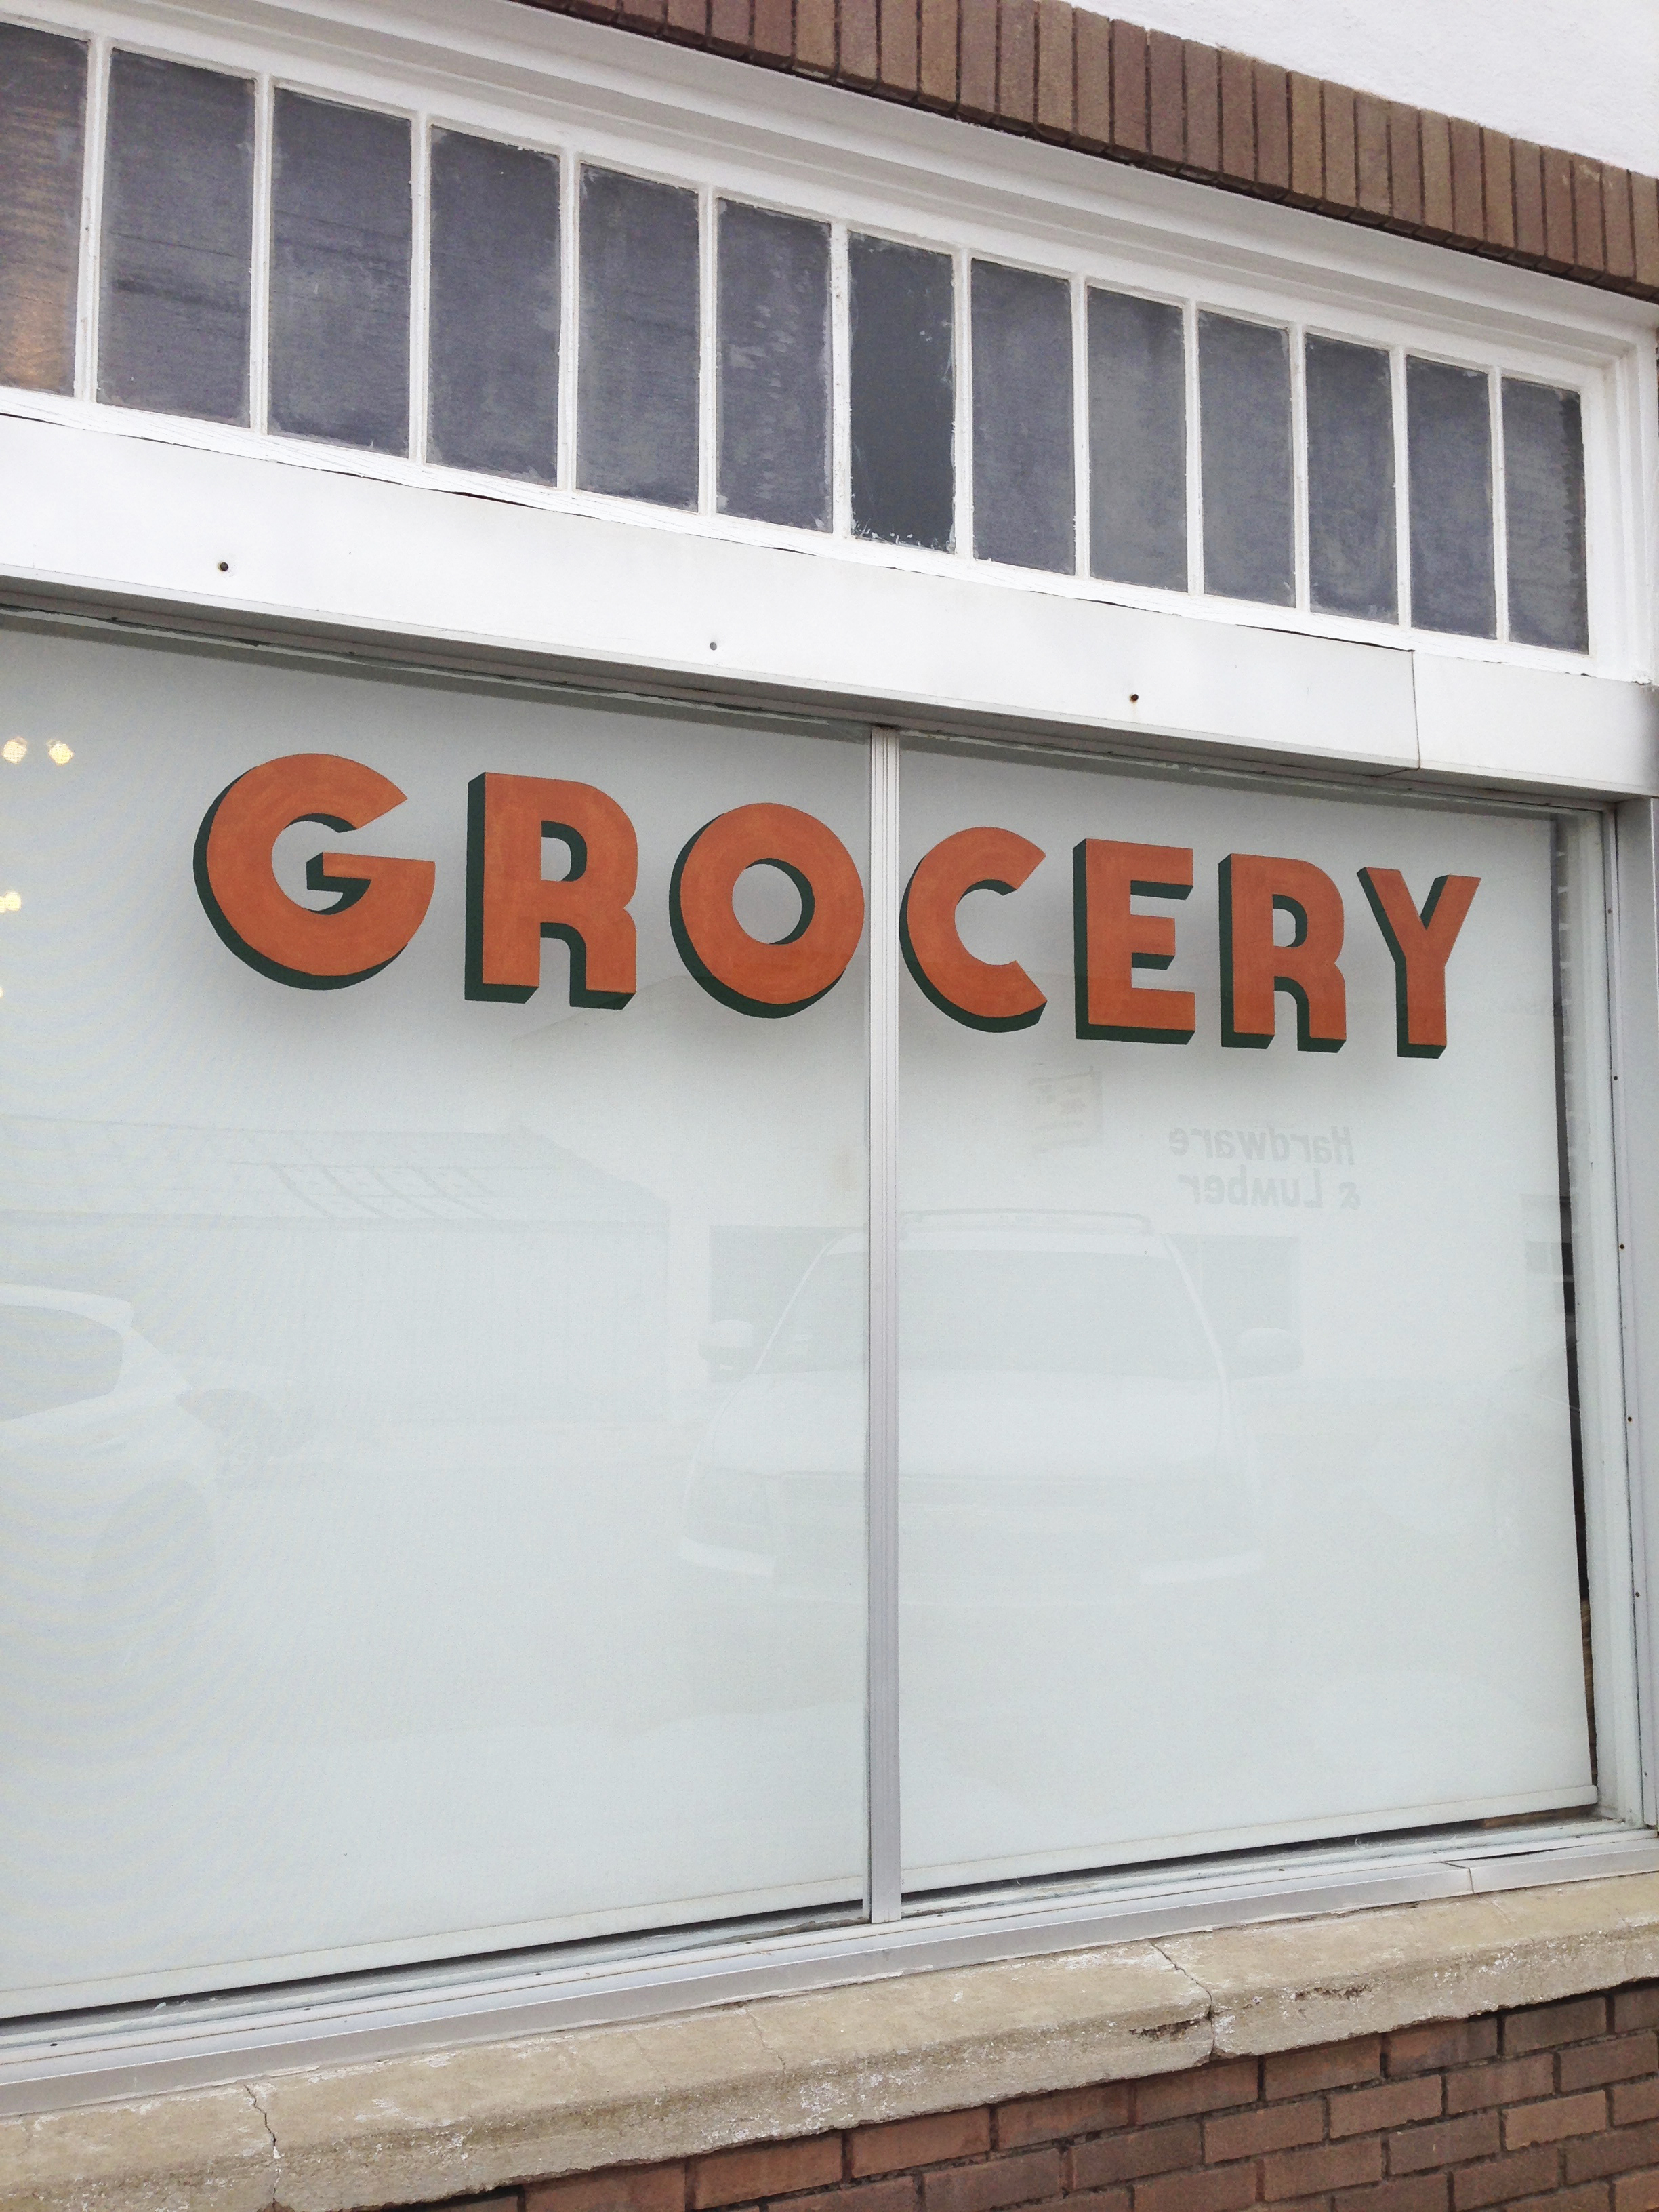
The Get Go - Probably the most curated and perfect grocery store I've ever been to. It's like a mini Whole Foods, but cheaper. Artisan soaps, organic lip balm, a wide assortment of local beers, and the freshest produce you've ever seen. All packed into a tiny store the size of a gas station convenience store. We usually stop here on the way out of town to get some provisions for the ride home.

Marfa Book Co. – Home of the best and rarest books found in real life (I see you Amazon). Especially if you are an artist or designer. Also, they have Marcel the shop dog who will scream at you until you rub his belly.

Cast + Crew - The coolest home decor and accessories.

Marfa Brands – Home of the best soap in the world, made in (you guessed it) Marfa.

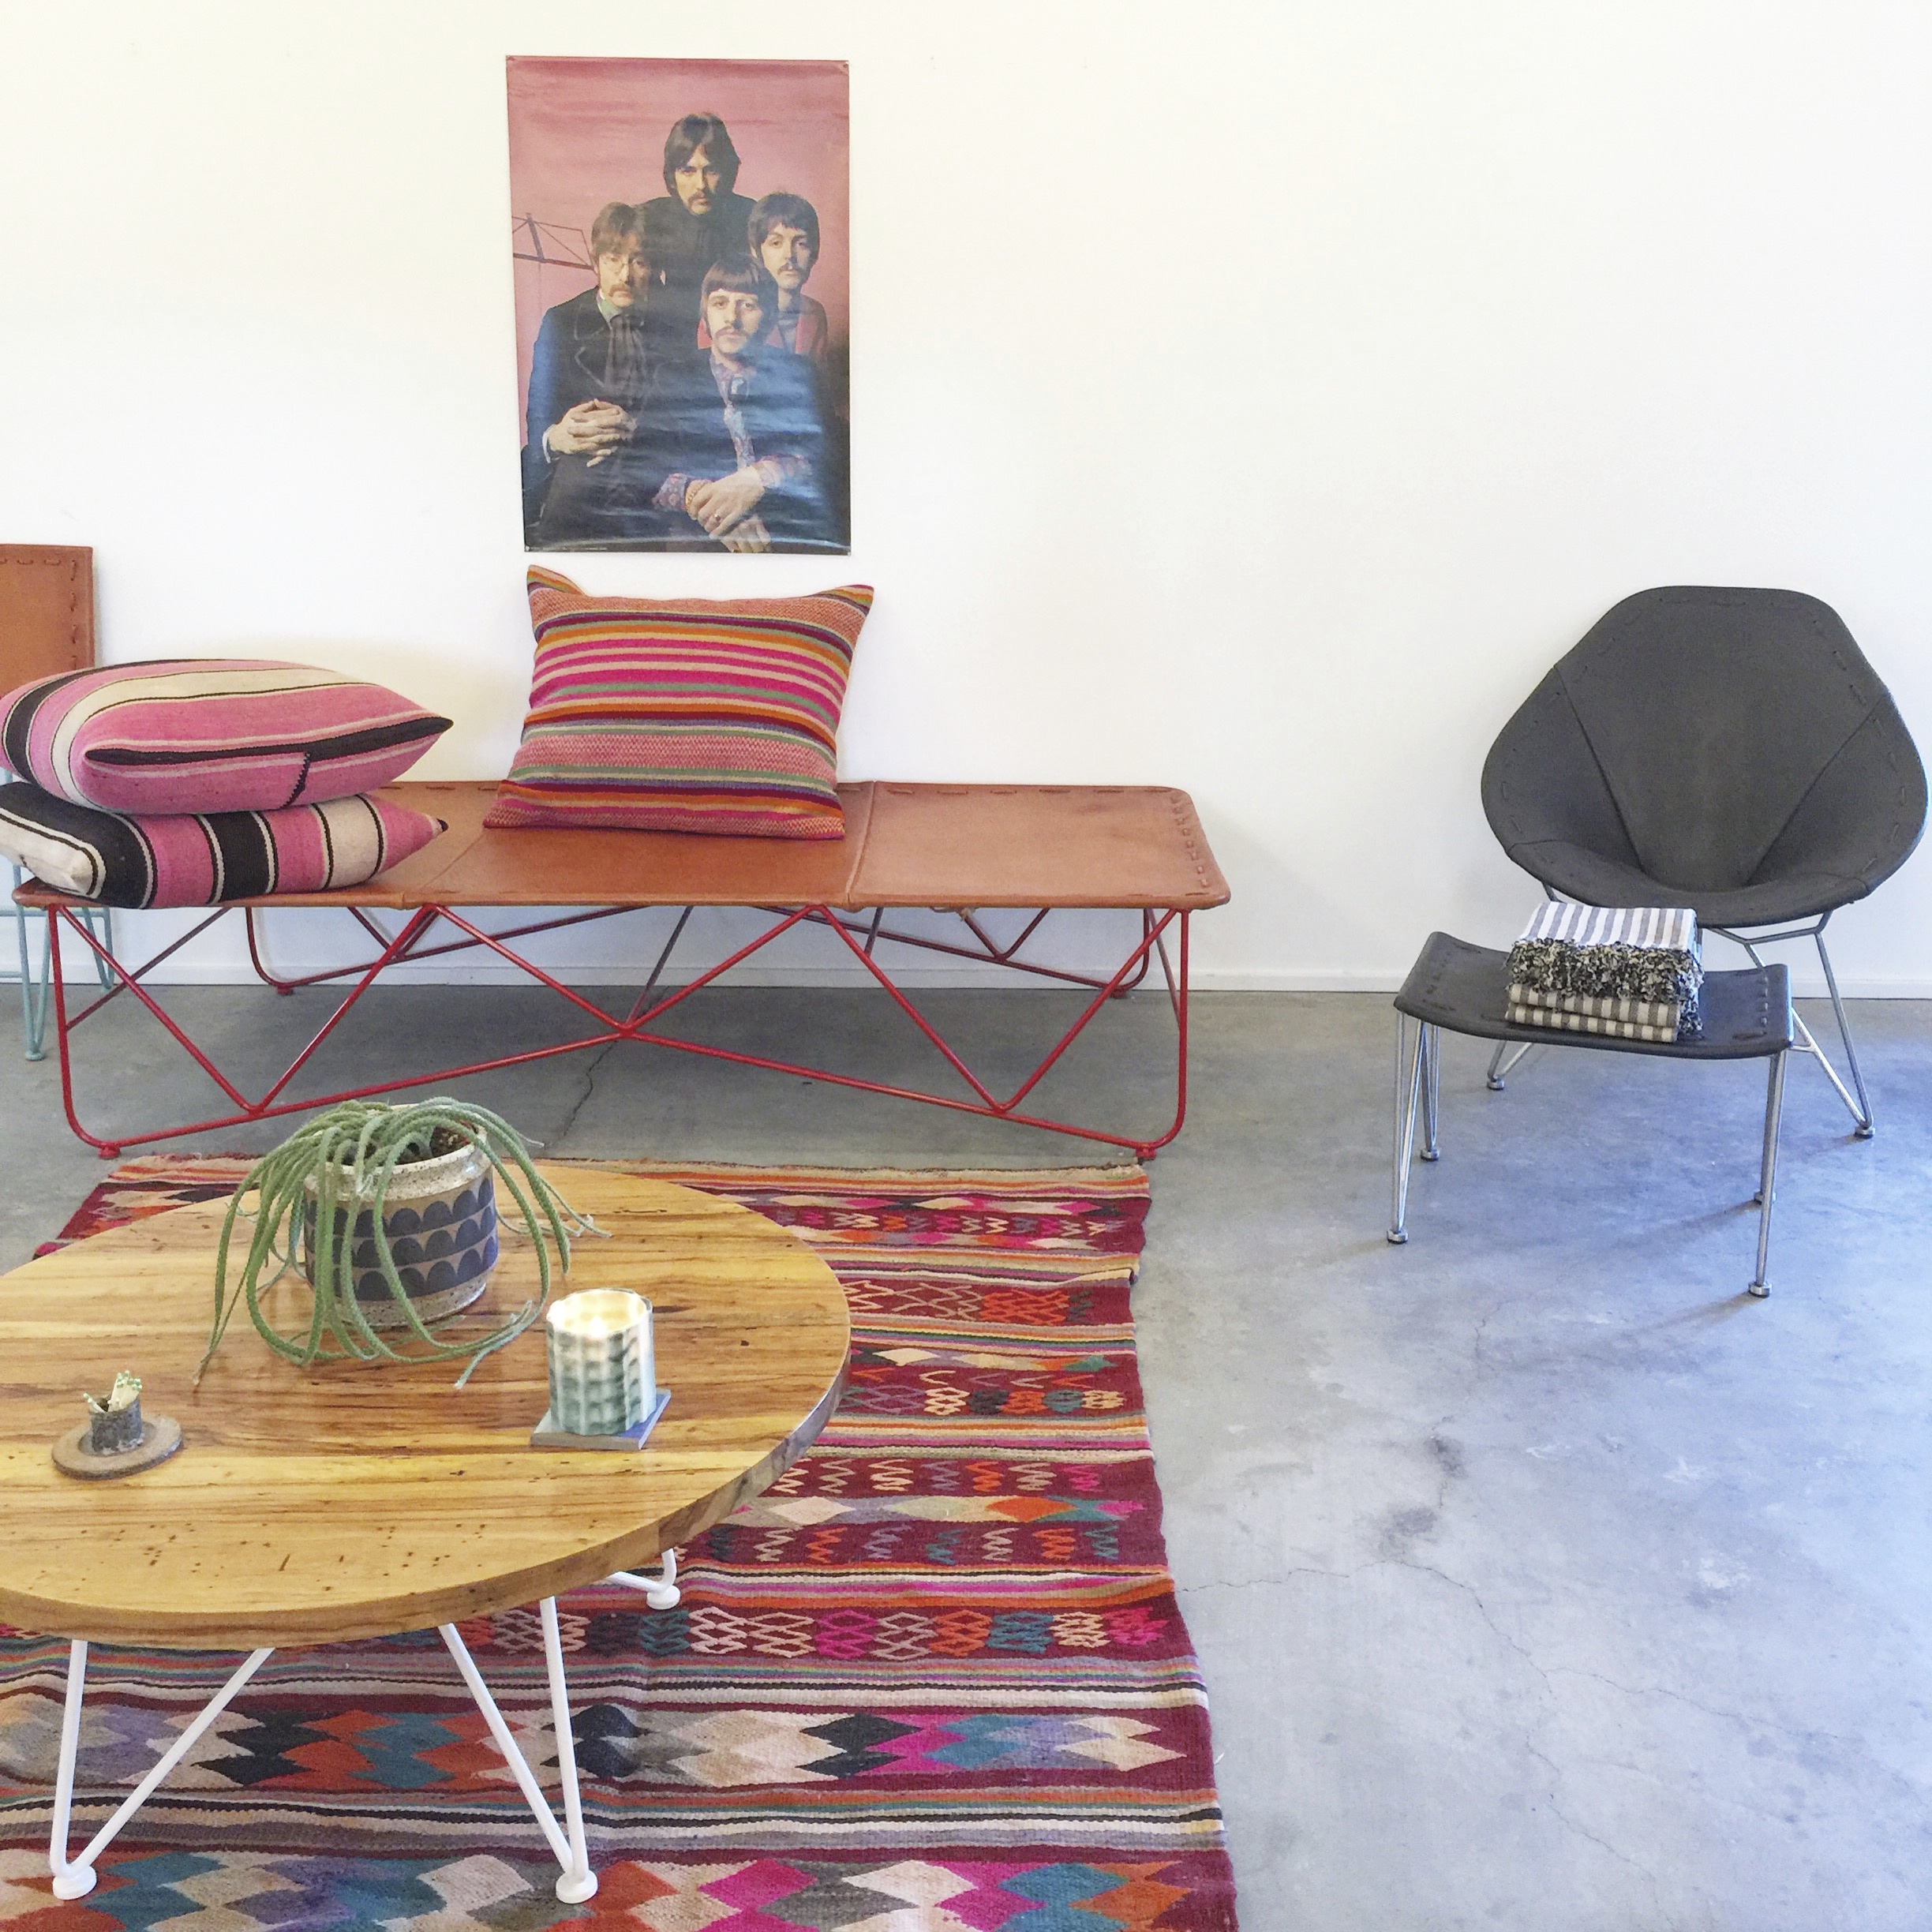
Garza Marfa – Our heaven. Hand crafted furniture and textiles by husband and wife designers. We add to our Garza Marfa collection every time we visit. Also, Constance is just a gem to talk to and pick her brain. 

Freda - Beautiful handcrafted jewelry, clothing, and home decor.

Dosa | Tienda M - Minimalist pottery, home decor, jewelry, accessories. This store is everything.

Marfa Lights & Lamps - We stumbled upon this store (and home) by accident on our last visit. This guy is a wealth of knowledge and had thousands of mid-century and Art Deco lamps for sale. A lamp hoarder if you will. Also he has about 27 rescue dogs running around the shop. So if you're not into lamps. You can just play with his dogs instead.
 

- T I P S -

  • It's the desert so you can imagine how windy and cold it can get, especially at night. The first year when we went in December it dipped into the 20s at night, but last year it only got down to 40. So bring layers!
  • Rent a bike. The town is totally walkable, but a bike is a great way to really see the town. Plus it's cute.
  • Again you are in the desert. Meaning there is negative cell reception in the area, so bring a map! You know, like a paper map. From the olden days. El Cosmico provides paper maps of the town, and trust me it's a huge help when you're trying to find secret spots. Most places have wifi, but better safe than sorry.
  • It's a small town so a lot of times a place will randomly be closed, but there will usually be a sign on the door to call that number to come and unlock the store. Always call the number. They are honestly probably next door and you don't want to miss out on whatever goods they have for sale.
  • You will stick out like a sore thumb to the locals. They can spot you a mile away. Just be cool and try to blend, you are overtaking their town that they grew up in. So leave it as you found it.


What's Better Than an Accordion Door? Anything.

DIYCatharine KlepacComment

Considering we've made several updates on the exterior of our little Bungalow (read more about them here, here, here, and here), I thought it was about high time I shared some of the updates we've been making inside. Just to jog your memory a bit, let's take a look at how you all remember the laundry room looking. Are you sitting down? And not eating? You probably should have an empty stomach for this one.

Look at everything this room has to offer! We have blood (?) stained chevron carpet. It has a bit of a Missoni feel, don't you think? We also have burglar bars and a cat tapestry on our back door. I so wish that I had a photo of the front of the cat tapestry. Let's just say that it's needlepoint and has two ginger cats on it. One of a kind. We also have an even more unique textured vinyl accordion door from the laundry room to our office.

Why? Because clearly with a 30" wide door opening, a 1970s vinyl accordion door was the only answer. On the other side of the room was a random hollow-core builder door (complete with gold hardware) that led to the master bedroom. On the other side of that room was ANOTHER accordion door. Needless to say we knew we'd be replacing 90% of the doors in our house so that they would all match the look and style of our home (and each other for that matter). 

 We immediately took both accordion doors down, and went doorless for a while. It was just that bad. We went to Home Depot and Lowes to price out what an traditional 5-panel craftsman style door would cost and it was a whopping $200 per door. Ouch. With 10 doors to replace in our house, that was out of the question.

We thought about refurbishing an old door from our local architectural salvage, but those were about the same price and needed a LOT of love. So Derek decided that he would rebuild all of our interior doors one by one. 

The two accordion doors were first on the list (since we were currently doorless). They are also they same size so that made things a little easier.

Note: This is not a traditional door making method, this is just what we did with what we had, and it still resulted in a strong solid core door that fit what we needed for this house.

Derek started with a sheet of 1/2" plywood to make up the middle layer of the door, that was cut down to size. This particular door was 80" x 31". He then used 1x4's for the overall frame of the door. Each piece was milled down to 1/2" so that with the trim, plywood, and other side of trim the total thickness came out to 1-1/2" (the standard thickness of interior doors). 

He then used wood glue and finishing nails to attach the trim to one side of the door. He used clamping cauls to keep everything tight so that it could dry overnight. He then repeated this process for the other side. 

He then repeated this same process for the rails which created the look of a traditional 5-panel door. Once the rail pieces dried, he repeated this for the opposite side as well.

Once all of the trim had cured, he went around all of the edges and filled in any gaps with wood filler, and sanded down any imperfections to create a nice smooth edge around the entire door.

After the door was complete, it was time for paint. Derek primed and painted the door, sanding in between each coat in order to get a nice smooth finish. He ended up doing three finish coats when all was said and done.

With the office already having 3 door swings into the space, we didn't want to add another one, and we also didn't want to block one of the closets when this door was open. We thought about installing a pocket door, but our pantries and other office closet (that room has three closets) made a pocket door impossible. So we decided that a barn door would be the perfect solution. It would be able to perfectly slide against the laundry room and fit nicely behind the backdoor when it was open. Barn door hardware can be pretty pricey so we were pretty excited when we found this set from Home Depot, and the installation was pretty straight forward. We also picked up a nice linear satin nickel pull to match the barn door hardware.

And now for a little before and after-ness. 

I am kicking myself for not taking a photo of the beautiful accordion door from the laundry room side when we did our final walkthrough, but you can pretty much use your imagination on how awful it was.

IMG_9342 (1).jpg

And no, our tile isn't dirty, read more about that fiasco here

Having a door there really makes the laundry room / breakfast nook feel like an actual room. Now we just have 9 more doors to make and hang! ;)

gray + navy = gravy

DIYCatharine KlepacComment

Now that we have the front yard landscaping, privacy fence, and hog panel gate out of the way there is only one thing left to do. Repaint the exterior of out little bungalow. Now don't get us wrong, we actually really liked the mint color, but the rust colored screens and railing weren't really working. And honestly, the mint had seen better days and was peeling up in several areas.

We knew that we wanted to go a lot darker, something really moody and modern that would be a nice contrast against our cedar fence. So after zillions of paint swatches, and taking our fan decks around town to color match some local shops that we really liked, we finally settled on the following colors. 

We both use Sherwin Williams on most of our projects at work (and with our trusty designer discount) using it at home was a no brainer. For all of the paint bases we used SW Duration Exterior paint in a semi-gloss finish, since it is known to hold up over the years against the weather and also fights off mold and mildew (and semi-gloss is great against rain and general cleaning). For the overall paint color we chose SW Sea Serpent which is sort of a dark grey / navy or GRAVY as I like to call it. For the trim we wanted a nice bright contrast so we we chose SW Extra White. For the porch ceiling we wanted to keep with the traditional style of our 1930 home and used SW Porch Ceiling Blue. Legend has it that this color keeps wasps from nesting. Derek had this porch ceiling color at his old King William house when we were dating and there were never any wasps, so here's hoping! For the door we wanted something fun and punchy and went with SW Funky Yellow.  

We had every intention of repainting the house ourselves, but the intense amount of prep work is what held us back for so long. There were a lot of areas on our clapboard siding that had rotted through and needed to be replaced. Several boards were warping due to water damage and the house shifting over the years. Old house probs.

With everything going on with my family and with us both working full time jobs, we knew we had to call in the professionals for this project. I know. it went against every bone in our bodies to not do this ourselves. But if we did attempt this on our own, we were doomed to face the next 12 weekends scraping and painting. And let's face it. It's over 100F out.  So after meeting with several different painters, we ended up going with FraVa Services. They were able to start within the same week and their team immediately got to work with the prep portion of the project. Lots of scraping, power washing, and caulking. We requested that they caulk in between each board because let's be honest, we have no idea when (if) that has ever happened. And we are slowly trying to seal up this house.

Disregard my poor sat on cactus. I bet he only did that once!

So. Much. Scraping.

Things like this were replaced. Lot's of bandaids on this house, let me tell ya!

Since FraVa was more of a general contractor than a painter, we also had them repair this big fat bandaid of a roof in our backyard. What in the world. Oh and more scraping.

We also had them replace the posts holding up our Leaning Tower of Pisa porch roof. 

We had them use a tinted primer since the color was going to be so dark, which was SW Exterior Latex Wood Primer. We requested that two coats of primer be used since there had been so much exposed wood after all of the scraping. 

After everything was primed twice, they started with the actual color. Oo la la!

Meanwhile, as the painters were doing their final touch ups, Derek was busy painting the front door SW Funky Yellow. He removed the hardware and carefully taped off the windows in the door, and used a foam roller, which only took two coats. 

Okay and now for the very best part. The before and afters!

Why yes, that IS our front porch separating from the house. More on that later. Back to the pretty afters.

We still need to repaint the back door, but we can't decide if it should also be SW Funky Yellow or stay white. 

Okay let's get one last look at the front. Ahhhhh SO much better right?

We plan to eventually replace the railing and columns because curly-q's just aren't us, but that will be much later on when it gets a little cooler out.