made X modern

paint

gray + navy = gravy

DIYCatharine KlepacComment

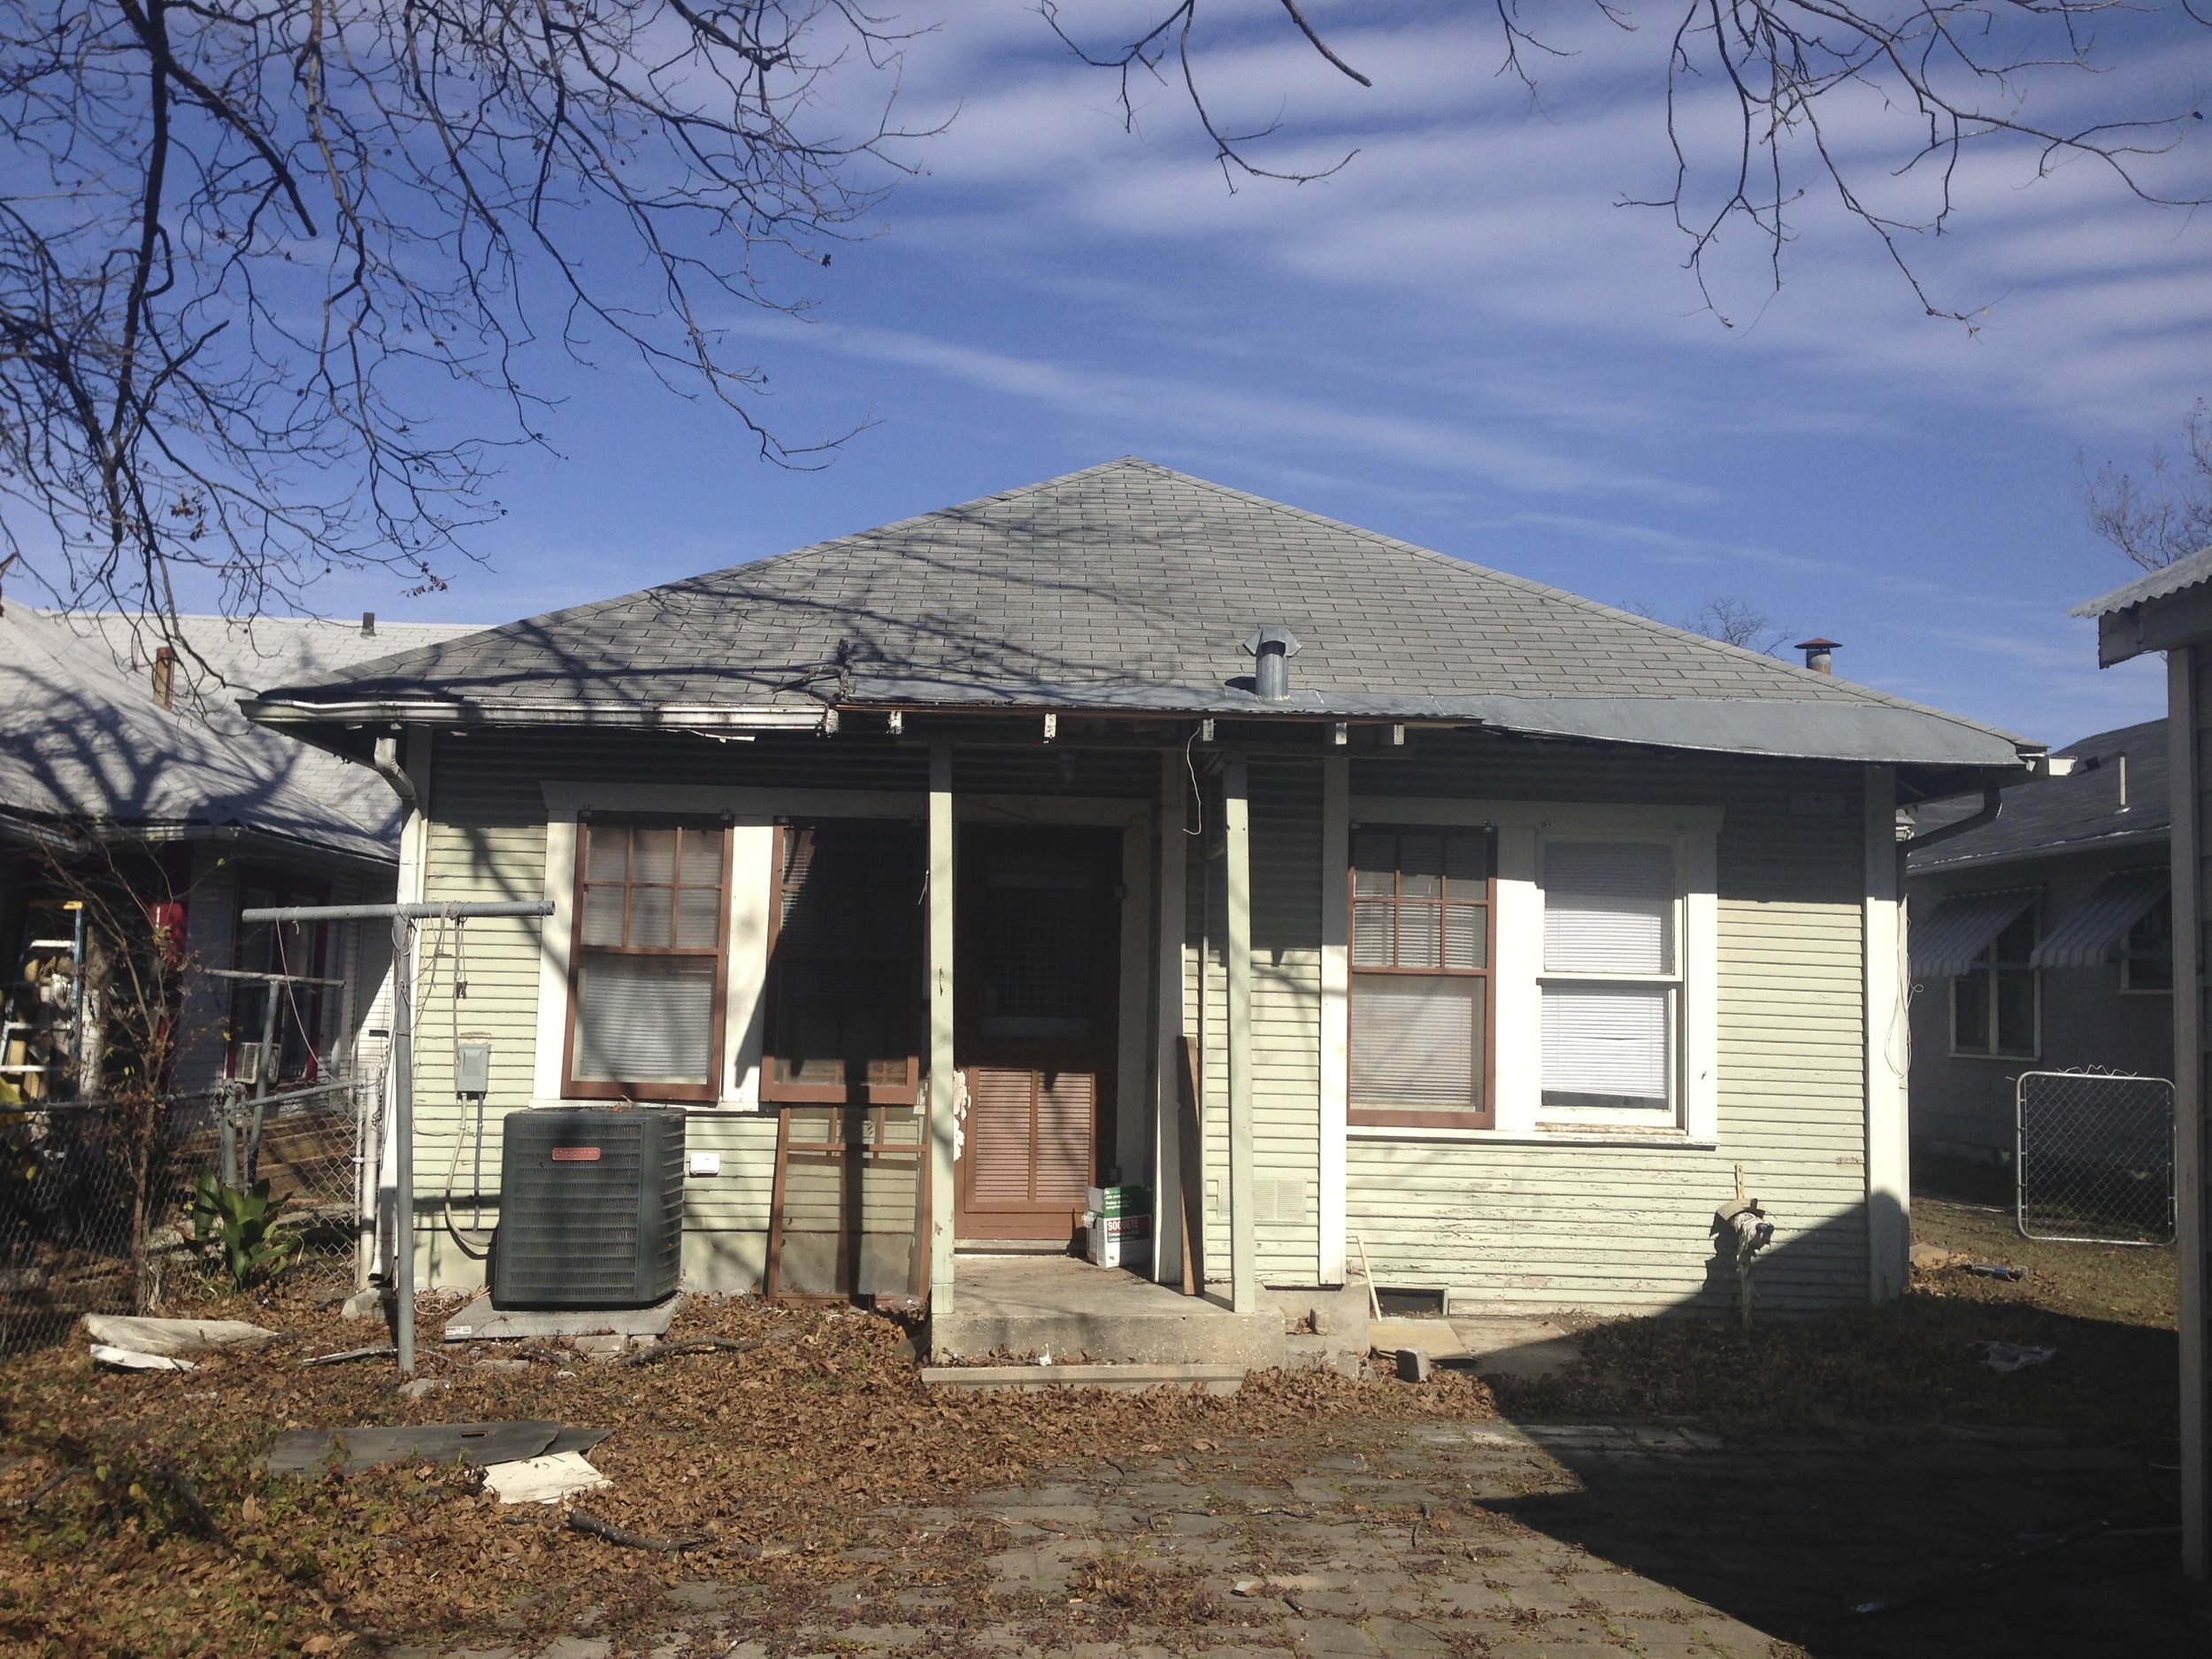
Now that we have the front yard landscaping, privacy fence, and hog panel gate out of the way there is only one thing left to do. Repaint the exterior of out little bungalow. Now don't get us wrong, we actually really liked the mint color, but the rust colored screens and railing weren't really working. And honestly, the mint had seen better days and was peeling up in several areas.

We knew that we wanted to go a lot darker, something really moody and modern that would be a nice contrast against our cedar fence. So after zillions of paint swatches, and taking our fan decks around town to color match some local shops that we really liked, we finally settled on the following colors. 

We both use Sherwin Williams on most of our projects at work (and with our trusty designer discount) using it at home was a no brainer. For all of the paint bases we used SW Duration Exterior paint in a semi-gloss finish, since it is known to hold up over the years against the weather and also fights off mold and mildew (and semi-gloss is great against rain and general cleaning). For the overall paint color we chose SW Sea Serpent which is sort of a dark grey / navy or GRAVY as I like to call it. For the trim we wanted a nice bright contrast so we we chose SW Extra White. For the porch ceiling we wanted to keep with the traditional style of our 1930 home and used SW Porch Ceiling Blue. Legend has it that this color keeps wasps from nesting. Derek had this porch ceiling color at his old King William house when we were dating and there were never any wasps, so here's hoping! For the door we wanted something fun and punchy and went with SW Funky Yellow.  

We had every intention of repainting the house ourselves, but the intense amount of prep work is what held us back for so long. There were a lot of areas on our clapboard siding that had rotted through and needed to be replaced. Several boards were warping due to water damage and the house shifting over the years. Old house probs.

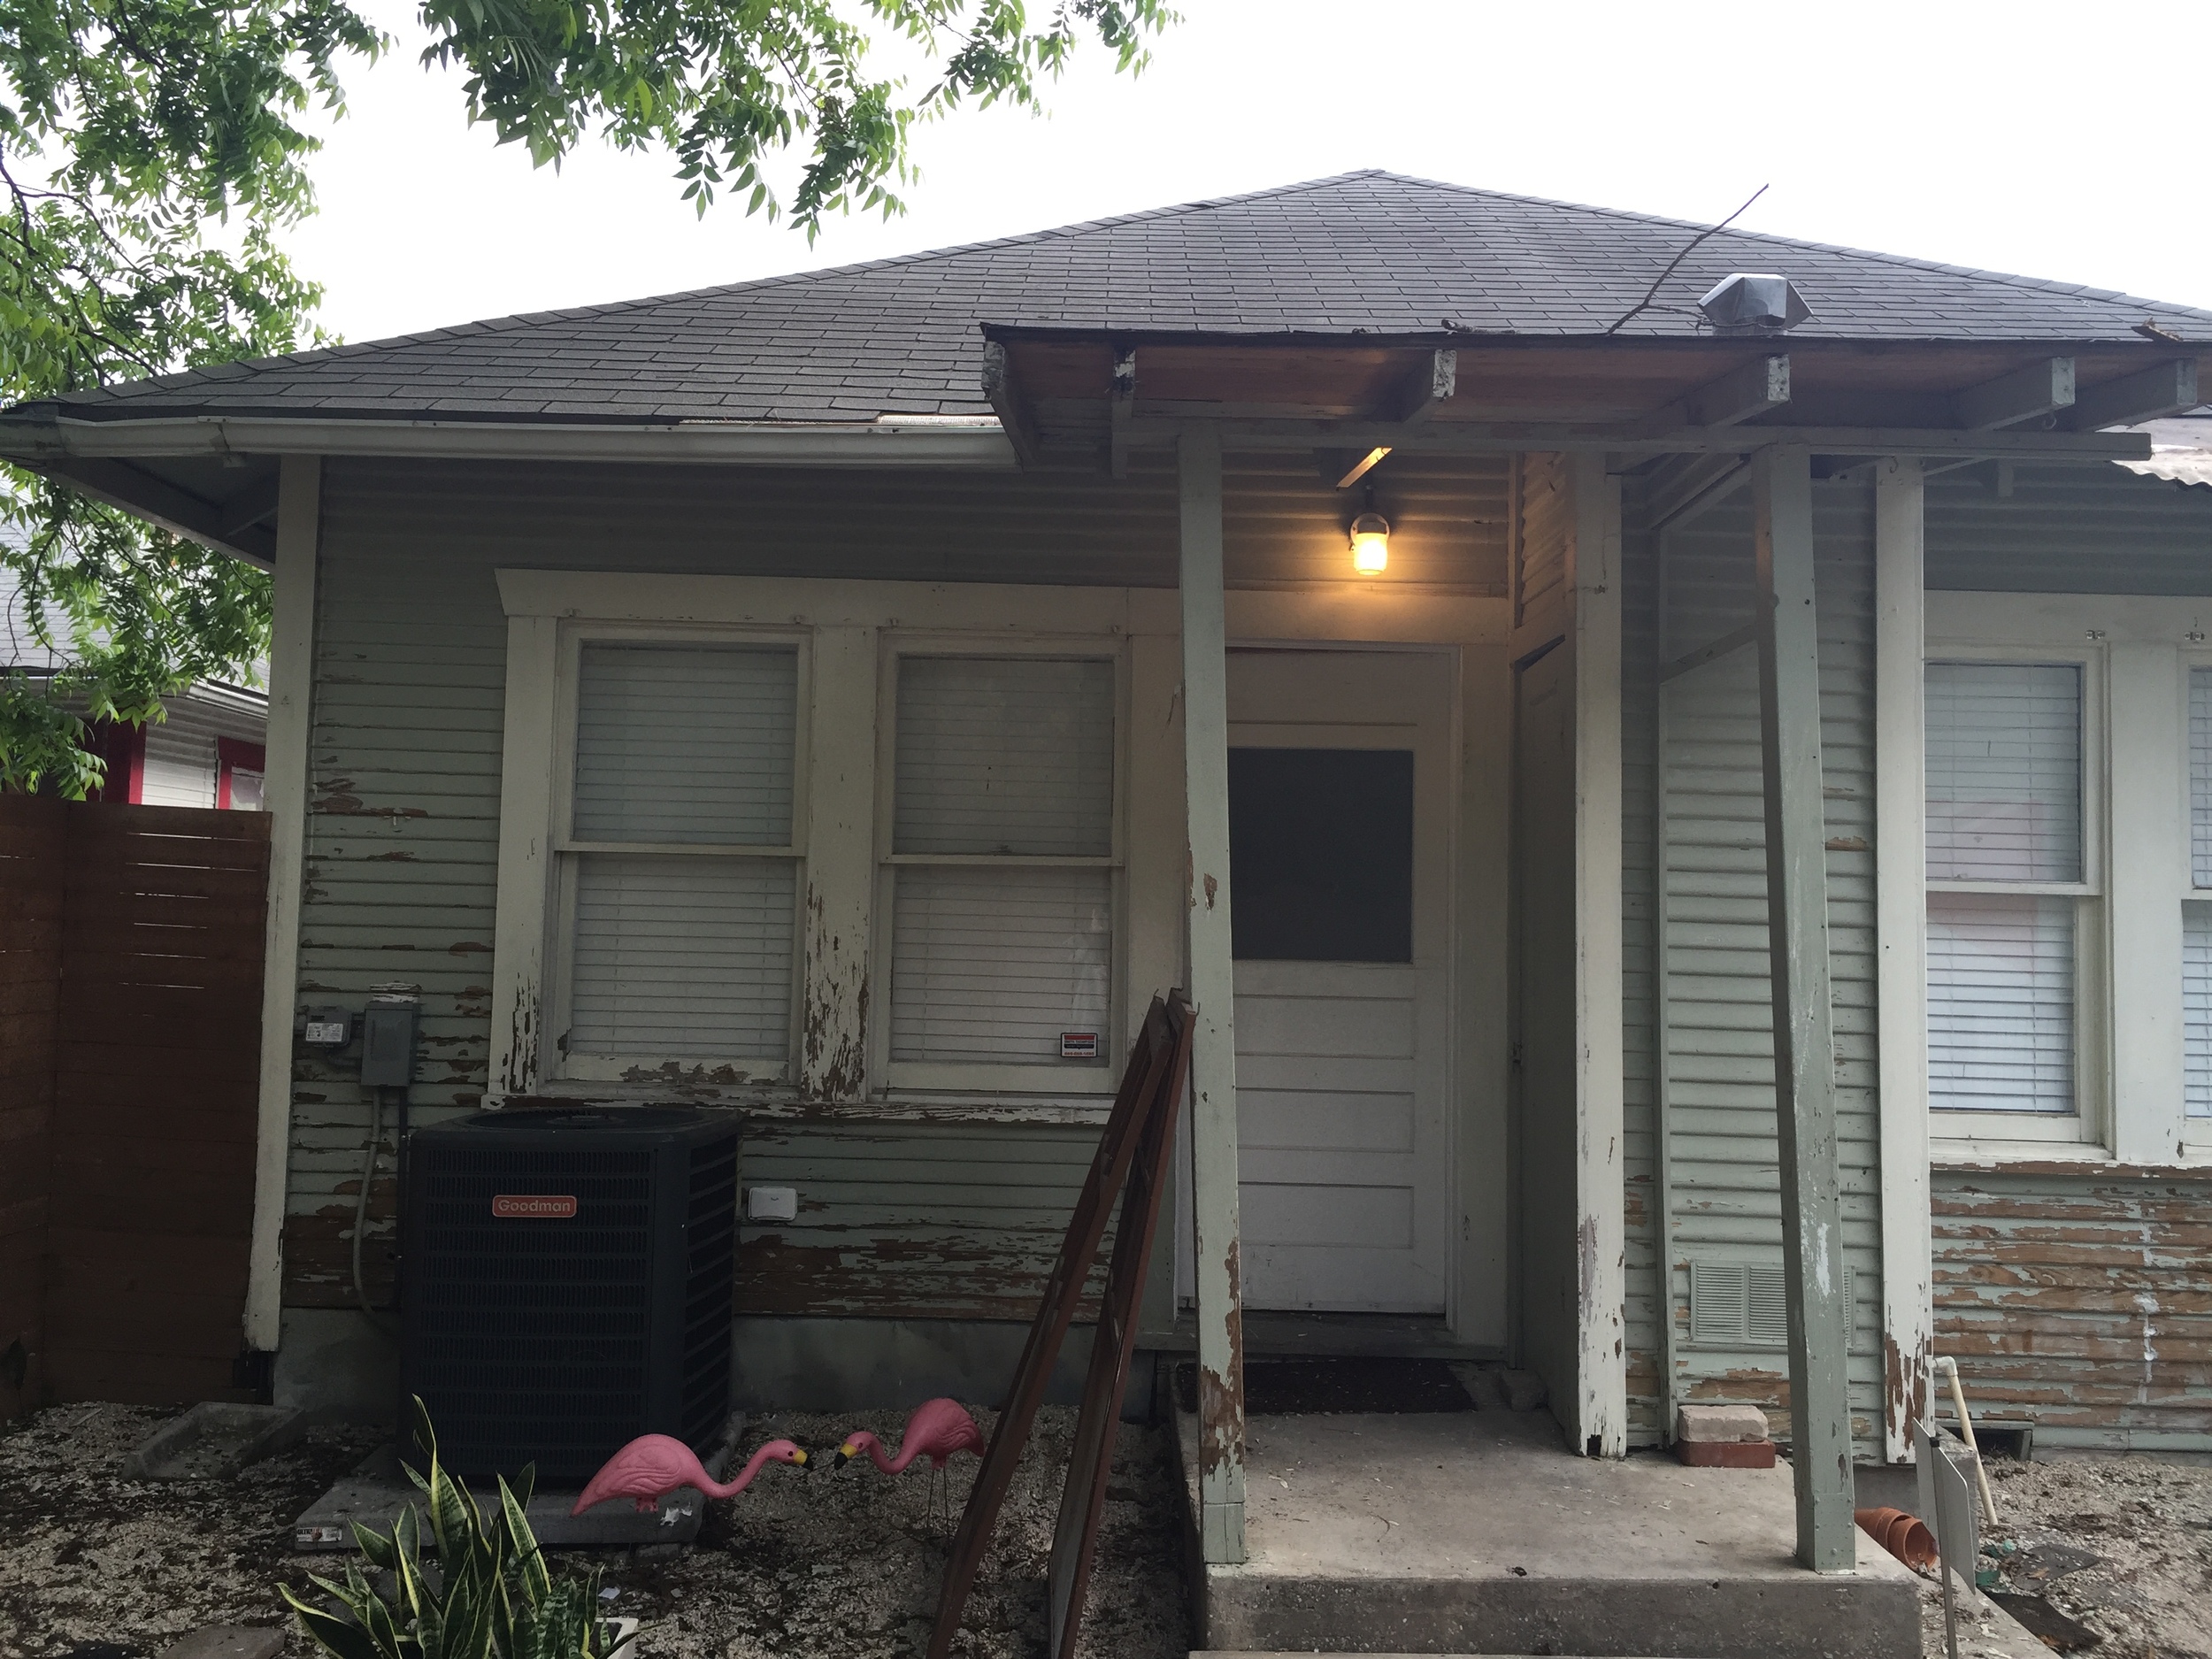
With everything going on with my family and with us both working full time jobs, we knew we had to call in the professionals for this project. I know. it went against every bone in our bodies to not do this ourselves. But if we did attempt this on our own, we were doomed to face the next 12 weekends scraping and painting. And let's face it. It's over 100F out.  So after meeting with several different painters, we ended up going with FraVa Services. They were able to start within the same week and their team immediately got to work with the prep portion of the project. Lots of scraping, power washing, and caulking. We requested that they caulk in between each board because let's be honest, we have no idea when (if) that has ever happened. And we are slowly trying to seal up this house.

Disregard my poor sat on cactus. I bet he only did that once!

So. Much. Scraping.

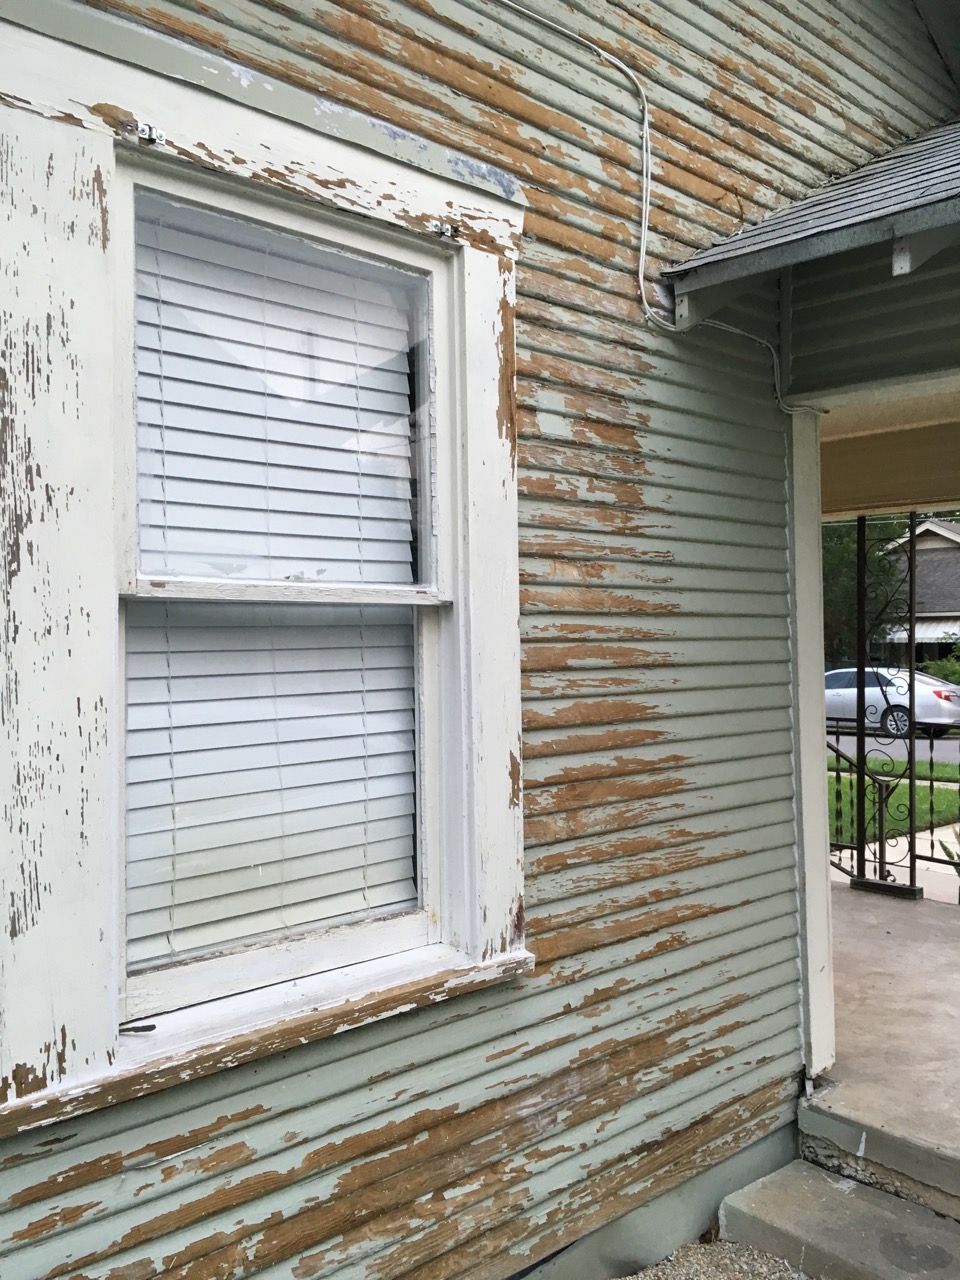
Things like this were replaced. Lot's of bandaids on this house, let me tell ya!

Since FraVa was more of a general contractor than a painter, we also had them repair this big fat bandaid of a roof in our backyard. What in the world. Oh and more scraping.

We also had them replace the posts holding up our Leaning Tower of Pisa porch roof. 

We had them use a tinted primer since the color was going to be so dark, which was SW Exterior Latex Wood Primer. We requested that two coats of primer be used since there had been so much exposed wood after all of the scraping. 

After everything was primed twice, they started with the actual color. Oo la la!

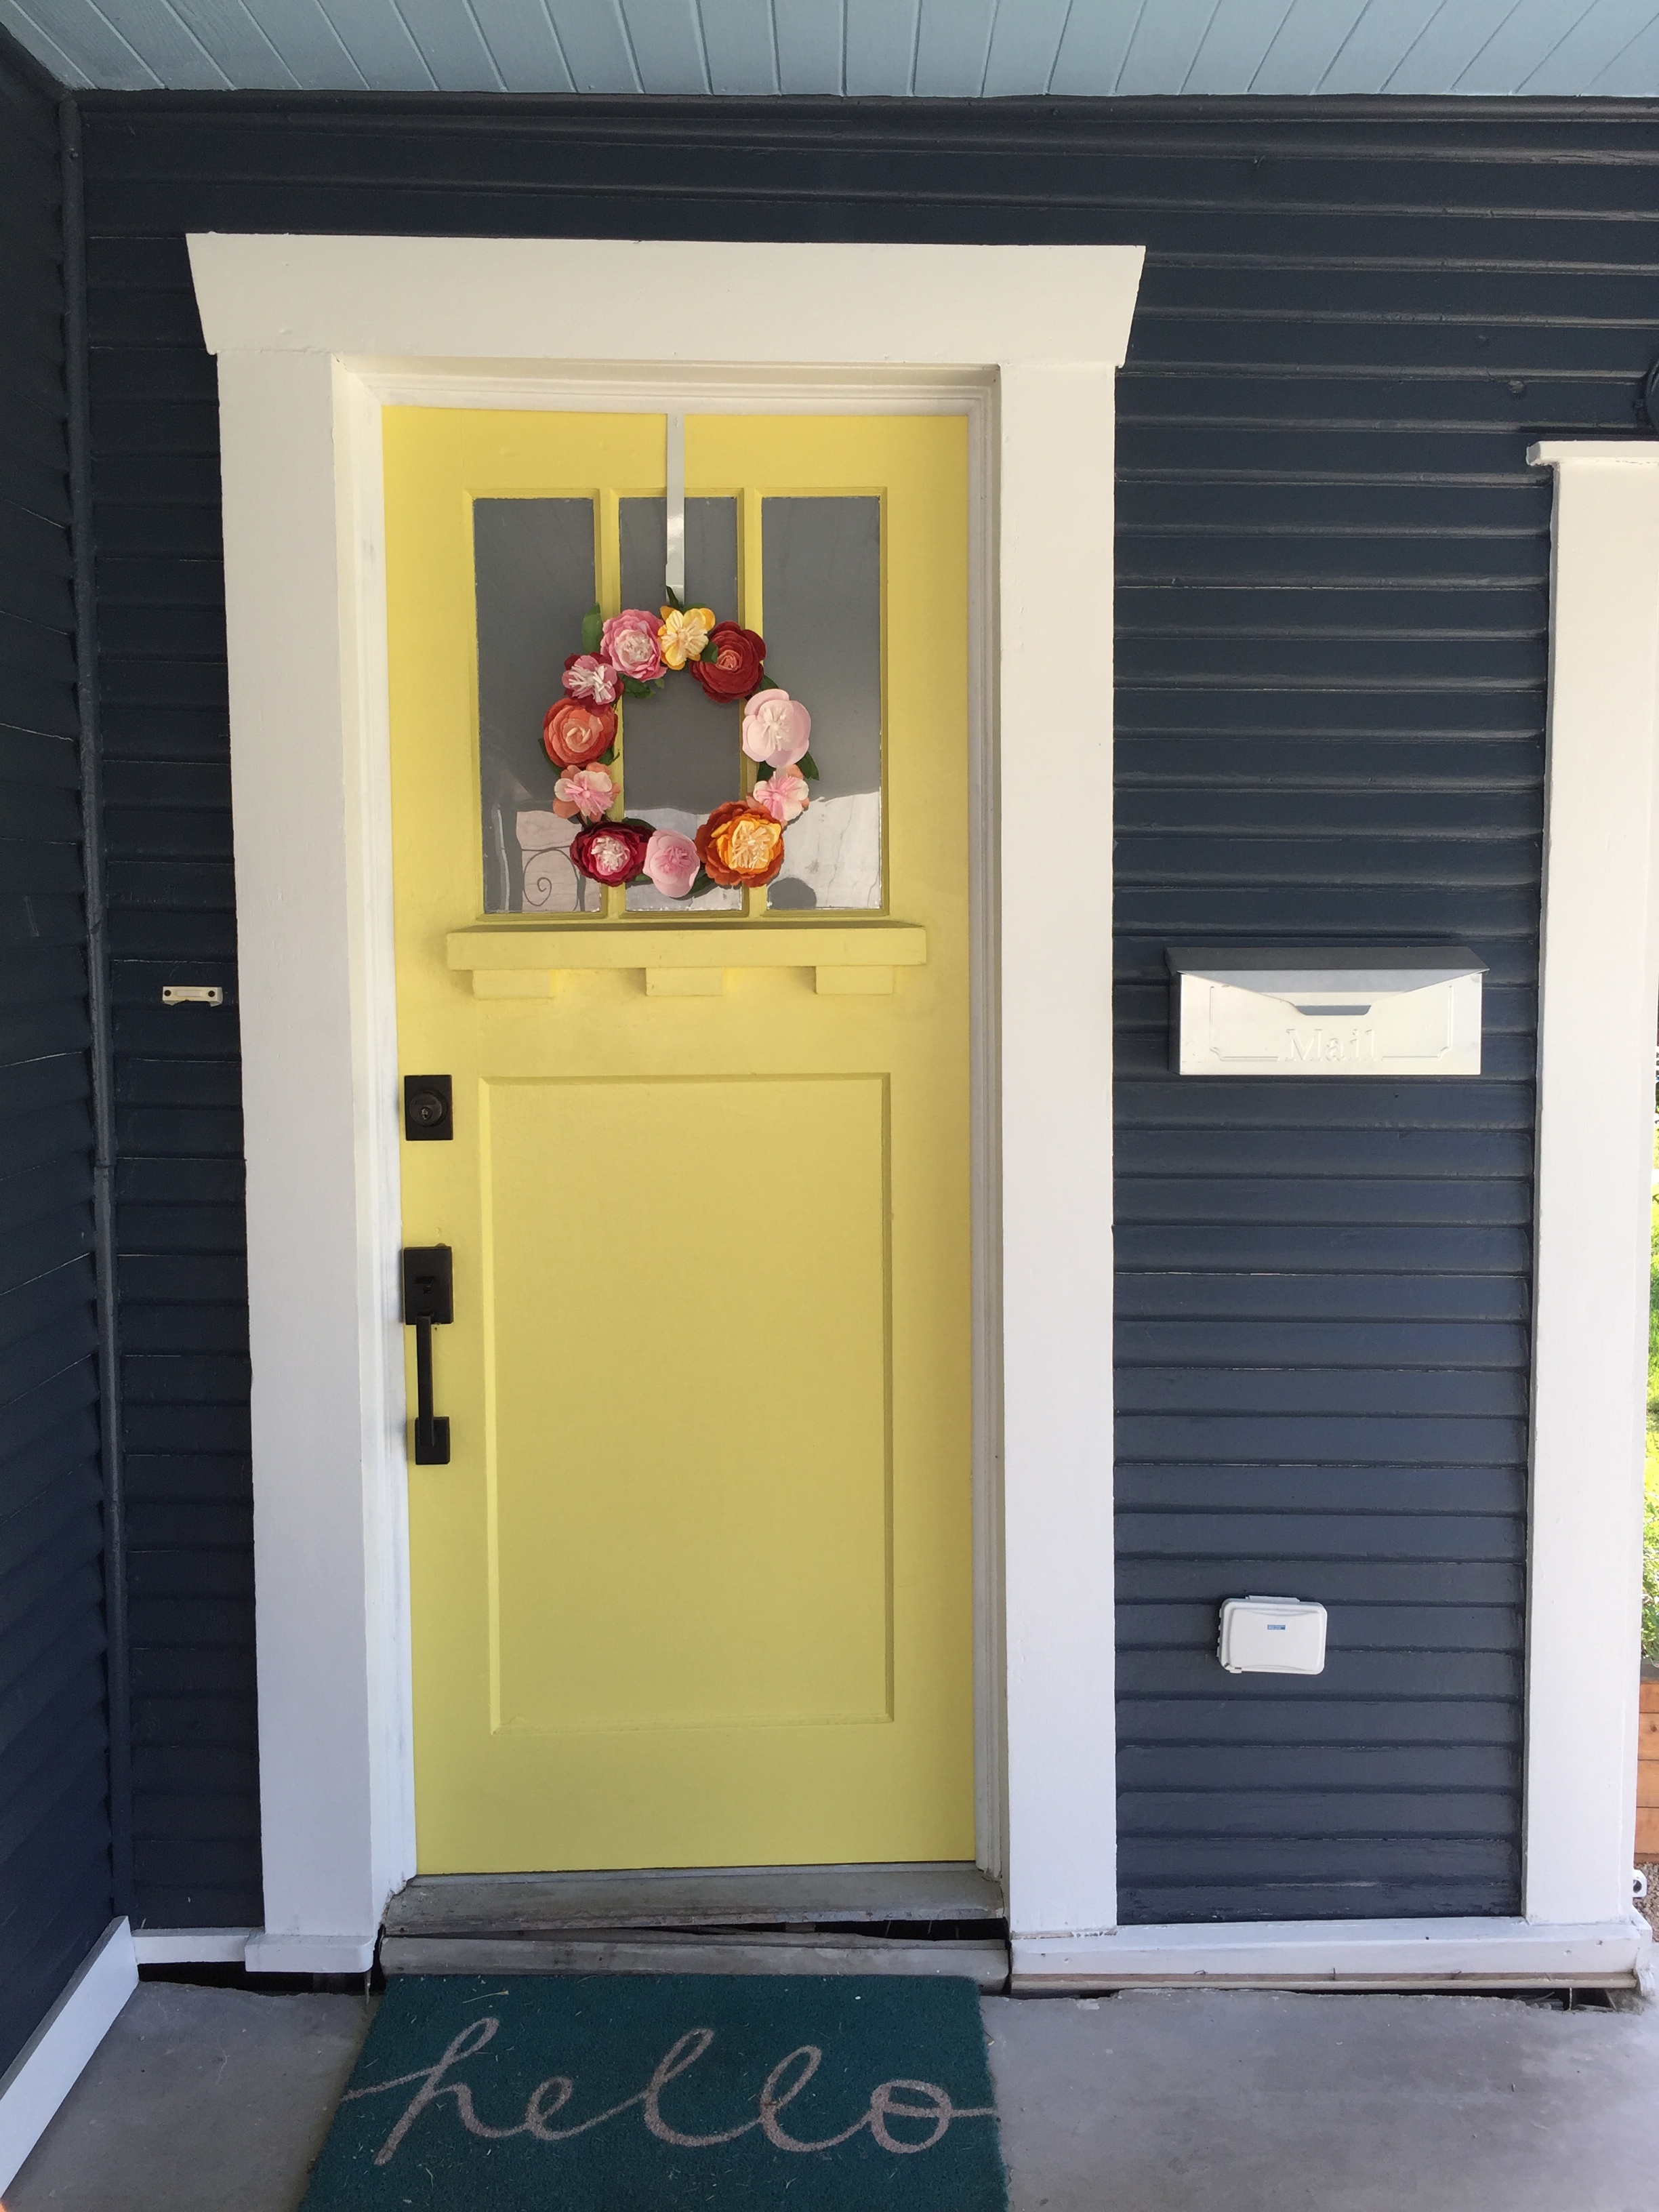
Meanwhile, as the painters were doing their final touch ups, Derek was busy painting the front door SW Funky Yellow. He removed the hardware and carefully taped off the windows in the door, and used a foam roller, which only took two coats. 

Okay and now for the very best part. The before and afters!

Why yes, that IS our front porch separating from the house. More on that later. Back to the pretty afters.

We still need to repaint the back door, but we can't decide if it should also be SW Funky Yellow or stay white. 

Okay let's get one last look at the front. Ahhhhh SO much better right?

We plan to eventually replace the railing and columns because curly-q's just aren't us, but that will be much later on when it gets a little cooler out.

One Shade of Grey

DIYCatharine KlepacComment

One of the first things that we like to do when we move into a house is to slap a fresh coat of paint on the walls. Since this house was a rental for so many years, every wall was covered in glossy white paint. Now I love me some white paint, but the gloss just had to go. We get it, it's wipeable when it's that shiny, but we don't live in a doctor's office. 

We wanted to keep it light and bright, while still giving the walls enough contrast to allow for all of the trim to pop a little. So we went with Benjamin Moore's Perspective color matched to Valspar's Ultra Premium paint in a satin finish. It is seriously the perfect grey. And it only took one coat. Hallelujah!

We started with the living room, behind a bookshelf in case we messed up or didn't absolutely love the color. Lucky for us, it was just what we wanted. When we first applied it we were a little scared because it almost looked white, but once it was dry it was the perfect shade of grey. When we paint, we like to tag team each room and each person has their role. I cut in all the trim, and Derek rolls. It's always been that way since 2009. When we met. And I made Derek help me paint my apartment. Now we just need to repaint all of the trim bright white because the oil paint has definitely yellowed over the years. That will be a much bigger task for sure.

Mr. Snoozin' and Treats

Mr. Snoozin' and Treats

I just love how bright each room feels, and how the walls just pop against the freshly stained floors. We decided against having every room a different color for once, and carried this color throughout the whole house for the most part. The master bedroom and bathroom will be a little different. What can I say? Old habits die hard.

Mirror Mirror

DIYCatharine KlepacComment

When we first toured our house, the first room you walked into was a super crowded living room that was connected to a dining room that opened to the kitchen. We knew our furniture would never fit in this weird long and narrow shared space. So we decided to flip the two rooms and have the dining room be on the side with the fireplace (when you first walk in) and then the living room would be off of the kitchen. I'm sure it sounds weird, but it just made more sense for us. We really didn't like the idea of walking straight into the living room. We felt like the dining room allowed for a bit of a pause.

I have since created a small entry space for when you first walk in which acts as a sort of touch down area. It has a small shelf with various bowls for keys, leashes, change, etc. I knew that I wanted to add a mirror to the wall above the shelf, but the space was very tall and narrow, which made finding just the right mirror almost impossible. I remembered this image I had saved in my inspiration folder back in 2010, and kept my eyes peeled for a mirror with similar proportions.

DSC_0120.jpg

via

We live a couple blocks away from a street lined with several thrift/antique shops. I try to scope them out once a month or so because honestly they don’t turnover their inventory that fast, and all the new things are set outside on the street so I can just oogle it all as I drive home everyday (while almost rear-ending the person in front of me because. priorities.). When my mom was in town visiting, we stumbled upon the perfect mirror and it was only $18!

The "wood" was actually this weird wood-look plastic, but I didn't really care because I had big plans to paint it. I hated that I found the mirror at this particular shop because I really dislike how manipulative the shop owner is. I'm all about wheeling and dealing when it comes to vintage finds, but this guy is just the worst. He'll do the whole "you better buy it now because I've had several people say they are coming back for it" every. single. time. Also, everything is usually marked up ridiculously high and then "on sale" and the sale price is what it should have cost to begin with. That kind of thing. When we went to track down our BFF shop owner, he informed us (again) that “all prices are negotiable” which I always think.. yay! haggling! In the past when I’d see a big piece (like a dresser or pair of chairs or something) that was marked $300 he’d take it down to $175 if I “get it right now” (which.. when else would I get it?), so I had high hopes for my (already super cheap) mirror. So after he dug it out of it’s super buried corner, he said “I’ll give you a good deal on this! how about 17.50!!” What. Whatever, I bought it anyway because I really liked it and I knew it would work perfectly in our entry. This guy.

Even though the frame was just plastic, the mirror was about 50lb, so I didn’t really want to take it apart to paint it. Instead I just covered the mirror  part with paper and taped it off.

I wanted it to be sort of a moody color because I had big plans for the shelf below it, which Derek made in high school shop. How cute is that? So I ended up going with a navy-ish color by Valspar in a satin finish because let's face it, the mirror is shiny enough. I primed the frame first with my trusty plastic primer and then sprayed on two coats of the navy. Luckily it dried a lot darker than the lid.. I was a little nervous at first that it wouldn’t be “navy” enough.

Afterward I removed all of the paper and tape and scraped off any excess paint from the mirror with a razor blade. 

IMG_9895.jpg

I’m pretty pleased with how it turned out, and I love the little pop of color it adds to the space.