

After receiving several questions and sweet comments about our gallery wall, I figured that I should share a little tutorial on how my favorite gallery wall to date, came to be.
Our dining room and living room share a long wall that needed some sort of division. I wanted to break up each room with my art selections, while still allowing for the two rooms to look cohesive. I knew that I wanted a large single piece over the sofa, which meant that I would need something a little different (but still large in scale) to balance this out on the other end of the wall. The solution: a gallery wall. I had toyed with a couple of different options before landing on what it is now.

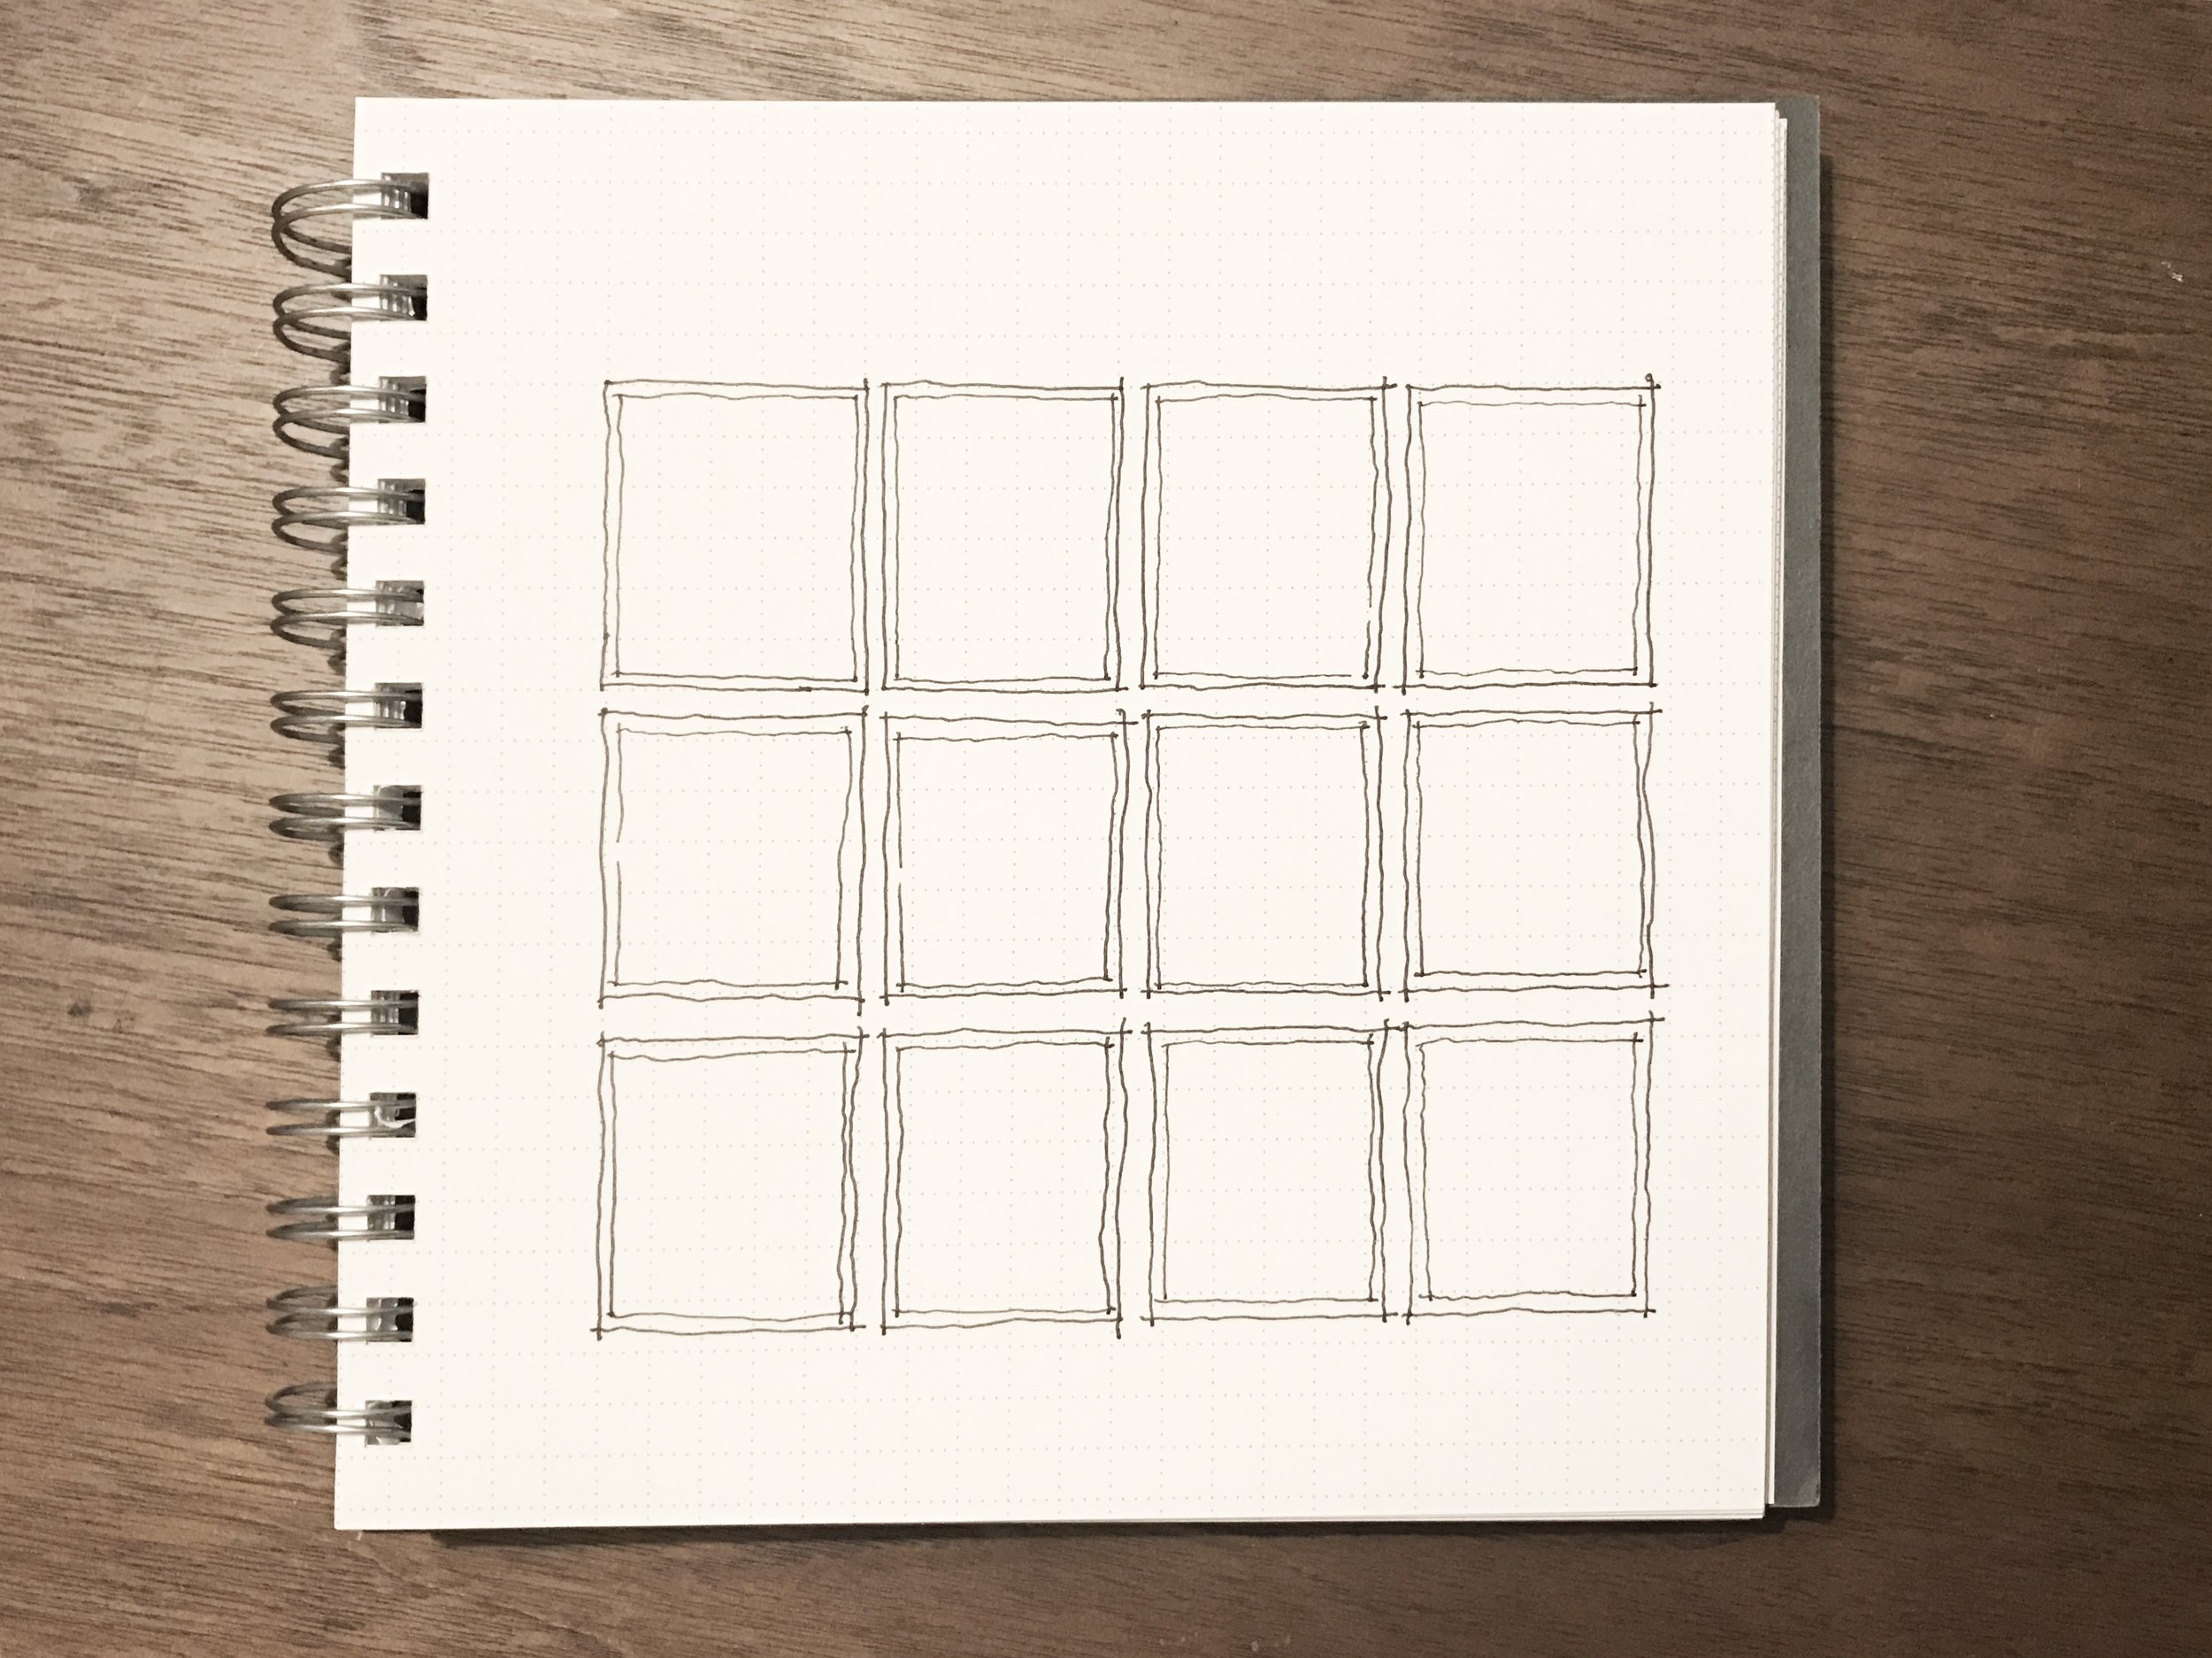
My friend Lauren over at Copper+Walnut had posted her freshly hung gallery wall on Instagram, and I knew that I wanted something similar for our dining room. I had about a 6 foot wide space to work with, so I sketched out a few ideas, and ended up landing on this:
I ran over to Ikea while visiting Derek's parents and picked up twelve 16" x 20" Ribba frames in black. Which was a feat in itself because that Ikea (Houston) doesn't let you take your shopping cart to your car so you have to carry everything in your blue bags. And 12 large Ribba frames was a bit of a workout.

You should know that although Ikea markets these frames as a true 16"x20", they are actually 15-3/4" x 19-3/4". Because. Sweden. Which I didn't realize at the time so I had a bit of trimming to do, but we'll get to that later.
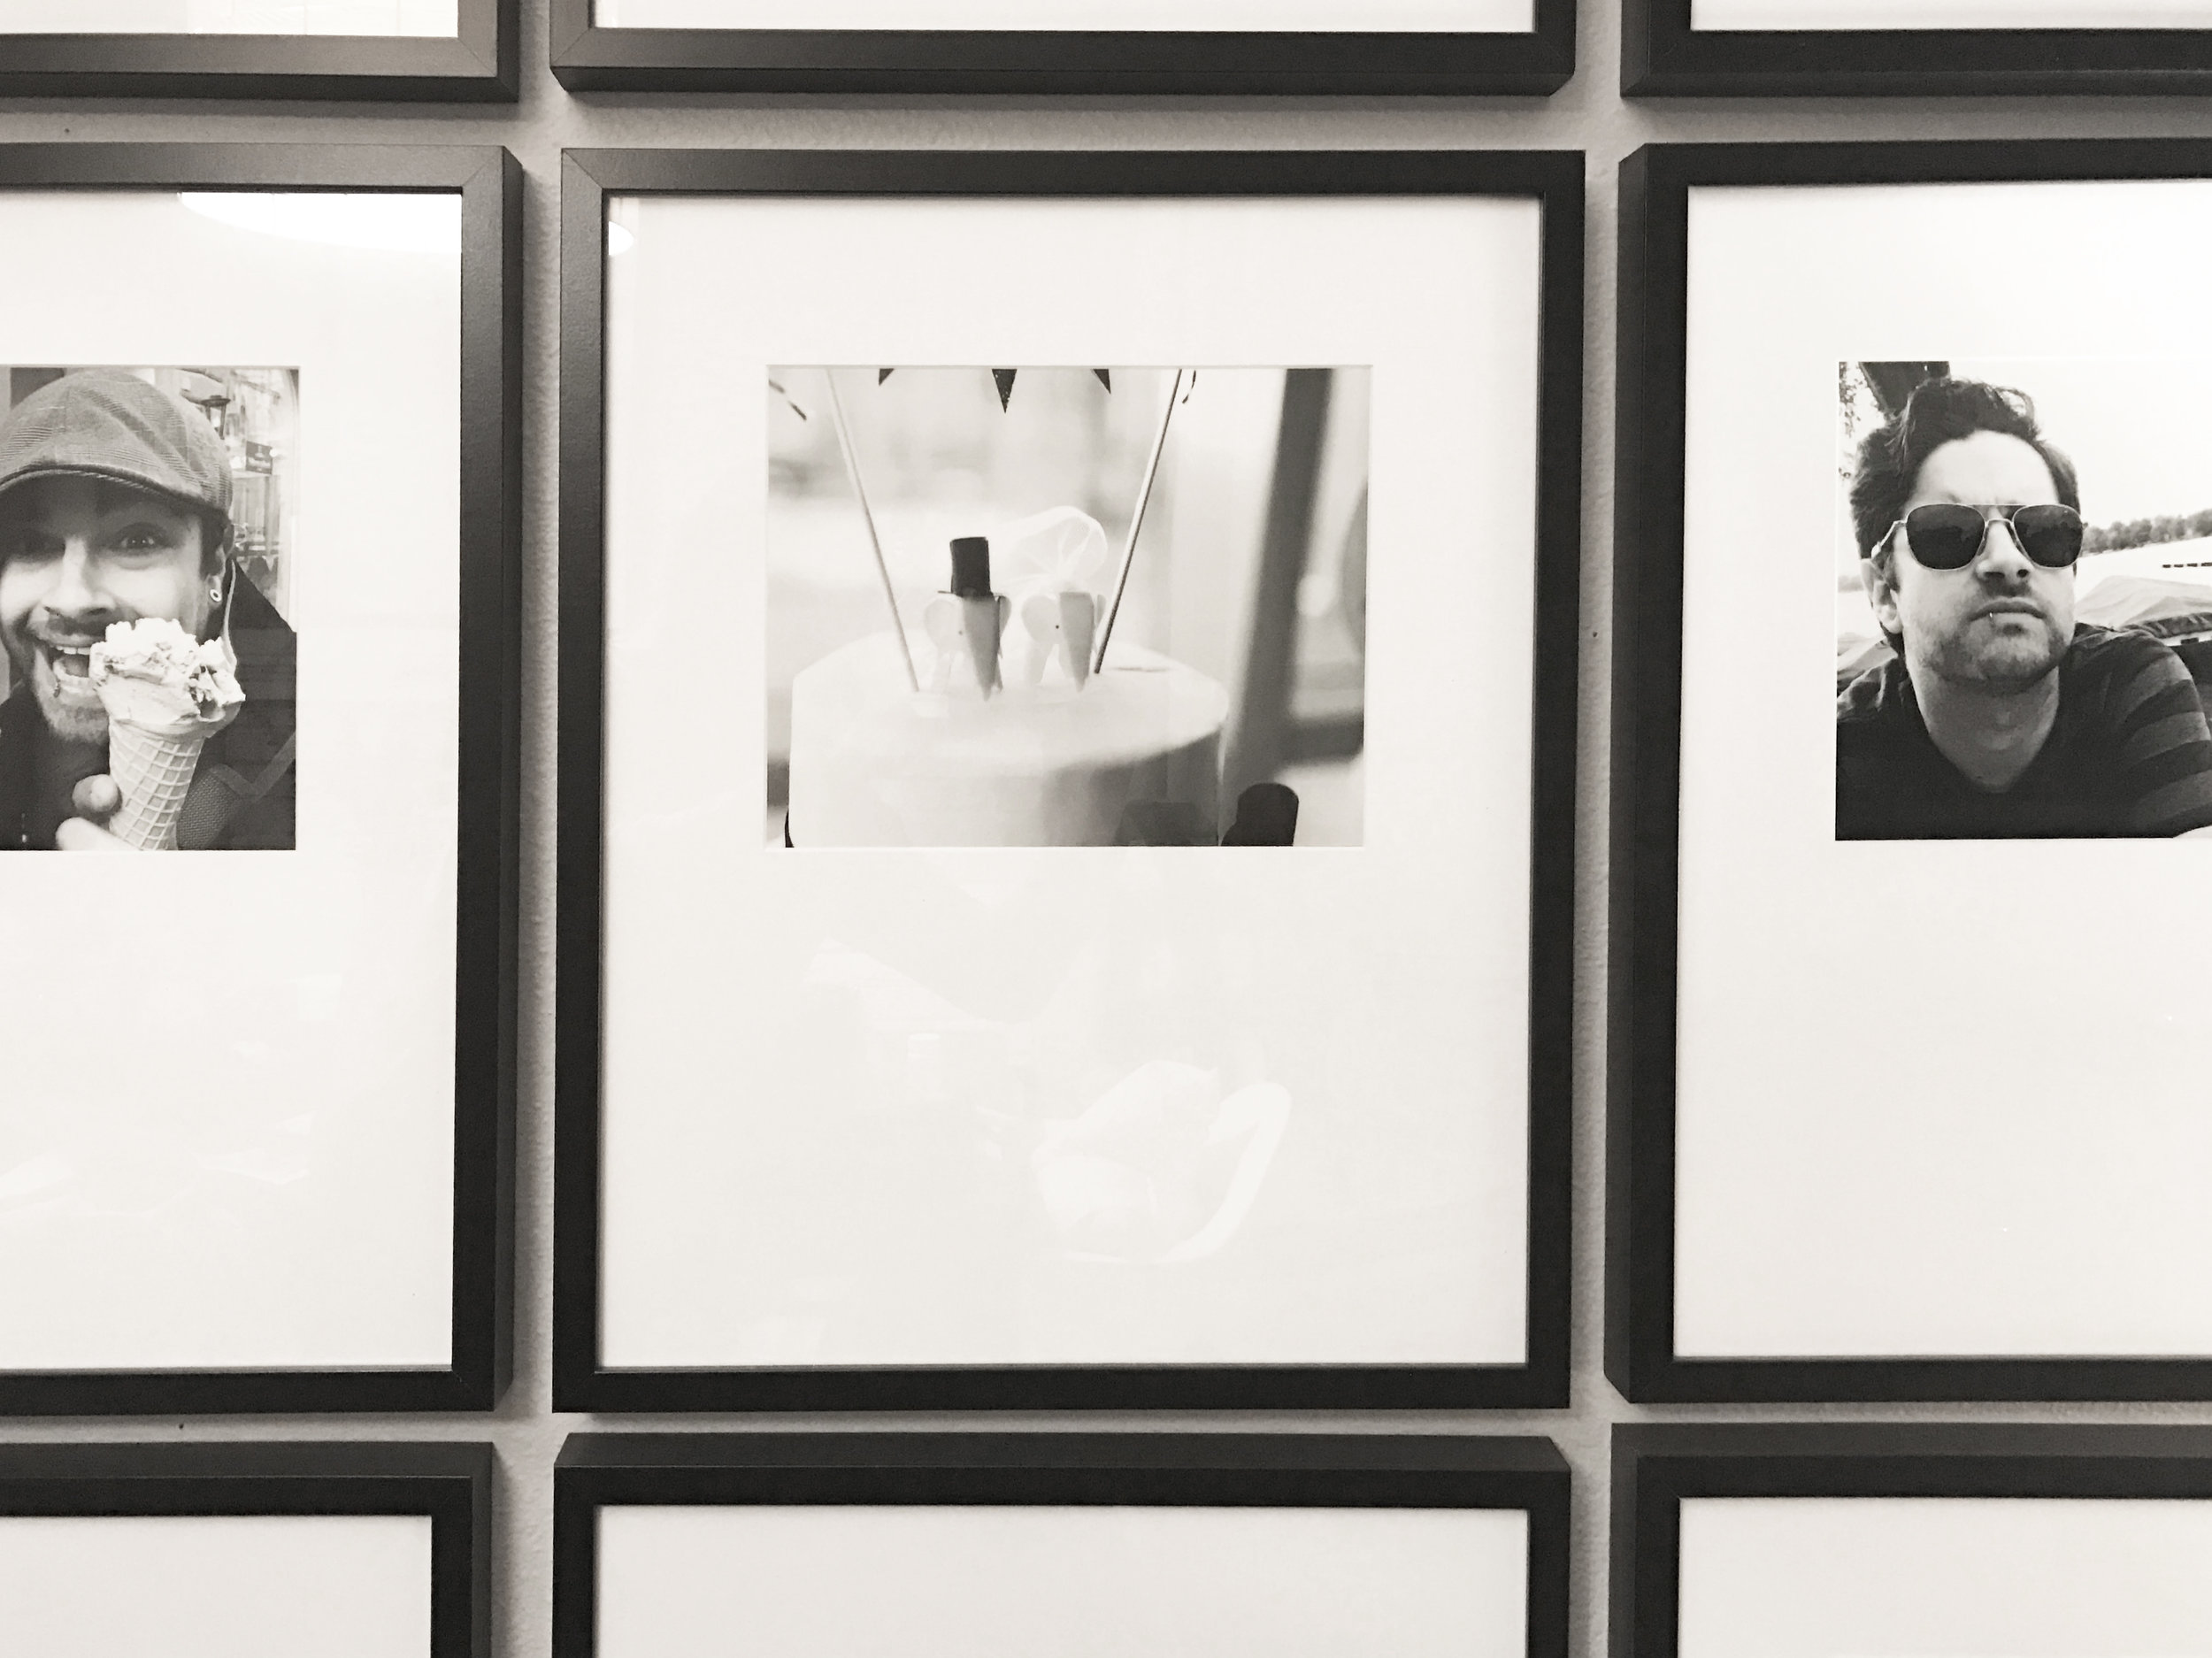
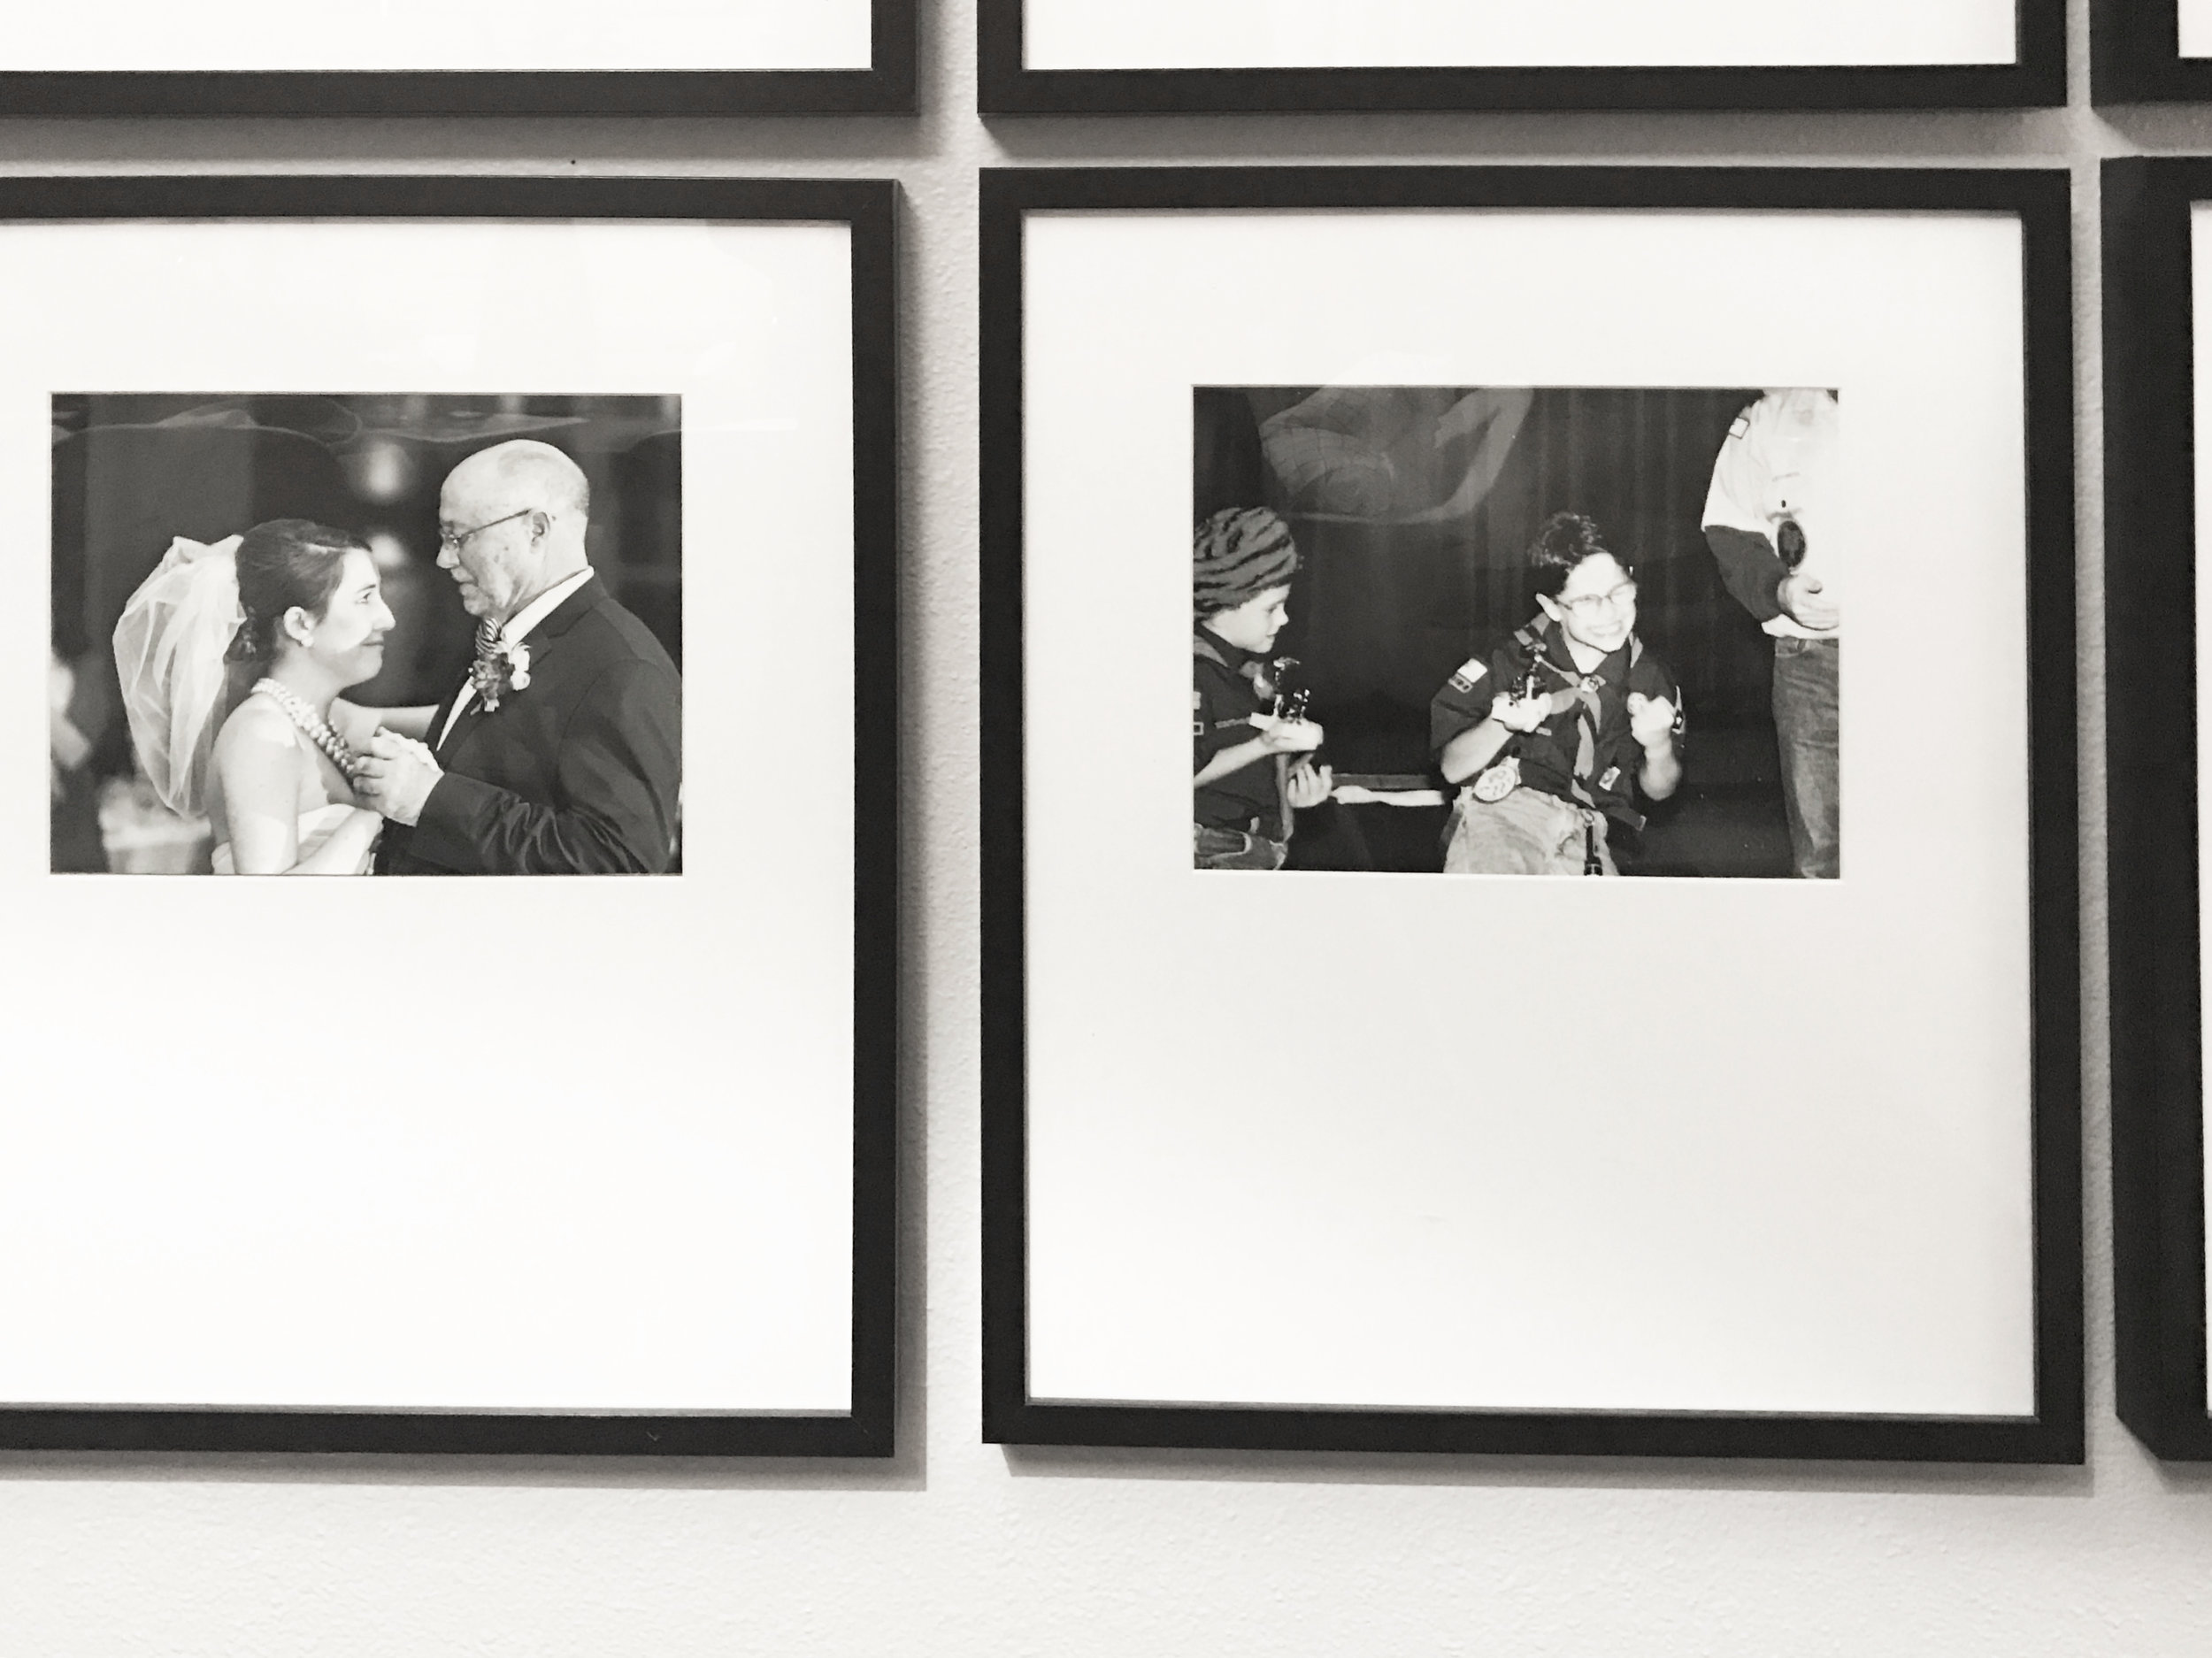
I decided to print my photos as 8x10's which let my frames be more mat heavy and created a bit of a minimalist approach to my gallery wall. This allowed me to highlight each photo individually in a smaller format, rather than keeping them large and busy. The Ribba frames come standard with a 11" x 15" mat opening so I ordered custom mats from Matboard & More.
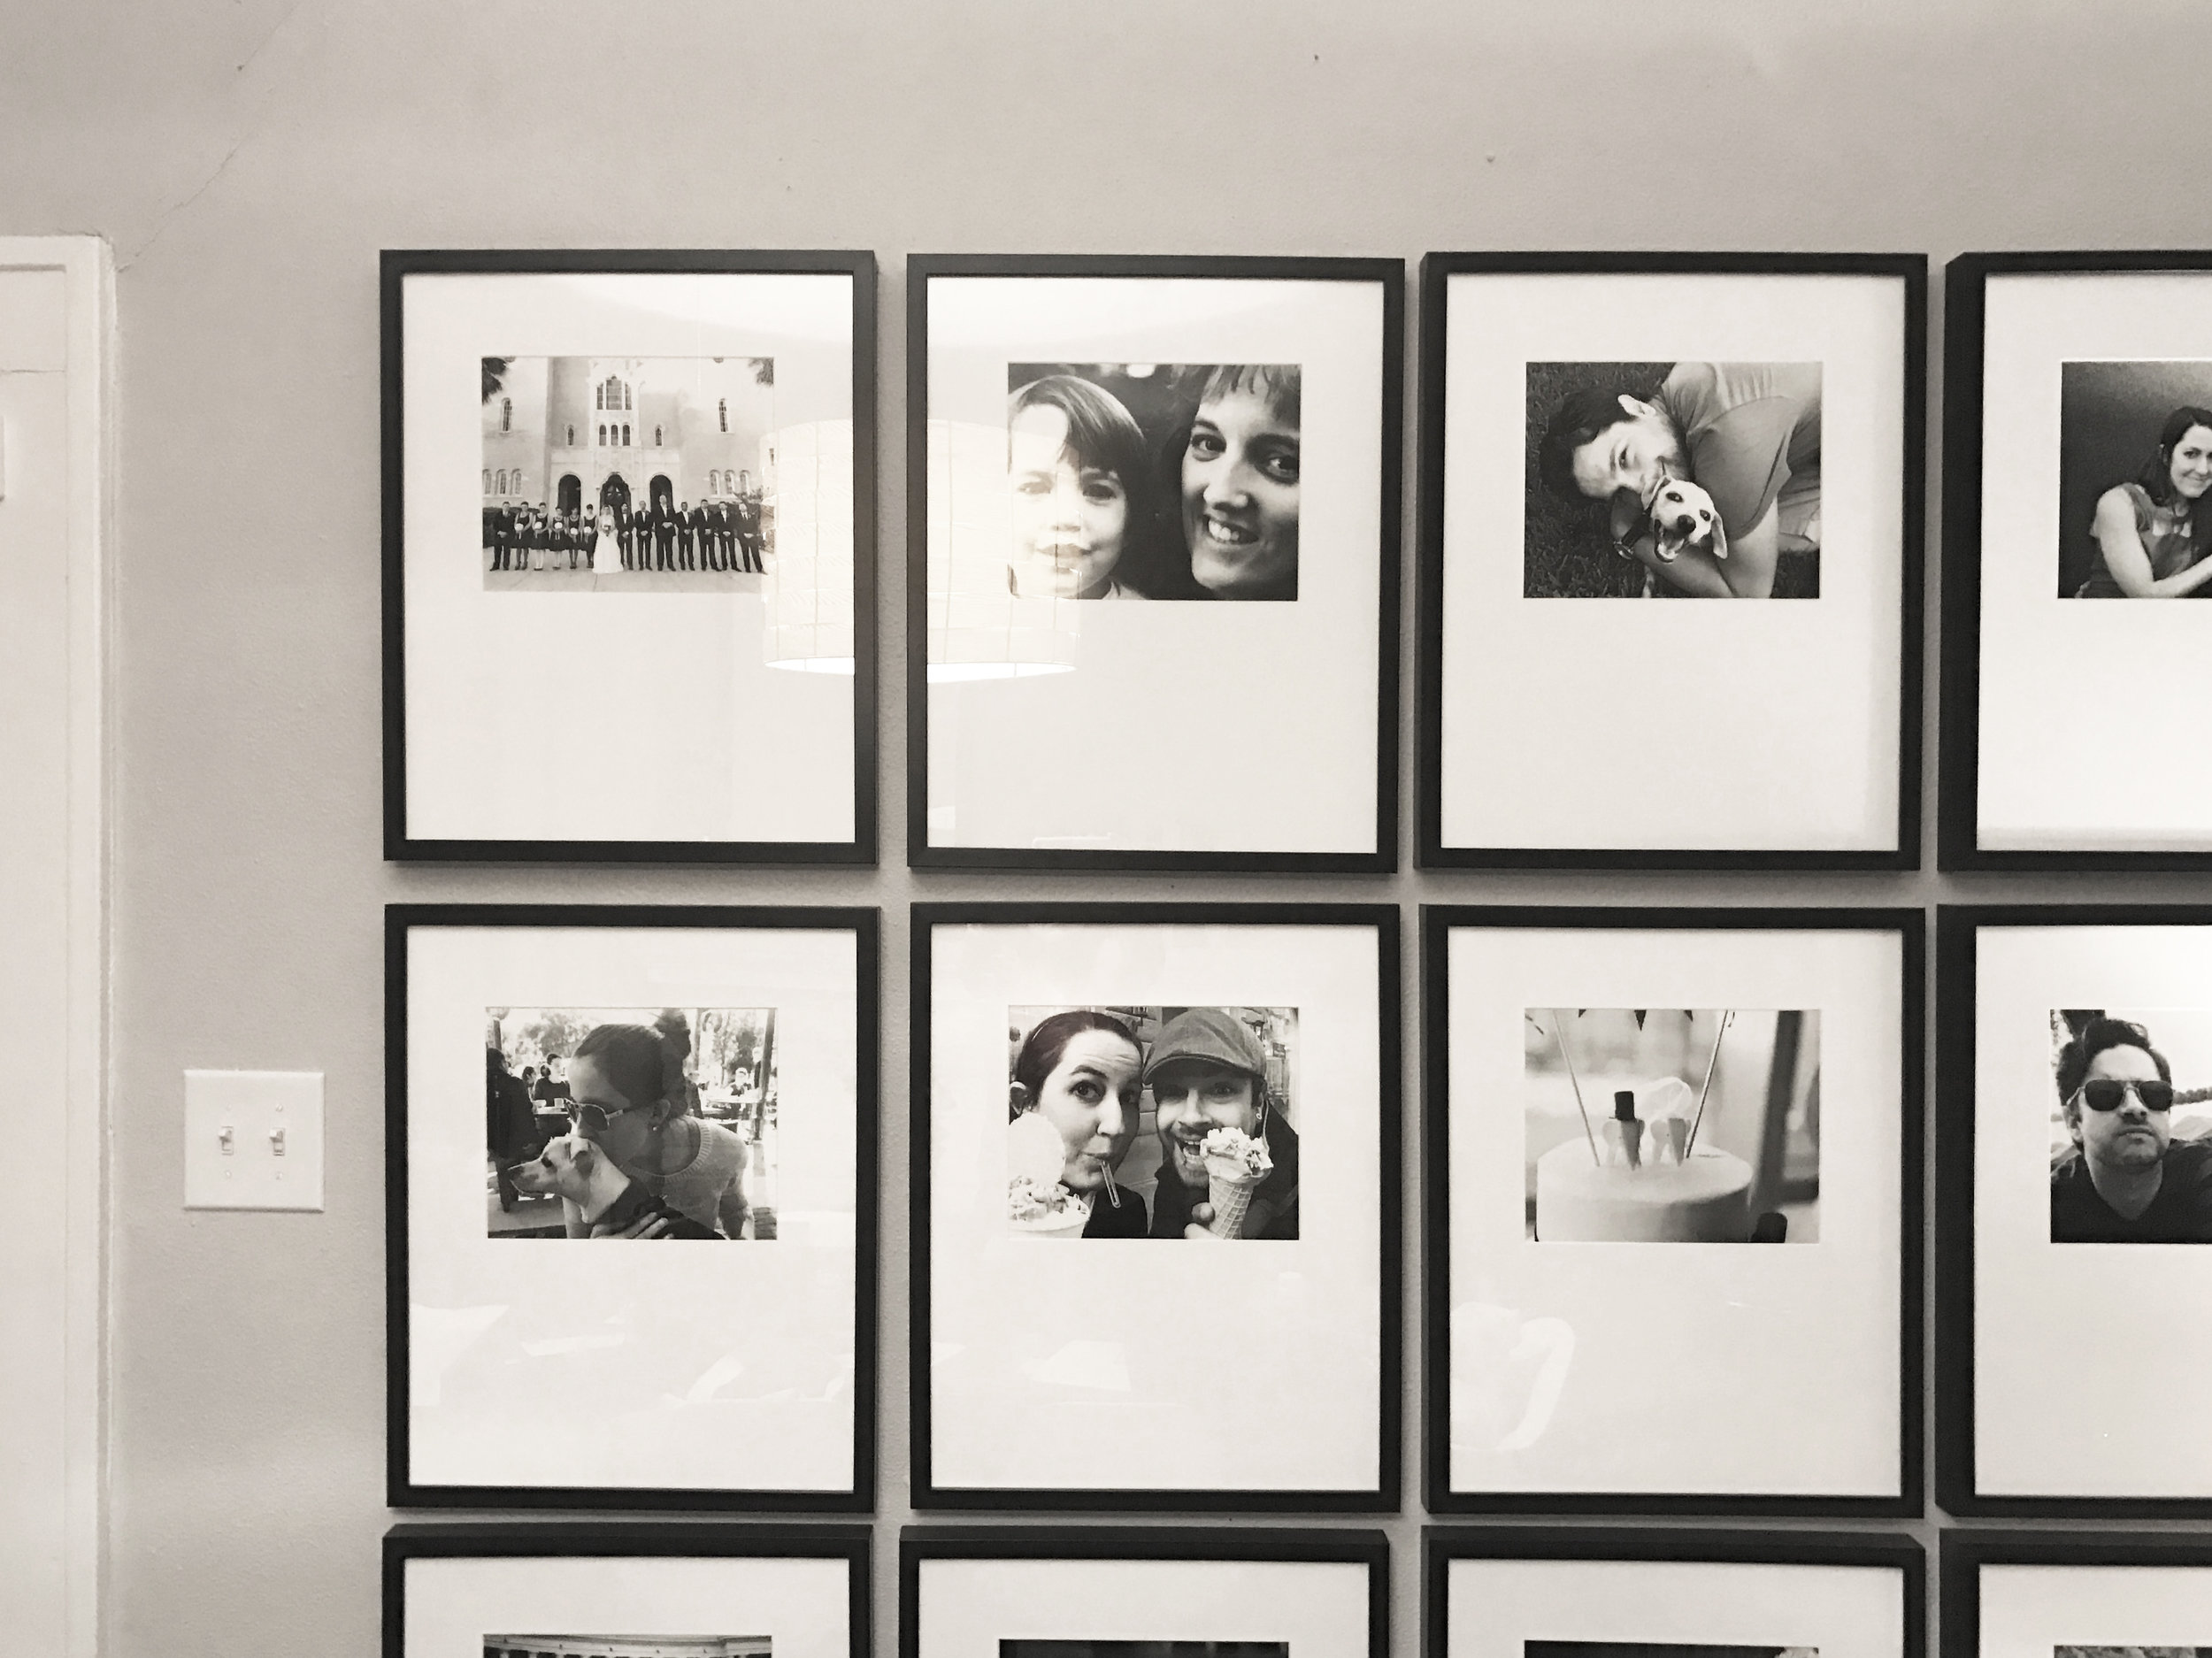
I went through their zillions of options (seriously, you can get any type of mat there) and set the overall dimension to 16"x20" (see warning above) and the opening to 7-7/8" x 9-7/8". I did this so that the mat slightly covered all sides of the 8x10 photos by 1/8". I could have made this dimension a little larger, but I wanted to see as much of the photo as possible. While my frames would be hung vertically, I wanted each framed photo to have a bit of a museum quality so I also chose to have each opening placed horizontally on a vertical mat and offset the opening to the upper 1/3 of the overall mat (also known as Top Center on their website).
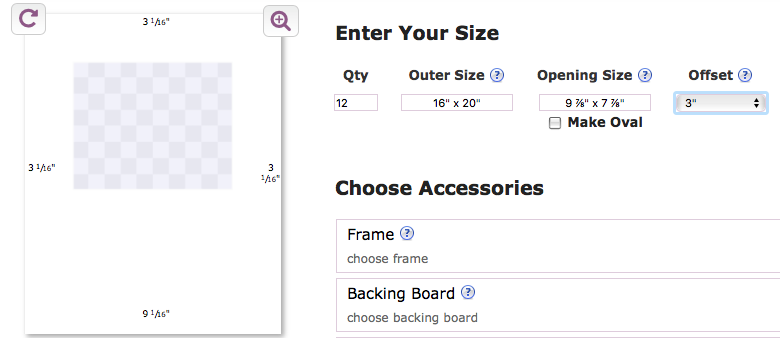
They let you set the dimensions as precise as 1/8" so really the options are endless. Ideally I should have ordered my outer size in 15-3/4" x 19-3/4" and I wouldn't have had to trim off 1/8" off each side of my mats when they arrived. Which if you've ever cut mats, it's pretty tough. 12 mats x 4 sides = 48 total cuts. #math
When it came time to hang all of my frames I took the overall dimension which was 64" (16" wide frames x 4 frames) and then knew I was going to space everything 1" apart, so I added 3" to that width as there would be 3 spaces between the 4 columns of frames. Then I centered the entire dimension within the space and lined the top row up with the door frame to create a nice clean line visually, and worked my way down the wall. I made templates for each frame using the faux photo included with the frames because it was the exact size of my frames (minus an 1/2" on each side where the frame would be) and with a little bit of math, I placed each template so that it would end up having each frame 1" apart between each column and row of frames. I marked on each template where the hanging wire sat so that I knew exactly where to place each nail without having to make a bunch of random holes in the wall.
With each frame at $9.99 each, and the custom mats at $4.00 each the overall cost for this quick and easy project was about $160. It's such a fun conversation piece when we have guests over, especially with the photos from when we were little. Hello cowlick (this is why I can't have bangs). We choose photos that varied in composition, and I arranged them so that there weren't a bunch with similar scales right next to each other, or three Geoffreys in a row. This really helped the overall gallery feel balanced.

My parents loved our gallery wall so much that they ended up making a similar one for their front entry and had the mats ordered with the right outer size so their gallery wall took half the time.
