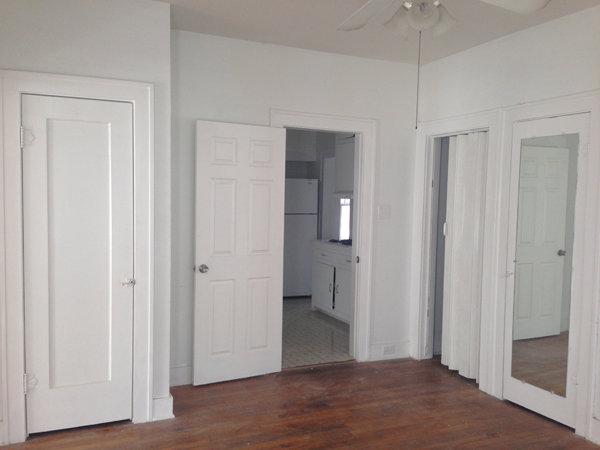
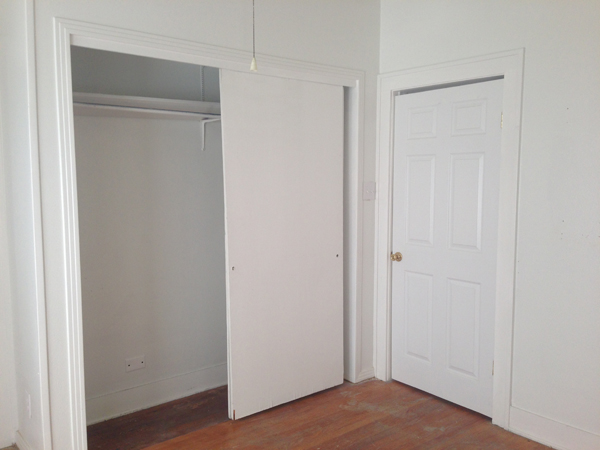
So before we dig in, I feel like I need to give you a little backstory on the door situation in our 1930 bungie. As I've mentioned before our house has had two owners. A sweet little family back when it was originally built and then it was sold and used as a rental for 40 years. So yes it's only had two owners, but having four decades of renters means this sucker is full of cheap (lazy) bandaids and weird quirks. When we moved in all of the closets and two of the rooms had original single panel solid wood doors.
One to the bathroom:
And one to the guest room:
There were two flimsy builder hollow core doors that looked like they were straight out of an apartment.
One to the kitchen from the master (I know. Midnight snack anyone?):
And one from the master to what is now Olivia's nursery (ooo shiny 90s gold hardware):
There were also two accordion doors. Yep.
A super gross fabric/vinyl one from the nursery to the laundry room (think those accordion partitions from the 70s that divided classrooms in elementary school. Oh and it was covered in paint):
And a shiny plastic one from the hallway to the master bedroom:
When we first moved in we immediately removed all of the accordion doors because 1. they were filthy, and 2. we were not about to try and move furniture through 18" openings. Removing the door to the now nursery (then office) wasn't a big deal at all because it wasn't a true bedroom yet. However, removing the door to the master bedroom meant that we ended up not having a bedroom door for almost 5 years (!!)
Why did it take so long? Well first of all we rarely have guests so this project was not at the top of our todo list. Second of all, we had such a hodgepodge collection of doors and we eventually wanted to replace them all with 5 panel shaker doors that matched which was pretty pricey. After looking around at Lowe's and Home Depot a couple years ago, if you wanted a solid core 5 panel door it was a custom order and started at around $300 a door. Woof. We started looking at architectural salvage stores to find some we could refinish but even those started at $100 and still needed to be completed stripped and refinished from decades of abuse. Double woof. Also, having an old house means that your door openings are all different widths, that tend to be on the smaller side. Ours range from 31" - 34", which are not common door widths so it was like finding a needle in a haystack.
So Derek had planned on building all of the doors in our house instead. He made the barn door from the laundry room to the office/nursery, and it turned out just gorgeous. However, Derek is a busy guy with lots of fabrication products on his plate and it was going to take some time to squeeze four more doors into his schedule, so I was getting a little desperate.
A few weeks later after going to our neighbors' house we saw that they had new beautiful 5-panel doors and we were all "where did you find these?" and they were all "we cheated". So after picking their brains a bit, they explained that they just bought single panel solid core doors from Habitat Restore and added in the horizontal slats to make their own 5 panel doors. Duh. So we headed over to Habitat Restore and picked up our own single panel doors in all of the sizes we needed. Luckily they already had two original 5 panel doors in our sizes, so those were ready to be painted. Phew! We somehow crammed them all into my very small SUV #innercityliving.
We grabbed some sheets of MDF from Home Depot and we were in business. I measured out each stile to be the same width as the stiles on the premade 5 panel doors so that they would all be consistant throughout the house, which ended up being 4". I had Derek cut the 4" stiles using the table saw, and then I used a Fine Finish blade and a chop saw to do the shorter cuts which would fit each door recess. I was sure to measure the widths of each recessed panel on every door front and back, as some varied from 1/8" - 1/4" on each side (go figure), and I wanted each stile to fit snug within the recess.
Then came the tricky part. I had to figure out the spacing of each of my stiles so that they were perfectly even and created 5 recessed panels. Rather than frogging around with the math, I used this website where I input the total length of the recess (67"), the length of each style (4"), how many stiles I had (4), and that there were no stiles at the top or bottom of my recess.
This gave me the exact distance for each stile's centerline which I marked on both verticle sides of the door front and back.
I then measured the center line on both ends of each of my stiles and lined them up with the marks I made on my door.
I double checked the spacing for good measure before gluing them down. Once everything looked good I used liquid nails and a mallet to hammer everything into place.
Then I used our collection of paint cans to keep everything in place and prevent the MDF from lifting or bowing while the liquid nails cured.
Once all of my stiles were glued down on both sides of all of my doors, I filled in any blemishes with wood filler and then sanded the doors to prep them for paint. We love the look of black doors against our crisp white trim and light grey walls, so I went with my all time favorite black, Sherwin Williams Iron Ore.
Derek sprayed all of the doors for me because let's face it, I was pregnant at the time. In between each coat of paint I wet sanded the doors to create a nice smooth finish.
While the doors were drying with their final coat of paint, we went ahead and prepped all of the door hardware. All of the original solid core doors in our house (bathroom, guest bedroom) had the original 1930 butterfly hinges, but were caked in decades of paint. We brought these back to their original patina (I'll do a whole blog post on this method). For the doors that either didn't have hinges (accordion) or had boring builder hinges, we replaced them with matching half mortise hinges that we picked up from our local architectural salvage store for about $20 a hinge. This way everything would look cohesive and true to the original character of our home. For the door handles, we originally thought about finding historic knobs true to the era of our home but in the end decided against it. First of all, they are about $100 a knob and its hard to find enough that match. Second of all, we want certain elements of our home to remain in the craftsman style, while other elements are more modern. I just love riding that line of balance. We picked up several of these Kwikset Halifax Square Door Levers in polished chrome, which bring these classic doors into the 21st century.
And where is the door to the kitchen for our midnight snacks? That's another post for another time.
So funny story. After completing this project, now Home Depot sells pre-made 5 panel doors for about $99 a pop that are right off the shelf, no more custom orders. Whatever Home Depot we were tired of waiting on you to get in the shaker door game. We still saved a ton of money though going this route because our Habitat doors were only about $30 a piece. And what a difference they make! Let's look at a little before and after just to really sell it.
Yes that is Derek's Architecture Lego collection. He is very proud.


